ZyXEL ES1100-16P User Guide - Page 17
Wall Mounting (for ES1100-8P/16/16P/24E) - switch
 |
View all ZyXEL ES1100-16P manuals
Add to My Manuals
Save this manual to your list of manuals |
Page 17 highlights
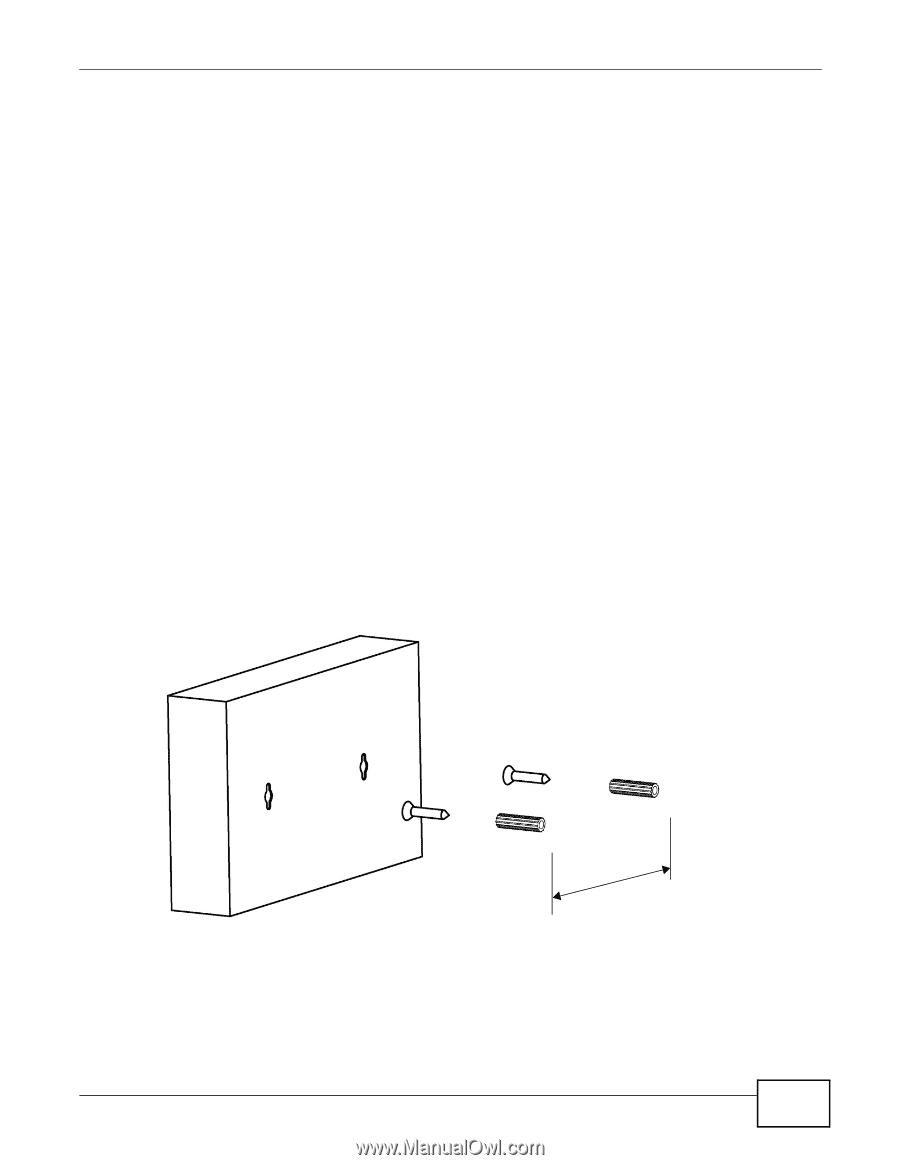
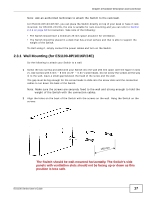
Chapter 2 Hardware Description and Connection Note: Ask an authorized technician to attach the Switch to the rack/wall. For ES1100-8P/16/16P/24E, you can place the Switch directly on top of your desk or have it rackmounted. For ES1100-24/24G, the size is suitable for rack-mounting and you can refer to Section 2.3.2 on page 18 for instruction. Take note of the following: • The Switch should have a minimum 25 mm space around it for ventilation. • The Switch should be placed in a desk that has a level surface and that is able to support the weight of the Switch. To start using it, simply connect the power cables and turn on the Switch. 2.3.1 Wall Mounting (for ES1100-8P/16/16P/24E) Do the following to attach your Switch to a wall. 1 Screw the two screws provided with your Switch into the wall 150 mm apart (see the figure in step 2). Use screws with 6 mm ~ 8 mm (0.24" ~ 0.31") wide heads. Do not screw the screws all the way in to the wall; leave a small gap between the head of the screw and the wall. The gap must be big enough for the screw heads to slide into the screw slots and the connection cables to run down the back of the Switch. Note: Make sure the screws are securely fixed to the wall and strong enough to hold the weight of the Switch with the connection cables. 2 Align the holes on the back of the Switch with the screws on the wall. Hang the Switch on the screws. 150 mm The Switch should be wall-mounted horizontally. The Switch's side panels with ventilation slots should not be facing up or down as this position is less safe. ES1100 Series User's Guide 17
-
 1
1 -
2
-
3
-
4
-
5
-
6
-
7
-
8
-
9
-
10
-
11
-
 12
12 -
 13
13 -
 14
14 -
 15
15 -
 16
16 -
 17
17 -
 18
18 -
 19
19 -
 20
20 -
 21
21 -
 22
22 -
23
-
24
-
25
-
26
-
27
-
28
-
29
-
30
 |
 |