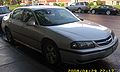
2000 Chevrolet Impala Owner's Manual - Page 78
2000 Chevrolet Impala Manual
Page 78 highlights
yellowblue The following information shows how to reset or customize features after entering the main menu: SETTINGS - Display Current Settings OIL LIFE - Oil Life Reset: This feature allows you to reset the GM Oil Life Systemt after an oil change, see "Engine Oil" in the Index. Be careful not to reset the OIL LIFE accidentally at any time other than when the oil has been changed. It can't be reset accurately until the next oil change. To clear the CHANGE ENGINE OIL light from the instrument cluster and reset the oil life monitor: 1. Scroll, using the SEEK up or down arrows, until OIL LIFE appears on the display. 2. Press the PREV or NEXT button to enter the submenu. RESET will then be displayed. 3. Press the DISP button to reset. A chime will be heard to verify the new setting and DONE will be displayed for one second. TIRE MON (Check Tire Pressure Reset): This feature allows you to reset the tire pressure monitor after checking all tire pressures, see "Tires" in the Index. To clear the LOW TIRE PRESSURE light from the instrument cluster and reset the check tire pressure monitor: 1. Scroll, using the SEEK up or down arrows, until TIRE MON appears on the display. 2. Press the PREV or NEXT button to enter the submenu. RESET will be displayed. 3. Press the DISP reset. A chime will be heard to verify the new setting and DONE will be displayed for one second. LT DELAY (Delayed Headlamp Illumination): This feature allows the vehicle's headlamps and parking lamps to stay on for a fixed amount of time after exiting the vehicle. To customize delayed headlamp illumination: 1. Scroll, using the SEEK up or down arrows, until LT DELAY appears on the display. 2. Press the PREV or NEXT button to enter the submenu. The current selection will have an asterisk next to it. Scroll, using the SEEK up or down arrows, through the following options: D OFF - Turns feature off. D 30 SEC - 30 seconds. D 60 SEC - 60 seconds. 3. With your preference displayed, press the DISP button to select. A chime will be heard to verify the new setting. The new selection will be displayed with an asterisk for one second. 2-15
-
 1
1 -
2
-
3
-
4
-
5
-
6
-
7
-
8
-
9
-
10
-
11
-
12
-
13
-
14
-
15
-
16
-
17
-
18
-
19
-
20
-
21
-
22
-
23
-
24
-
25
-
26
-
27
-
28
-
29
-
30
-
31
-
32
-
33
-
34
-
35
-
36
-
37
-
38
-
39
-
40
-
41
-
42
-
43
-
44
-
45
-
46
-
47
-
48
-
49
-
50
-
51
-
52
-
53
-
54
-
55
-
56
-
57
-
58
-
59
-
60
-
61
-
62
-
63
-
64
-
65
-
66
-
67
-
68
-
69
-
70
-
71
-
72
-
 73
73 -
 74
74 -
 75
75 -
 76
76 -
 77
77 -
 78
78 -
 79
79 -
 80
80 -
 81
81 -
 82
82 -
 83
83 -
84
-
85
-
86
-
87
-
88
-
89
-
90
-
91
-
92
-
93
-
94
-
95
-
96
-
97
-
98
-
99
-
100
-
101
-
102
-
103
-
104
-
105
-
106
-
107
-
108
-
109
-
110
-
111
-
112
-
113
-
114
-
115
-
116
-
117
-
118
-
119
-
120
-
121
-
122
-
123
-
124
-
125
-
126
-
127
-
128
-
129
-
130
-
131
-
132
-
133
-
134
-
135
-
136
-
137
-
138
-
139
-
140
-
141
-
142
-
143
-
144
-
145
-
146
-
147
-
148
-
149
-
150
-
151
-
152
-
153
-
154
-
155
-
156
-
157
-
158
-
159
-
160
-
161
-
162
-
163
-
164
-
165
-
166
-
167
-
168
-
169
-
170
-
171
-
172
-
173
-
174
-
175
-
176
-
177
-
178
-
179
-
180
-
181
-
182
-
183
-
184
-
185
-
186
-
187
-
188
-
189
-
190
-
191
-
192
-
193
-
194
-
195
-
196
-
197
-
198
-
199
-
200
-
201
-
202
-
203
-
204
-
205
-
206
-
207
-
208
-
209
-
210
-
211
-
212
-
213
-
214
-
215
-
216
-
217
-
218
-
219
-
220
-
221
-
222
-
223
-
224
-
225
-
226
-
227
-
228
-
229
-
230
-
231
-
232
-
233
-
234
-
235
-
236
-
237
-
238
-
239
-
240
-
241
-
242
-
243
-
244
-
245
-
246
-
247
-
248
-
249
-
250
-
251
-
252
-
253
-
254
-
255
-
256
-
257
-
258
-
259
-
260
-
261
-
262
-
263
-
264
-
265
-
266
-
267
-
268
-
269
-
270
-
271
-
272
-
273
-
274
-
275
-
276
-
277
-
278
-
279
-
280
-
281
-
282
-
283
-
284
-
285
-
286
-
287
-
288
-
289
-
290
-
291
-
292
-
293
-
294
-
295
-
296
-
297
-
298
-
299
-
300
-
301
-
302
-
303
-
304
-
305
-
306
-
307
-
308
-
309
-
310
-
311
-
312
-
313
-
314
-
315
-
316
-
317
-
318
-
319
-
320
-
321
-
322
-
323
-
324
-
325
-
326
-
327
-
328
-
329
-
330
-
331
-
332
-
333
-
334
-
335
-
336
-
337
-
338
-
339
-
340
-
341
-
342
-
343
-
344
-
345
-
346
-
347
-
348
-
349
-
350
-
351
-
352
-
353
-
354
-
355
-
356
-
357
-
358
-
359
-
360
-
361
-
362
-
363
-
364
-
365
 |
 |