2012 Lincoln MKT Owner Guide 1st Printing - Page 166
2012 Lincoln MKT Manual

Page 166 highlights
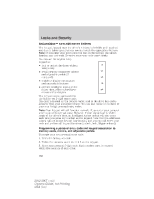
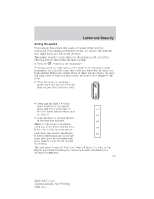
Locks and Security Ensure that the vehicle is off before beginning this procedure. Ensure that all doors are closed before beginning this procedure and that all doors remain closed throughout the procedure. Perform this procedure exactly as described below, and perform all steps within 30 seconds of starting the sequence. If any steps are performed out of sequence, stop and wait for at least one minute before starting again. Please read and understand the entire procedure before you begin. 1. Press on any programmed intelligent access key. 2. Place the new unprogrammed intelligent access key in the pocket inside the center console utility compartment. 3. Press the driver or passenger power door unlock control three times. 4. Press and release the brake pedal one time. 5. Press the driver or passenger power door lock control three times. 6. Press and release the brake pedal one time. The indicator on the Start/Stop button should begin to rapidly flash, indicating that programming mode has been entered and two programmed intelligent access keys have been detected in the vehicle. 7. Within one minute, press the start/stop button. A message will be displayed on the message center indicating that the new intelligent access key was programmed. If four intelligent access keys have already been programmed to your vehicle, you cannot program anymore and the message MAX # OF KEYS LEARNED will be displayed on the message center. 8. Remove intelligent access key from utility compartment pocket and press on the newly programmed intelligent access keys to exit programming mode. 9. Verify that the remote entry functions operate (lock, unlock) and that the vehicle starts with new intelligent access key. If the intelligent access key has been successfully programmed, it can be used to activate the Intelligent Access with Push Button Start feature and can be used to start your vehicle. Note: To program MyKey features, refer to MyKey in this chapter. PERIMETER ALARM SYSTEM The perimeter anti-theft system will help protect your vehicle from unauthorized entry. If there is any potential perimeter anti-theft problem with your vehicle, ensure ALL Intelligent Access Keys are brought to the authorized dealer to aid in troubleshooting. 166 2012 MKT (mkt) Owners Guide, 1st Printing USA (fus)
-
 1
1 -
2
-
3
-
4
-
5
-
6
-
7
-
8
-
9
-
10
-
11
-
12
-
13
-
14
-
15
-
16
-
17
-
18
-
19
-
20
-
21
-
22
-
23
-
24
-
25
-
26
-
27
-
28
-
29
-
30
-
31
-
32
-
33
-
34
-
35
-
36
-
37
-
38
-
39
-
40
-
41
-
42
-
43
-
44
-
45
-
46
-
47
-
48
-
49
-
50
-
51
-
52
-
53
-
54
-
55
-
56
-
57
-
58
-
59
-
60
-
61
-
62
-
63
-
64
-
65
-
66
-
67
-
68
-
69
-
70
-
71
-
72
-
73
-
74
-
75
-
76
-
77
-
78
-
79
-
80
-
81
-
82
-
83
-
84
-
85
-
86
-
87
-
88
-
89
-
90
-
91
-
92
-
93
-
94
-
95
-
96
-
97
-
98
-
99
-
100
-
101
-
102
-
103
-
104
-
105
-
106
-
107
-
108
-
109
-
110
-
111
-
112
-
113
-
114
-
115
-
116
-
117
-
118
-
119
-
120
-
121
-
122
-
123
-
124
-
125
-
126
-
127
-
128
-
129
-
130
-
131
-
132
-
133
-
134
-
135
-
136
-
137
-
138
-
139
-
140
-
141
-
142
-
143
-
144
-
145
-
146
-
147
-
148
-
149
-
150
-
151
-
152
-
153
-
154
-
155
-
156
-
157
-
158
-
159
-
160
-
 161
161 -
 162
162 -
 163
163 -
 164
164 -
 165
165 -
 166
166 -
 167
167 -
 168
168 -
 169
169 -
 170
170 -
 171
171 -
172
-
173
-
174
-
175
-
176
-
177
-
178
-
179
-
180
-
181
-
182
-
183
-
184
-
185
-
186
-
187
-
188
-
189
-
190
-
191
-
192
-
193
-
194
-
195
-
196
-
197
-
198
-
199
-
200
-
201
-
202
-
203
-
204
-
205
-
206
-
207
-
208
-
209
-
210
-
211
-
212
-
213
-
214
-
215
-
216
-
217
-
218
-
219
-
220
-
221
-
222
-
223
-
224
-
225
-
226
-
227
-
228
-
229
-
230
-
231
-
232
-
233
-
234
-
235
-
236
-
237
-
238
-
239
-
240
-
241
-
242
-
243
-
244
-
245
-
246
-
247
-
248
-
249
-
250
-
251
-
252
-
253
-
254
-
255
-
256
-
257
-
258
-
259
-
260
-
261
-
262
-
263
-
264
-
265
-
266
-
267
-
268
-
269
-
270
-
271
-
272
-
273
-
274
-
275
-
276
-
277
-
278
-
279
-
280
-
281
-
282
-
283
-
284
-
285
-
286
-
287
-
288
-
289
-
290
-
291
-
292
-
293
-
294
-
295
-
296
-
297
-
298
-
299
-
300
-
301
-
302
-
303
-
304
-
305
-
306
-
307
-
308
-
309
-
310
-
311
-
312
-
313
-
314
-
315
-
316
-
317
-
318
-
319
-
320
-
321
-
322
-
323
-
324
-
325
-
326
-
327
-
328
-
329
-
330
-
331
-
332
-
333
-
334
-
335
-
336
-
337
-
338
-
339
-
340
-
341
-
342
-
343
-
344
-
345
-
346
-
347
-
348
-
349
-
350
-
351
-
352
-
353
-
354
-
355
-
356
-
357
-
358
-
359
-
360
-
361
-
362
-
363
-
364
-
365
-
366
-
367
-
368
-
369
-
370
-
371
-
372
-
373
-
374
-
375
-
376
-
377
-
378
-
379
-
380
-
381
-
382
-
383
-
384
-
385
-
386
-
387
-
388
-
389
-
390
-
391
-
392
-
393
-
394
-
395
-
396
-
397
-
398
-
399
-
400
-
401
-
402
-
403
-
404
-
405
-
406
-
407
-
408
-
409
-
410
-
411
-
412
-
413
-
414
-
415
-
416
-
417
-
418
-
419
-
420
-
421
-
422
-
423
-
424
-
425
-
426
-
427
-
428
-
429
-
430
-
431
-
432
-
433
-
434
-
435
-
436
-
437
 |
 |