2002 Mazda Protege Owner's Manual - Page 180
2002 Mazda Protege Manual
Page 180 highlights
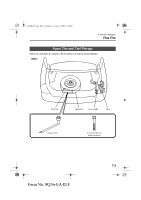
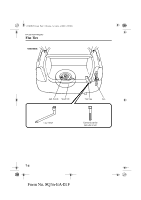
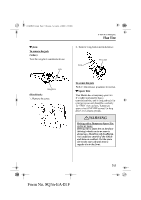
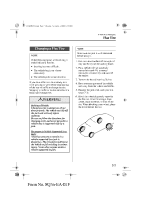
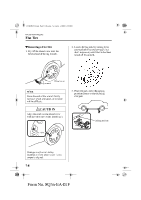
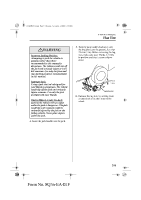
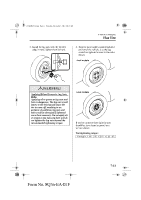
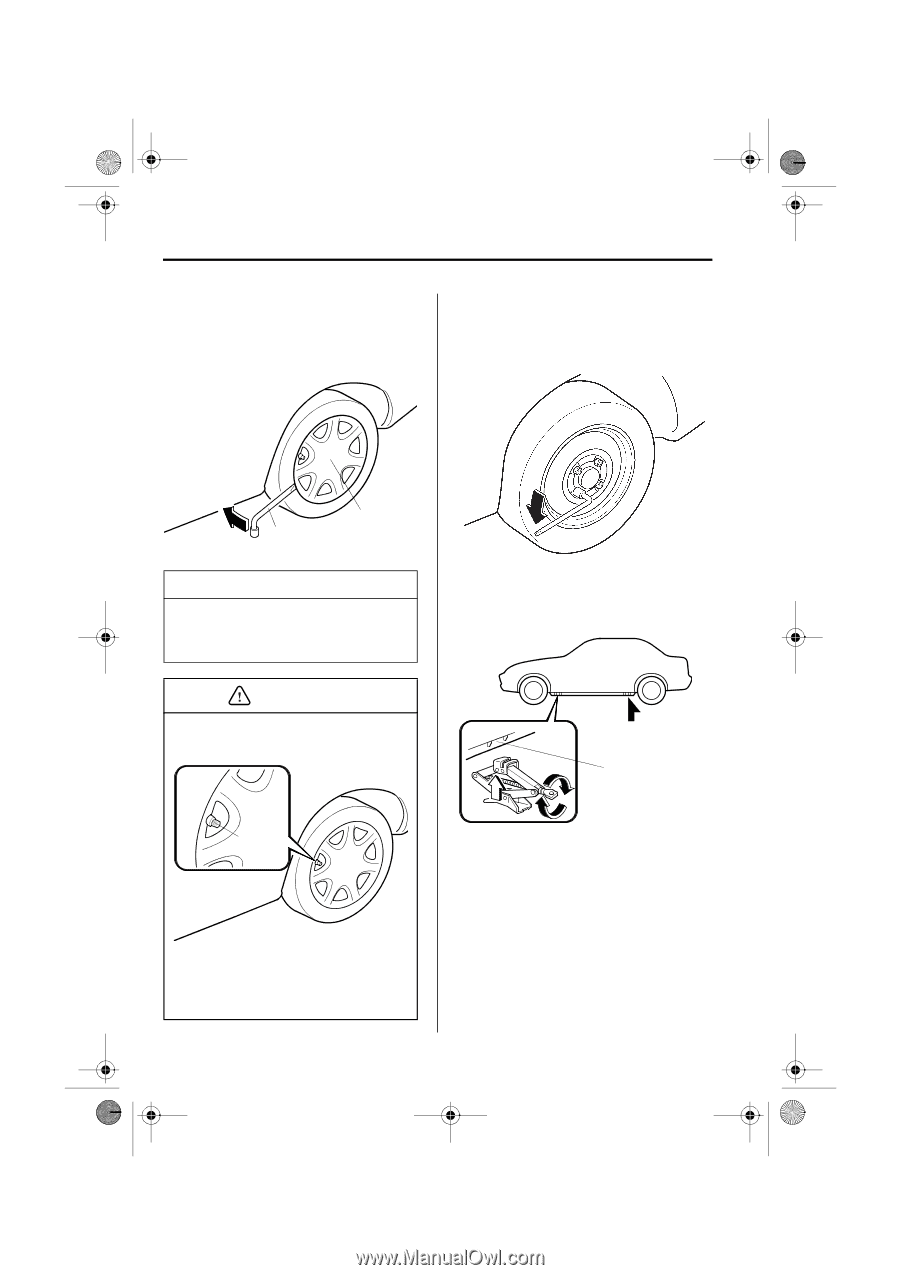
J39L(02MY).book Page 8 Thursday, November 1, 2001 10:49 AM In Case of an Emergency Flat Tire M Removing a Flat Tire 1. Pry off the wheel cover with the beveled end of the lug wrench. 2. Loosen the lug nuts by turning them counterclockwise one turn each, but don't remove any until the tire has been raised off the ground. Wheel cover Lug wrench NOTE Force the end of the wrench firmly between wheel and cover, or removal will be difficult. 3. Place the jack under the jacking position closest to the tire being changed. CAUTION Align the notch on the wheel cover with the valve stem when installing it. Jacking position Tire valve Damage could occur during installation if the wheel cover is not properly aligned. 7-8 Form No. 8Q36-EA-01F
-
 1
1 -
2
-
3
-
4
-
5
-
6
-
7
-
8
-
9
-
10
-
11
-
12
-
13
-
14
-
15
-
16
-
17
-
18
-
19
-
20
-
21
-
22
-
23
-
24
-
25
-
26
-
27
-
28
-
29
-
30
-
31
-
32
-
33
-
34
-
35
-
36
-
37
-
38
-
39
-
40
-
41
-
42
-
43
-
44
-
45
-
46
-
47
-
48
-
49
-
50
-
51
-
52
-
53
-
54
-
55
-
56
-
57
-
58
-
59
-
60
-
61
-
62
-
63
-
64
-
65
-
66
-
67
-
68
-
69
-
70
-
71
-
72
-
73
-
74
-
75
-
76
-
77
-
78
-
79
-
80
-
81
-
82
-
83
-
84
-
85
-
86
-
87
-
88
-
89
-
90
-
91
-
92
-
93
-
94
-
95
-
96
-
97
-
98
-
99
-
100
-
101
-
102
-
103
-
104
-
105
-
106
-
107
-
108
-
109
-
110
-
111
-
112
-
113
-
114
-
115
-
116
-
117
-
118
-
119
-
120
-
121
-
122
-
123
-
124
-
125
-
126
-
127
-
128
-
129
-
130
-
131
-
132
-
133
-
134
-
135
-
136
-
137
-
138
-
139
-
140
-
141
-
142
-
143
-
144
-
145
-
146
-
147
-
148
-
149
-
150
-
151
-
152
-
153
-
154
-
155
-
156
-
157
-
158
-
159
-
160
-
161
-
162
-
163
-
164
-
165
-
166
-
167
-
168
-
169
-
170
-
171
-
172
-
173
-
174
-
 175
175 -
 176
176 -
 177
177 -
 178
178 -
 179
179 -
 180
180 -
 181
181 -
 182
182 -
 183
183 -
 184
184 -
 185
185 -
186
-
187
-
188
-
189
-
190
-
191
-
192
-
193
-
194
-
195
-
196
-
197
-
198
-
199
-
200
-
201
-
202
-
203
-
204
-
205
-
206
-
207
-
208
-
209
-
210
-
211
-
212
-
213
-
214
-
215
-
216
-
217
-
218
-
219
-
220
-
221
-
222
-
223
-
224
-
225
-
226
-
227
-
228
-
229
-
230
-
231
-
232
-
233
-
234
-
235
-
236
-
237
-
238
-
239
-
240
-
241
-
242
-
243
-
244
-
245
-
246
-
247
-
248
-
249
-
250
-
251
-
252
-
253
-
254
-
255
-
256
-
257
-
258
-
259
-
260
-
261
-
262
-
263
-
264
-
265
-
266
-
267
-
268
-
269
-
270
 |
 |
7-8
In Case of an Emergency
Flat Tire
Form No. 8Q36-EA-01F
▼
Removing a Flat Tire
1.
Pry off the wheel cover with the
beveled end of the lug wrench.
2.
Loosen the lug nuts by turning them
counterclockwise one turn each, but
don’t remove any until the tire has been
raised off the ground.
3.
Place the jack under the jacking
position closest to the tire being
changed.
NOTE
Force the end of the wrench firmly
between wheel and cover, or removal
will be difficult.
Align the notch on the wheel cover
with the valve stem when installing it.
Damage could occur during
installation if the wheel cover
is not
properly aligned.
Wheel cover
Lug wrench
CAUTION
Tire valve
Jacking position
J39L(02MY).book
Page 8
Thursday, November 1, 2001
10:49 AM