2003 Oldsmobile Bravada Owner's Manual - Page 196
2003 Oldsmobile Bravada Manual

Page 196 highlights
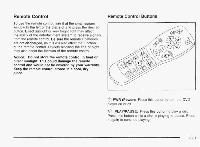
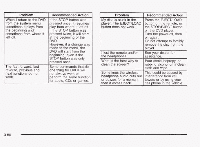
CQMP/AUDIO (Compression) CQMP: Press and release this button to display the current compression displayed on the screen. Press this button again to select the next compression state. Three compression states are available inciuding minimum, standard and off. The compression feature only functions on AC3 (Dolby@ Digital Surround) encoded DVD video discs. Press and hold this button to see if the DVD playing has optional audio tracks, such as different languages or commentaries. Press and release to change selections. INPUT/TITLE DVD AUX (Auxiliary): Press and release this button to switch between the auxiliary input device and the DVD player. Press and hold this button to see a display of the DVD's titles. Press and release to change the titles available. RTN (Return): When a DVD menu is active and this button is pressed, the selected option will be disabled. This button could have different functions with different discs. SCREEN BRIGHTNESS: Press the plus or the minus symbol to increase or to decrease the brightness of the screen. This button can also be found on the video screen. Setup Menu To access the setup menu, ensure a DVD is in the player and the video is in stop mode. Press the menu key. Once the menu is activated, use the UP, DOWN, RIGHT, LEFT, and Enter buttons to navigate the screen. The setup menu allows the use to select default preferences for Menu Language, Subtitle Language, Audio Language, TV Aspect, TV Mode, and Dynamic Range Compression. Not all DVDs support all the feature defaults in the setup menus. In the event a particular feature is not supported, defaults will be provided by the DVD media. Exit the setup menu by pressing the RETURN button on the remote control. If you make changes to the system setup defaults, the disc will resume play from the beginning and not where it previously left off. 6-h Battery Replacement To change the batteries, do the following: 1. Unclip the battery door located on the back of the remote control. 2. Replace the two AAA batteries in the compartment. Make sure that they are installed correctly. 3. Close the battery door securely. If the remote control is to be stored for a long period of time, remove the batteries and keep them in a cool, dry place. 3-83 -:q- LIGHT: Press this button to illuminate the keypad for about eight seconds.
-
 1
1 -
2
-
3
-
4
-
5
-
6
-
7
-
8
-
9
-
10
-
11
-
12
-
13
-
14
-
15
-
16
-
17
-
18
-
19
-
20
-
21
-
22
-
23
-
24
-
25
-
26
-
27
-
28
-
29
-
30
-
31
-
32
-
33
-
34
-
35
-
36
-
37
-
38
-
39
-
40
-
41
-
42
-
43
-
44
-
45
-
46
-
47
-
48
-
49
-
50
-
51
-
52
-
53
-
54
-
55
-
56
-
57
-
58
-
59
-
60
-
61
-
62
-
63
-
64
-
65
-
66
-
67
-
68
-
69
-
70
-
71
-
72
-
73
-
74
-
75
-
76
-
77
-
78
-
79
-
80
-
81
-
82
-
83
-
84
-
85
-
86
-
87
-
88
-
89
-
90
-
91
-
92
-
93
-
94
-
95
-
96
-
97
-
98
-
99
-
100
-
101
-
102
-
103
-
104
-
105
-
106
-
107
-
108
-
109
-
110
-
111
-
112
-
113
-
114
-
115
-
116
-
117
-
118
-
119
-
120
-
121
-
122
-
123
-
124
-
125
-
126
-
127
-
128
-
129
-
130
-
131
-
132
-
133
-
134
-
135
-
136
-
137
-
138
-
139
-
140
-
141
-
142
-
143
-
144
-
145
-
146
-
147
-
148
-
149
-
150
-
151
-
152
-
153
-
154
-
155
-
156
-
157
-
158
-
159
-
160
-
161
-
162
-
163
-
164
-
165
-
166
-
167
-
168
-
169
-
170
-
171
-
172
-
173
-
174
-
175
-
176
-
177
-
178
-
179
-
180
-
181
-
182
-
183
-
184
-
185
-
186
-
187
-
188
-
189
-
190
-
 191
191 -
 192
192 -
 193
193 -
 194
194 -
 195
195 -
 196
196 -
 197
197 -
 198
198 -
 199
199 -
 200
200 -
 201
201 -
202
-
203
-
204
-
205
-
206
-
207
-
208
-
209
-
210
-
211
-
212
-
213
-
214
-
215
-
216
-
217
-
218
-
219
-
220
-
221
-
222
-
223
-
224
-
225
-
226
-
227
-
228
-
229
-
230
-
231
-
232
-
233
-
234
-
235
-
236
-
237
-
238
-
239
-
240
-
241
-
242
-
243
-
244
-
245
-
246
-
247
-
248
-
249
-
250
-
251
-
252
-
253
-
254
-
255
-
256
-
257
-
258
-
259
-
260
-
261
-
262
-
263
-
264
-
265
-
266
-
267
-
268
-
269
-
270
-
271
-
272
-
273
-
274
-
275
-
276
-
277
-
278
-
279
-
280
-
281
-
282
-
283
-
284
-
285
-
286
-
287
-
288
-
289
-
290
-
291
-
292
-
293
-
294
-
295
-
296
-
297
-
298
-
299
-
300
-
301
-
302
-
303
-
304
-
305
-
306
-
307
-
308
-
309
-
310
-
311
-
312
-
313
-
314
-
315
-
316
-
317
-
318
-
319
-
320
-
321
-
322
-
323
-
324
-
325
-
326
-
327
-
328
-
329
-
330
-
331
-
332
-
333
-
334
-
335
-
336
-
337
-
338
-
339
-
340
-
341
-
342
-
343
-
344
-
345
-
346
-
347
-
348
-
349
-
350
-
351
-
352
-
353
-
354
-
355
-
356
-
357
-
358
-
359
-
360
-
361
-
362
-
363
-
364
-
365
-
366
-
367
-
368
-
369
-
370
-
371
-
372
-
373
-
374
-
375
-
376
-
377
-
378
-
379
-
380
-
381
-
382
-
383
-
384
-
385
-
386
-
387
-
388
-
389
-
390
-
391
-
392
-
393
-
394
-
395
-
396
-
397
-
398
-
399
-
400
-
401
-
402
-
403
-
404
-
405
-
406
-
407
-
408
-
409
-
410
 |
 |