2006 Suzuki Reno Owner's Manual - Page 199
2006 Suzuki Reno Manual

Page 199 highlights
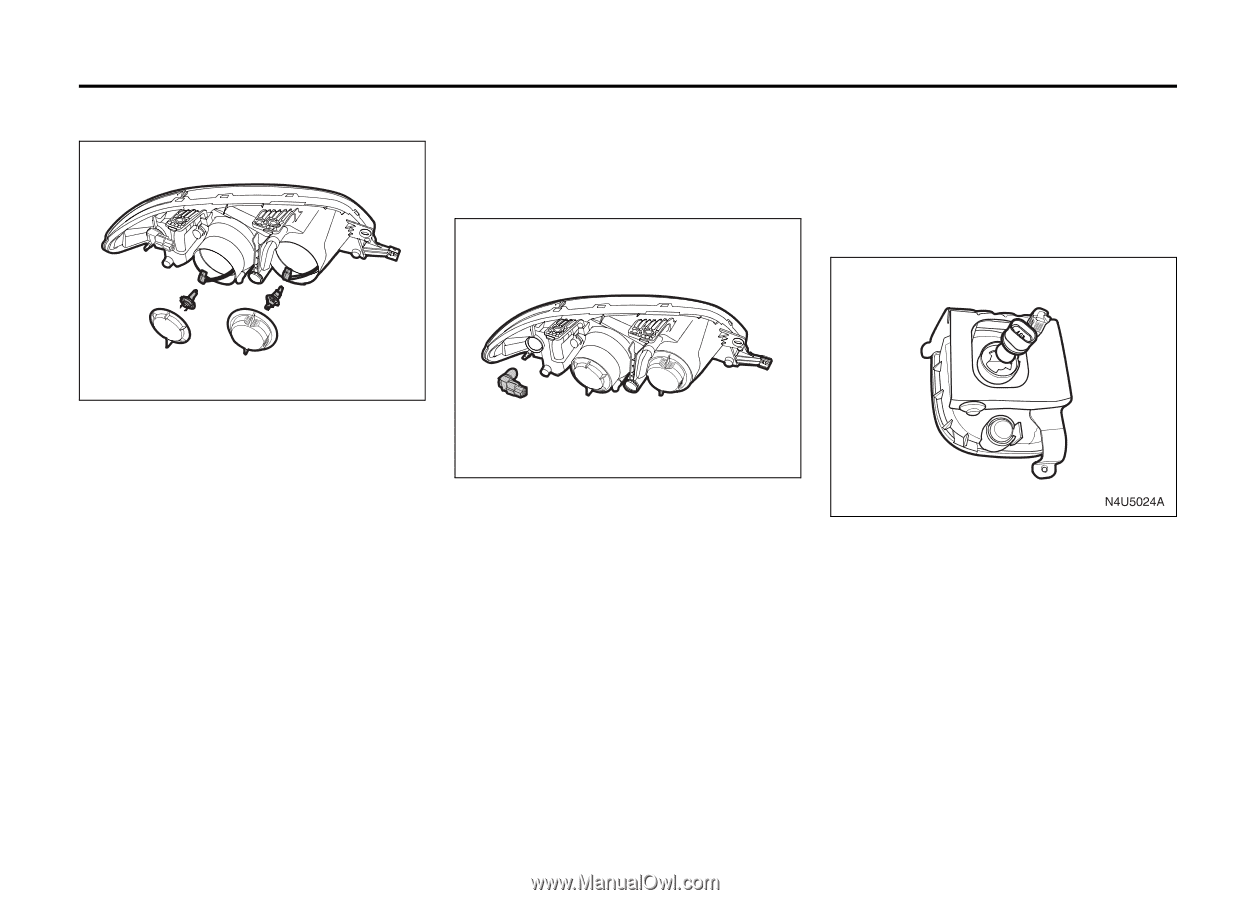
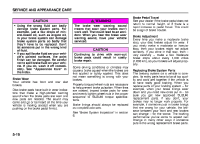
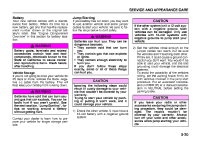
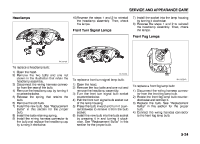
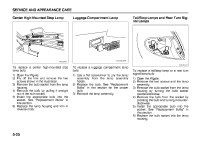
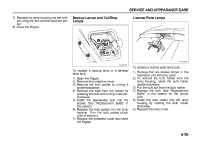
SERVICE AND APPEARANCE CARE Headlamps 10)Reverse the steps 1 and 2 to reinstall the headlamp assembly. Then, check the lamps. 7) Install the socket into the lamp housing by turning it clockwise. 8) Reverse the steps 1 and 2 to reinstall the headlamp assembly. Then, check the lamps. Front Turn Signal Lamps Front Fog Lamps N4U5042A To replace a headlamp bulb: 1) Open the hood. 2) Remove the two bolts and one nut shown in the illustration that retain the headlamp assembly. 3) Disconnect the wiring harness connector from the rear of the bulb. 4) Remove the headlamp cap by turning it counterclockwise. 5) Release the spring that retains the bulb. 6) Remove the old bulb. 7) Install the new bulb. See "Replacement Bulbs" in this section for the proper bulb. 8) Install the bulb retaining spring. 9) Install the wiring harness connector to the bulb and replace the headlamp cap by turning it clockwise. N4U5043A To replace a front turn signal lamp bulb: 1) Open the hood. 2) Remove the two bolts and one nut and remove the headlamp assembly. 3) Turn the front turn signal bulb socket counterclockwise. 4) Pull the front turn signal bulb socket out of the lamp housing. 5) Press the bulb inward and turn it counterclockwise to remove it from the bulb socket. 6) Install the new bulb into the bulb socket by pressing it in and turning it clockwise. See "Replacement Bulbs" in this section for the proper bulb. To replace a front fog lamp bulb: 1) Disconnect the wiring harness connector from the front fog lamp bulb. 2) Rotate the front fog lamp bulb counterclockwise and remove it. 3) Replace the bulb. See "Replacement Bulbs" in this section for the proper bulb. 4) Connect the wiring harness connector to the front fog lamp bulb. 5-24
-
 1
1 -
2
-
3
-
4
-
5
-
6
-
7
-
8
-
9
-
10
-
11
-
12
-
13
-
14
-
15
-
16
-
17
-
18
-
19
-
20
-
21
-
22
-
23
-
24
-
25
-
26
-
27
-
28
-
29
-
30
-
31
-
32
-
33
-
34
-
35
-
36
-
37
-
38
-
39
-
40
-
41
-
42
-
43
-
44
-
45
-
46
-
47
-
48
-
49
-
50
-
51
-
52
-
53
-
54
-
55
-
56
-
57
-
58
-
59
-
60
-
61
-
62
-
63
-
64
-
65
-
66
-
67
-
68
-
69
-
70
-
71
-
72
-
73
-
74
-
75
-
76
-
77
-
78
-
79
-
80
-
81
-
82
-
83
-
84
-
85
-
86
-
87
-
88
-
89
-
90
-
91
-
92
-
93
-
94
-
95
-
96
-
97
-
98
-
99
-
100
-
101
-
102
-
103
-
104
-
105
-
106
-
107
-
108
-
109
-
110
-
111
-
112
-
113
-
114
-
115
-
116
-
117
-
118
-
119
-
120
-
121
-
122
-
123
-
124
-
125
-
126
-
127
-
128
-
129
-
130
-
131
-
132
-
133
-
134
-
135
-
136
-
137
-
138
-
139
-
140
-
141
-
142
-
143
-
144
-
145
-
146
-
147
-
148
-
149
-
150
-
151
-
152
-
153
-
154
-
155
-
156
-
157
-
158
-
159
-
160
-
161
-
162
-
163
-
164
-
165
-
166
-
167
-
168
-
169
-
170
-
171
-
172
-
173
-
174
-
175
-
176
-
177
-
178
-
179
-
180
-
181
-
182
-
183
-
184
-
185
-
186
-
187
-
188
-
189
-
190
-
191
-
192
-
193
-
 194
194 -
 195
195 -
 196
196 -
 197
197 -
 198
198 -
 199
199 -
 200
200 -
 201
201 -
 202
202 -
 203
203 -
 204
204 -
205
-
206
-
207
-
208
-
209
-
210
-
211
-
212
-
213
-
214
-
215
-
216
-
217
-
218
-
219
-
220
-
221
-
222
-
223
-
224
-
225
-
226
-
227
-
228
-
229
-
230
-
231
-
232
-
233
-
234
-
235
-
236
-
237
-
238
-
239
-
240
-
241
-
242
-
243
-
244
-
245
-
246
-
247
-
248
-
249
-
250
-
251
-
252
-
253
-
254
-
255
-
256
 |
 |