3Com 3C3FEM656C User Guide - Page 10
Quick Start Guide - modem
 |
UPC - 662705346670
View all 3Com 3C3FEM656C manuals
Add to My Manuals
Save this manual to your list of manuals |
Page 10 highlights
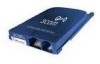
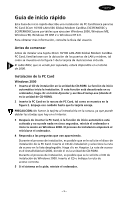
English Quick Start Guide This Quick Start Guide describes a basic PC Card installation for 3Com 10/100 LAN+56K Global Modem CardBus PC Cards (3C3FEM656C and 3CXFEM656C) for notebooks running Windows 2000, Windows ME, Windows 98, Windows 95 OSR 2, or Windows NT 4.0. For more information, see the User Guide. Before You Begin Before installing the 3Com 10/100 LAN+56K Global Modem CardBus PC Card, familiarize yourself with the location of the LAN and modem ports, as shown in Figure 1 on the enclosed illustration card. The ISDN cable, sold separately, will be available autumn 2000. Installing the PC Card Windows 2000 1 Insert the Installation CD into the CD-ROM drive. The auto-start feature starts the installation. If auto-start is disabled on your computer, click Start>Run and type d:\setup.exe (where d: is your CD-ROM drive). 2 Insert the PC Card into the PC Card slot as shown in Figure 2. Push carefully until the card seats firmly. CAUTION: Do not force the card into the slot or you may bend the pins inside. 3 After inserting the PC Card, if auto-start is enabled and nothing happens within five seconds, reboot your computer and log in to Windows 2000. The installation process will begin when the computer restarts. 4 Respond to the prompts as they appear. During the installation process, you may receive prompts for the PC Card installation disk. Insert the Installation CD and select the path from the drop-down list. Click OK. The path is d:\install\disks\win2000, where d: is your CD-ROM drive. During the installation process, you may receive prompts for the Windows 2000 installation CD. Insert the CD and indicate the correct path. 5 Restart your computer, if you are prompted. - 5 -
-
 1
1 -
2
-
3
-
4
-
 5
5 -
 6
6 -
 7
7 -
 8
8 -
 9
9 -
 10
10 -
 11
11 -
 12
12 -
 13
13 -
 14
14 -
 15
15 -
16
-
17
-
18
-
19
-
20
-
21
-
22
-
23
-
24
-
25
-
26
-
27
-
28
-
29
-
30
-
31
-
32
-
33
-
34
-
35
-
36
-
37
-
38
-
39
-
40
-
41
-
42
-
43
-
44
-
45
-
46
-
47
-
48
-
49
-
50
-
51
-
52
-
53
 |
 |
