3Com 3CRWDR200A-75 User Guide - Page 22
Powering Up the, Router, Connecting - ip
 |
View all 3Com 3CRWDR200A-75 manuals
Add to My Manuals
Save this manual to your list of manuals |
Page 22 highlights
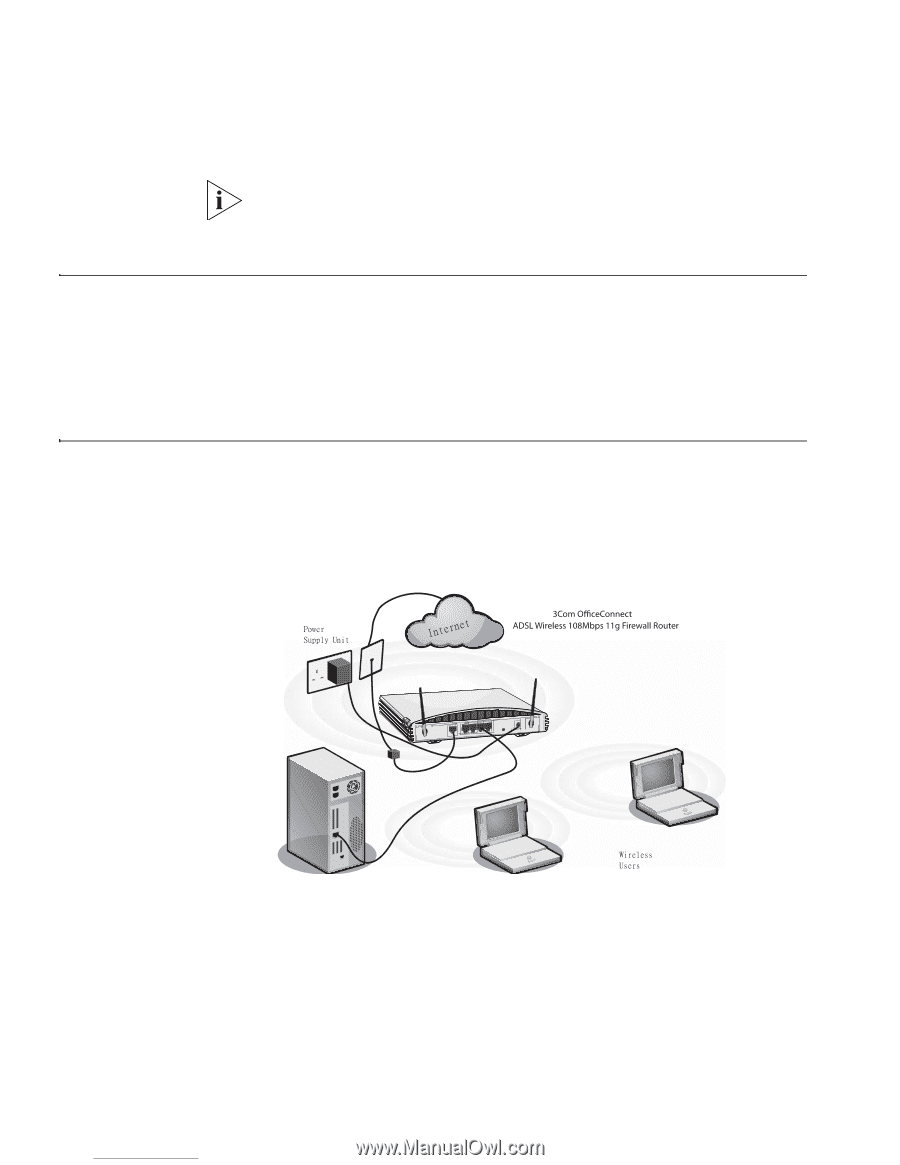
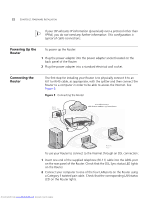
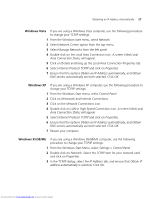
22 CHAPTER 2: HARDWARE INSTALLATION If your ISP allocates IP information dynamically over a protocol other than PPPoE, you do not need any further information. This configuration is typical of cable connections. Powering Up the Router To power up the Router: 1 Plug the power adapter into the power adapter socket located on the back panel of the Router. 2 Plug the power adapter into a standard electrical wall socket. Connecting the Router The first step for installing your Router is to physically connect it to an RJ11or RJ45 cable, as appropriate, with the splitter and then connect the Router to a computer in order to be able to access the Internet. See Figure 5: Figure 5 Connecting the Router Qpxfs! Tvqqmz!Voju Joufsofu POWER OK Cable/DSL 2 1 LAN Xjsfmftt! Vtfst To use your Router to connect to the Internet through an DSL connection: 1 Insert one end of the supplied telephone (RJ-11) cable into the ADSL port on the rear panel of the Router. Check that the DSL Sync status LED lights on the Router. 2 Connect your computer to one of the four LAN ports on the Router using a Category 5 twisted pair cable. Check that the corresponding LAN status LED on the Router lights. Downloaded from www.Manualslib.com manuals search engine
-
 1
1 -
2
-
3
-
4
-
5
-
6
-
7
-
8
-
9
-
10
-
11
-
12
-
13
-
14
-
15
-
16
-
 17
17 -
 18
18 -
 19
19 -
 20
20 -
 21
21 -
 22
22 -
 23
23 -
 24
24 -
 25
25 -
 26
26 -
 27
27 -
28
-
29
-
30
-
31
-
32
-
33
-
34
-
35
-
36
-
37
-
38
-
39
-
40
-
41
-
42
-
43
-
44
-
45
-
46
-
47
-
48
-
49
-
50
-
51
-
52
-
53
-
54
-
55
-
56
-
57
-
58
-
59
-
60
-
61
-
62
-
63
-
64
-
65
-
66
-
67
-
68
-
69
-
70
-
71
-
72
-
73
-
74
-
75
-
76
-
77
-
78
-
79
-
80
-
81
-
82
-
83
-
84
-
85
-
86
-
87
-
88
-
89
-
90
-
91
-
92
-
93
-
94
-
95
-
96
-
97
-
98
-
99
-
100
-
101
-
102
-
103
-
104
-
105
-
106
-
107
-
108
-
109
-
110
-
111
-
112
-
113
-
114
-
115
-
116
-
117
-
118
-
119
-
120
-
121
-
122
-
123
-
124
-
125
-
126
-
127
-
128
-
129
-
130
-
131
-
132
-
133
-
134
-
135
-
136
-
137
-
138
-
139
-
140
-
141
-
142
-
143
-
144
 |
 |