AIWA HV-FX9000 Operating Instructions - Page 22
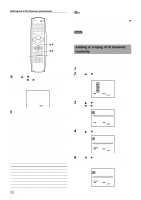
Adding or erasing VCR channels, manually
 |
View all AIWA HV-FX9000 manuals
Add to My Manuals
Save this manual to your list of manuals |
Page 22 highlights
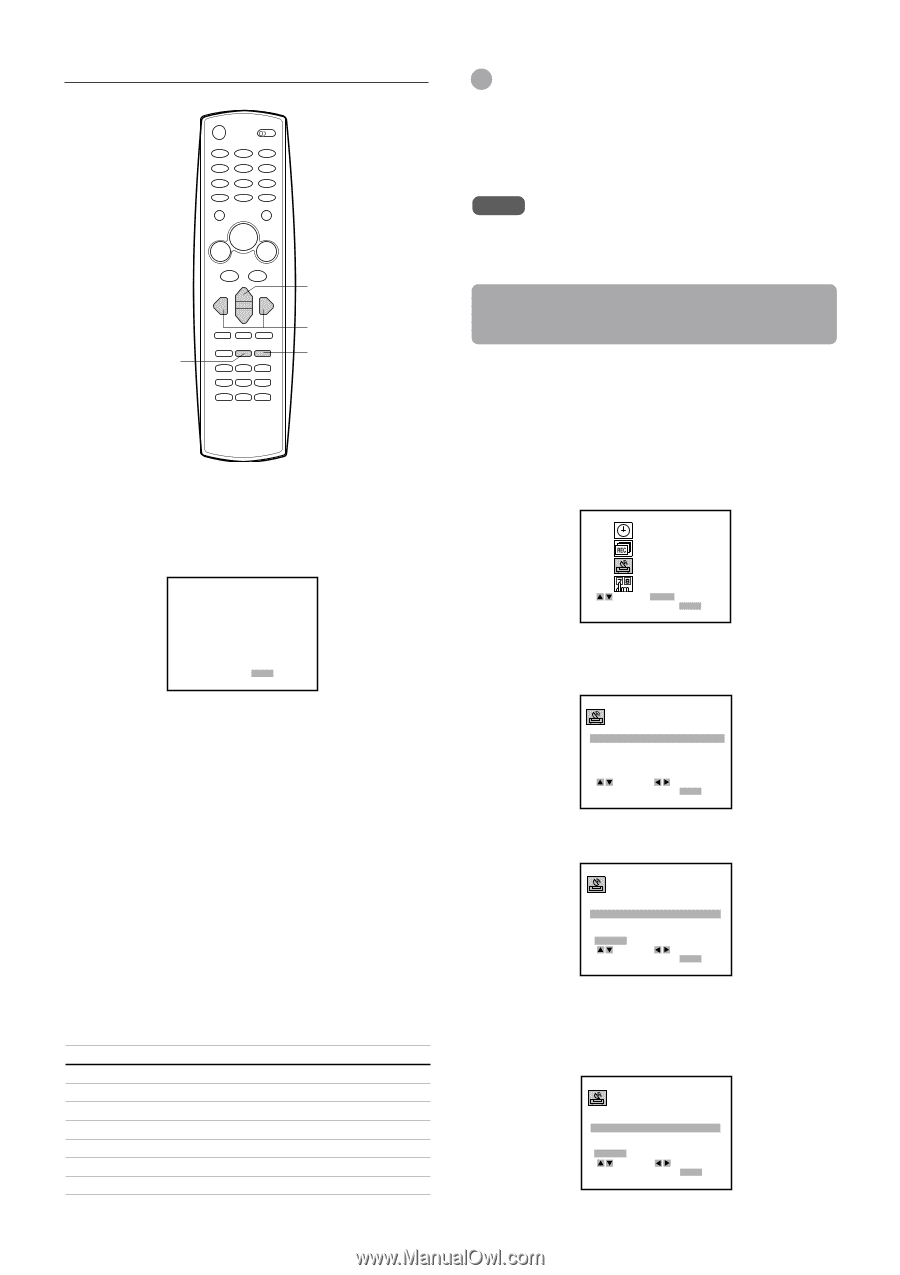
Setting the VCR channels (continued) ENTER/ DISPLAY i/k j/l MENU 4 Press i or k to select AUTO CHANNEL SET, then press j or l . All available channels in your area are scanned and stored in the memory of the VCR. After scanning, the TV screen in step 3 appears. AUTO CHANNEL SET PROCEEDING CHANNEL 11 TO EXIT PRESS MENU 5 Press MENU to return to the normal screen. If "C" flashes in the display window after Auto Channel Set Check the antenna connections and repeat the above procedure from step 1. If you still cannot receive the channels, set the VCR channels manually. See "Adding or erasing VCR channels manually". (Presetting the VCR channels is necessary for recording TV programs.) CATV channels CATV systems use letters and numerals to designate channels. The table below shows the channel numbers of the CATV system and the corresponding channel number displayed on this VCR. For more information on available channels in your area, consult your local CATV company. Channels displayed on this VCR 01 02 to 13 14 to 36 37 to 94 95 to 99 100 to 124 125 CATV channels 5A 2 to 13 A to W W+1 to W+58 A-5 to A-1 W+59 to W+83 W+84 13 ENGLISH Tips • When you perform the Auto Channel Set, the VCR automatically selects the band (TV or CATV) in which there are more channels to be preset. To check the band, press k to select TUNING BAND in the TUNING menu. • In the display window, "c" is for a CATV channel and "ch" is for a TV channel. Note Once you conduct Auto Channel Set, the previous settings will be canceled. Adding or erasing VCR channels manually If Auto Channel Set does not set the VCR channel, add them manually for recording TV programs. You can also erase the unnecessary VCR channels. 1 Press MENU. 2 Press i or k to select TUNING, then press ENTER/DISPLAY. CLOCK PROGRAM TUNING SETUP SELECT ENTER ENTER TO EXIT PRESS MENU 3 Press i or k to select TUNING BAND, then press j or l to display TV or CATV. AUTO CHANNEL SET TUNING BAND : CATV CH. ADD / DEL : CH.23 ADD SOURCE SELECT : TUNER SELECT ADJUST TO EXIT PRESS MENU 4 Press i or k to select CH. ADD/DEL. AUTO CHANNEL SET TUNING BAND : CATV CH. ADD / DEL : CH. 23 ADD SOURCE SELECT : TUNER ENTER ADD / DELETE SELECT ADJUST TO EXIT PRESS MENU 5 Press j or l to select the channel to be erased or added. When the selected channel has already been set, ADD appears. When it has not been set, DEL appears. AUTO CHANNEL SET TUNING BAND : CATV CH. ADD / DEL : CH. 25 DEL SOURCE SELECT : TUNER ENTER ADD / DELETE SELECT ADJUST TO EXIT PRESS MENU
-
 1
1 -
2
-
3
-
4
-
5
-
6
-
7
-
8
-
9
-
10
-
11
-
12
-
13
-
14
-
15
-
16
-
 17
17 -
 18
18 -
 19
19 -
 20
20 -
 21
21 -
 22
22 -
 23
23 -
 24
24 -
 25
25 -
 26
26 -
 27
27 -
28
-
29
-
30
-
31
-
32
-
33
-
34
-
35
-
36
-
37
-
38
-
39
-
40
-
41
-
42
-
43
-
44
-
45
-
46
-
47
-
48
-
49
-
50
-
51
-
52
-
53
-
54
-
55
-
56
-
57
-
58
-
59
-
60
-
61
-
62
-
63
-
64
-
65
-
66
-
67
-
68
-
69
-
70
-
71
-
72
-
73
-
74
-
75
-
76
-
77
-
78
-
79
-
80
-
81
-
82
-
83
-
84
-
85
-
86
-
87
-
88
-
89
-
90
-
91
-
92
-
93
-
94
-
95
-
96
-
97
-
98
-
99
-
100
-
101
-
102
-
103
-
104
-
105
-
106
-
107
-
108
-
109
-
110
-
111
-
112
-
113
-
114
-
115
-
116
-
117
-
118
 |
 |