AIWA NSX-V9000 Operating Instructions - Page 20

Timer, Recording

Page 20 highlights

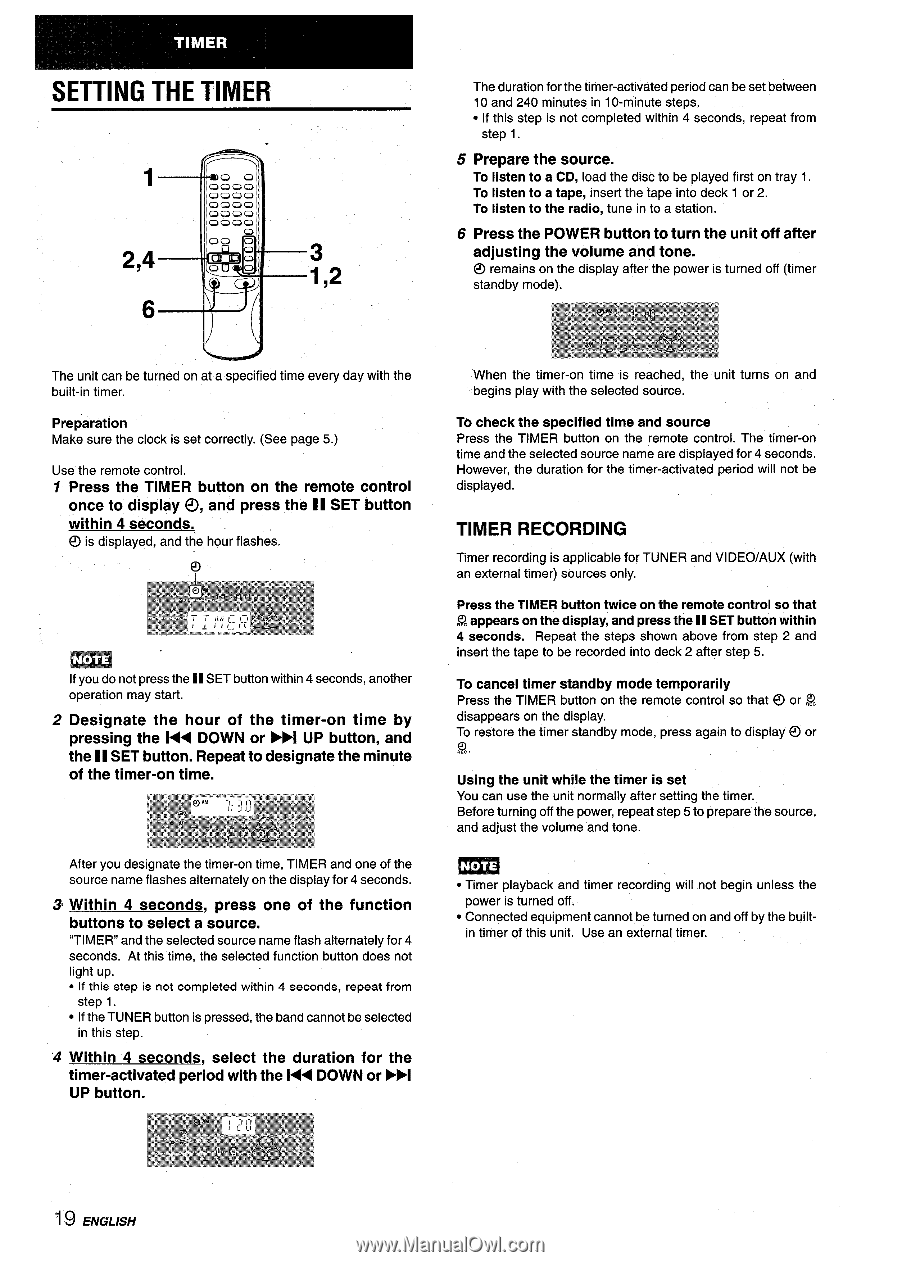
1 2,4 6 3 1,2 The duration for the timer-activated period can beset between 10 and 240 minutes in 10-minute steps. q If this step is not completed within 4 seconds, repeat from step 1. 5 Prepare the source. To listen to a CD, load the disc to be played first on tray 1. To listen to a tape, inserl the tape into deck 1 or 2. To listen to the radio, tune into a station. 6 Press the POWER button to turn the unit off after adjusting the volume and tone. @ remains on the display after the power is turned off (timer standby mode). The unit can be turned on at a specified time every day with the built-in timer. Preparation Make sure the clock is set correctly. (See page 5.) Use the remote control. 1 Press the TIMER button on the remote control once to display 0, and press the II SET button within 4 seconds. O is displayed, and the hour flashes. m If you do not press the II SET button within 4 seconds, another operation may start. 2 Designate the hour of the timer-on time by pressing the 1

  • 1
  • 2
  • 3
  • 4
  • 5
  • 6
  • 7
  • 8
  • 9
  • 10
  • 11
  • 12
  • 13
  • 14
  • 15
  • 16
  • 17
  • 18
  • 19
  • 20
  • 21
  • 22
  • 23
  • 24
  • 25
  • 26
  • 27
  • 28
  • 29
  • 30
  • 31
  • 32
  • 33
  • 34
  • 35
  • 36
  • 37
  • 38
  • 39
  • 40
  • 41
  • 42
  • 43
  • 44
  • 45
  • 46
  • 47
  • 48
  • 49
  • 50
  • 51
  • 52
  • 53
  • 54
  • 55
  • 56
  • 57
  • 58
  • 59
  • 60
  • 61
  • 62
  • 63
  • 64
  • 65
  • 66
  • 67
  • 68
  • 69
  • 70
  • 71
  • 72

1
2,4
3
1,2
6
The unit can be turned on at a specified time every day with the
built-in timer.
Preparation
Make sure the clock is set correctly. (See page 5.)
Use the remote control.
1
2
3’
‘4
Press
the TIMER
button
on the remote
control
once to display
0,
and press the II
SET button
within 4 seconds.
O is
displayed, and the hour flashes.
m
If you do not press the II SET button within 4 seconds, another
operation may start.
Designate
the
hour
of the
timer-on
time
by
pressing
the 1<< DOWN
or WI
UP button,
and
the 11SET button. Repeat to designate
the minute
of the timer-on
time.
After you designate the timer-on time, TIMER and one of the
source name flashes alternately on the display for 4 seconds.
Within
4 seconds,
press
one
of the
function
buttons
to select a source.
“TIMER” and the selected source name flash alternately for 4
seconds.
At this time, the selected function button does not
light up.
If this step is not completed within 4 seconds,
repeat from
step 1.
If the TUNER button is pressed, the band cannot be selected
in this step.
Within
4 seconds,
select
the
duration
for the
timer-activated
period with the l<<
DOWN or ml
UP button.
5
6
The duration for the timer-activated period can beset between
10 and 240 minutes in 10-minute steps.
If this step is not completed
within 4 seconds,
repeat from
step 1.
Prepare
the source.
To listen to a CD,
load the disc to be played first on tray 1.
To listen to a tape,
inserl the tape into deck 1 or 2.
To listen to the radio,
tune into a station.
Press the POWER
button to turn the unit off after
adjusting
the volume
and tone.
@
remains on the display after the power is turned off (timer
standby mode).
When the timer-on
time is reached,
the unit turns on and
begins play with the selected source.
To
check
the specified
time and source
Press the TIMER
button on the remote control. The timer-on
time and the selected source name are displayed for 4 seconds.
However, the duration for the timer-activated
period will not be
displayed.
TIMER
RECORDING
Timer recording is applicable for TUNER and VI DEO/AUX (with
an external timer) sources only.
Press the TIMER button twice on the remote control so that
Q appears on the display, and press the 11SET button within
4
seconds.
Repeat the steps shown above from step 2 and
insert the tape to be recorded into deck 2 after step 5.
To cancel
timer standby
mode temporarily
Press the TIMER button on the remote control so that @ or ~
disappears on the display.
To restore the timer standby mode, press again to display @ or
Using the unit while
the timer
is set
You can use the unit normally after setting the timer.
Before turning off the power, repeat step
5
to prepare the source,
and adjust the volume and tone.
Timer playback and timer recording will not begin unless the
power is turned off.
Connected equipment cannot be turned on and off by the built-
in timer of this unit.
Use an external timer.
19
ENGLISH