ASRock ALiveXFire-eSATA2 R3.0 User Manual - Page 37

Installing Windows, XP / XP 64-bit / Vista, Vista, bit With RAID Functions, XP / XP 64-bit With,

Page 37 highlights

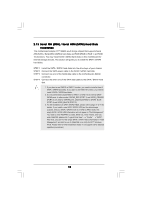
2.16 Installing Windows® 2000 / XP / XP 64-bit / VistaTM / VistaTM 64-bit With RAID Functions If you want to install Windows® 2000, Windows® XP, Windows® XP 64-bit, Windows® VistaTM or Windows® VistaTM 64-bit on a RAID disk composed of 2 or more SATA / SATAII HDDs with RAID functions, please follow below procedures according to the OS you install. Before installing Windows® 2000 to your system, your Windows® 2000 optical disk is supposed to include SP4. If there is no SP4 included in your disk, please visit the below website for proper procedures of making a SP4 disk: http://www.microsoft.com/Windows2000/downloads/servicepacks/sp4/spdeploy. htm#the_integrated_installation_fmay 2.16.1 Installing Windows® 2000 / XP / XP 64-bit With RAID Functions If you want to install Windows® 2000, Windows® XP or Windows® XP 64-bit on a RAID disk composed of 2 or more SATA / SATAII HDDs with RAID functions, please follow below steps. STEP 1: Set up BIOS. A. Enter BIOS SETUP UTILITY Advanced screen IDE Configuration. B. Set the "SATA Operation Mode" option to [RAID]. STEP 2: Make a SATA / SATAII Driver Diskette. A. Insert the ASRock Support CD into your optical drive to boot your system. B. During POST at the beginning of system boot-up, press key, and then a window for boot devices selection appears. Please select CD- ROM as the boot device. C. When you see the message on the screen, "Generate Serial ATA driver diskette [YN]?", press . D. Then you will see these messages, Please insert a blank formatted diskette into floppy drive A: press any key to start Please insert a floppy diskette into the floppy drive, and press any key. E. The system will start to format the floppy diskette and copy SATA / SATAII drivers into the floppy diskette. 37

  • 1
  • 2
  • 3
  • 4
  • 5
  • 6
  • 7
  • 8
  • 9
  • 10
  • 11
  • 12
  • 13
  • 14
  • 15
  • 16
  • 17
  • 18
  • 19
  • 20
  • 21
  • 22
  • 23
  • 24
  • 25
  • 26
  • 27
  • 28
  • 29
  • 30
  • 31
  • 32
  • 33
  • 34
  • 35
  • 36
  • 37
  • 38
  • 39
  • 40
  • 41
  • 42
  • 43
  • 44
  • 45
  • 46
  • 47
  • 48
  • 49
  • 50
  • 51
  • 52
  • 53
  • 54
  • 55
  • 56
  • 57
  • 58
  • 59
  • 60

37
37
37
37
37
2.16
2.16
2.16
2.16
2.16
Installing Windows
Installing Windows
Installing Windows
Installing Windows
Installing Windows
®
2000 / XP / XP 64-bit / Vista
TM
TM
TM
TM
TM
/
/
/
/
/
Vista
Vista
Vista
Vista
Vista
TM
TM
TM
TM
TM
64-bit With RAID Functions
If you want to install Windows
®
2000, Windows
®
XP, Windows
®
XP 64-bit, Windows
®
Vista
TM
or Windows
®
Vista
TM
64-bit on a RAID disk composed of 2 or more SATA /
SATAII HDDs with RAID functions, please follow below procedures according to the
OS you install.
2.16.1
Installing Windows
2.16.1
Installing Windows
2.16.1
Installing Windows
2.16.1
Installing Windows
2.16.1
Installing Windows
®
2000 / XP / XP 64-bit With
RAID Functions
RAID Functions
RAID Functions
RAID Functions
RAID Functions
If you want to install Windows
®
2000, Windows
®
XP or Windows
®
XP 64-bit on a RAID
disk composed of 2 or more SATA / SATAII HDDs with RAID functions, please follow
below steps.
STEP 1: Set up BIOS.
A.
Enter BIOS SETUP UTILITY
Advanced screen
IDE Configuration.
B.
Set the “SATA Operation Mode” option to [RAID].
STEP 2: Make a SATA / SATAII Driver Diskette.
A.
Insert the ASRock Support CD into your optical drive to boot your system.
B.
During POST at the beginning of system boot-up, press <F11> key, and
then a
window for boot devices selection appears. Please select CD-
ROM as the boot device.
C.
When you see the message on the screen, “Generate Serial ATA driver
diskette [YN]?”, press <Y>.
D.
Then you will see these messages,
Please insert a blank
formatted diskette into floppy
drive A:
press any key to start
Please insert a floppy diskette into the floppy drive, and press any key.
E.
The system will start to format the floppy diskette and copy SATA / SATAII
drivers into the floppy diskette.
Before installing Windows
®
2000 to your system, your Windows
®
2000 optical
disk is supposed to include SP4. If there is no SP4 included in your disk, please
visit the below website for proper procedures of making a SP4 disk:
http://www
.microsoft.com/W
indows2000/downloa
ds/service
pa
ck
s/sp4/spde
ploy
.
htm#the_integrated_installation_fmay