Aastra OpenCom 131 User Guide - Page 30
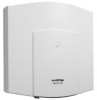
half of the housing. Be sure to align the 96-pin connector properly to the jack
 |
View all Aastra OpenCom 131 manuals
Add to My Manuals
Save this manual to your list of manuals |
Page 30 highlights
Installation Installing an Expansion Set 1. Turn off the OpenCom 130. Unplug the plug-in power supply from the socket. You should not install the expansion module or install or uninstall additional interface cards while the OpenCom 130 is turned on. 2. Open the housing cover of the OpenCom 130. In this case, carefully follow the Safety Precautions starting on page 25. The existing basic module is mounted in the left half of the housing. No components may be mounted in the right half of the housing. 3. Place the expansion module in the intended mounting location in the right half of the housing. Be sure to align the 96-pin connector properly to the jack on the basic module. Push the expansion module towards the basic module so that both modules are securely connected to one another via the 96-pin connector. A 3 4 Slot 1 Slot 2 Slot 3 2 1 B Installing the expansion module 4. Carefully press the expansion module at the top and bottom right, pushing it into the locking hooks provided (see "A" and "B" in the diagram). Secure the 28
-
 1
1 -
2
-
3
-
4
-
5
-
6
-
7
-
8
-
9
-
10
-
11
-
12
-
13
-
14
-
15
-
16
-
17
-
18
-
19
-
20
-
21
-
22
-
23
-
24
-
 25
25 -
 26
26 -
 27
27 -
 28
28 -
 29
29 -
 30
30 -
 31
31 -
 32
32 -
 33
33 -
 34
34 -
 35
35 -
36
-
37
-
38
-
39
-
40
-
41
-
42
-
43
-
44
-
45
-
46
-
47
-
48
-
49
-
50
-
51
-
52
-
53
-
54
-
55
-
56
-
57
-
58
-
59
-
60
-
61
-
62
-
63
-
64
-
65
-
66
-
67
-
68
-
69
-
70
-
71
-
72
-
73
-
74
-
75
-
76
-
77
-
78
-
79
-
80
-
81
-
82
-
83
-
84
-
85
-
86
-
87
-
88
-
89
-
90
-
91
-
92
-
93
-
94
-
95
-
96
-
97
-
98
-
99
-
100
-
101
-
102
-
103
-
104
-
105
-
106
-
107
-
108
-
109
-
110
-
111
-
112
-
113
-
114
-
115
-
116
-
117
-
118
-
119
-
120
-
121
-
122
-
123
-
124
-
125
-
126
-
127
-
128
-
129
-
130
-
131
-
132
-
133
-
134
-
135
-
136
-
137
-
138
-
139
-
140
-
141
-
142
-
143
-
144
-
145
-
146
-
147
-
148
-
149
-
150
-
151
-
152
-
153
-
154
-
155
-
156
-
157
-
158
-
159
-
160
-
161
-
162
-
163
-
164
-
165
-
166
-
167
-
168
-
169
-
170
-
171
-
172
-
173
-
174
-
175
-
176
-
177
-
178
-
179
-
180
-
181
-
182
-
183
-
184
-
185
-
186
-
187
-
188
-
189
-
190
-
191
-
192
-
193
-
194
-
195
-
196
-
197
-
198
-
199
-
200
-
201
-
202
-
203
-
204
-
205
-
206
-
207
-
208
-
209
-
210
-
211
-
212
-
213
-
214
-
215
-
216
-
217
-
218
-
219
-
220
-
221
-
222
-
223
-
224
-
225
-
226
-
227
-
228
-
229
-
230
-
231
-
232
-
233
-
234
-
235
-
236
-
237
-
238
-
239
-
240
-
241
-
242
-
243
-
244
 |
 |
