Acer EK240Y User Manual - Page 27
Use Buttons 1/2 to select System from the OSD. Then double-press Button 3
 |
View all Acer EK240Y manuals
Add to My Manuals
Save this manual to your list of manuals |
Page 27 highlights
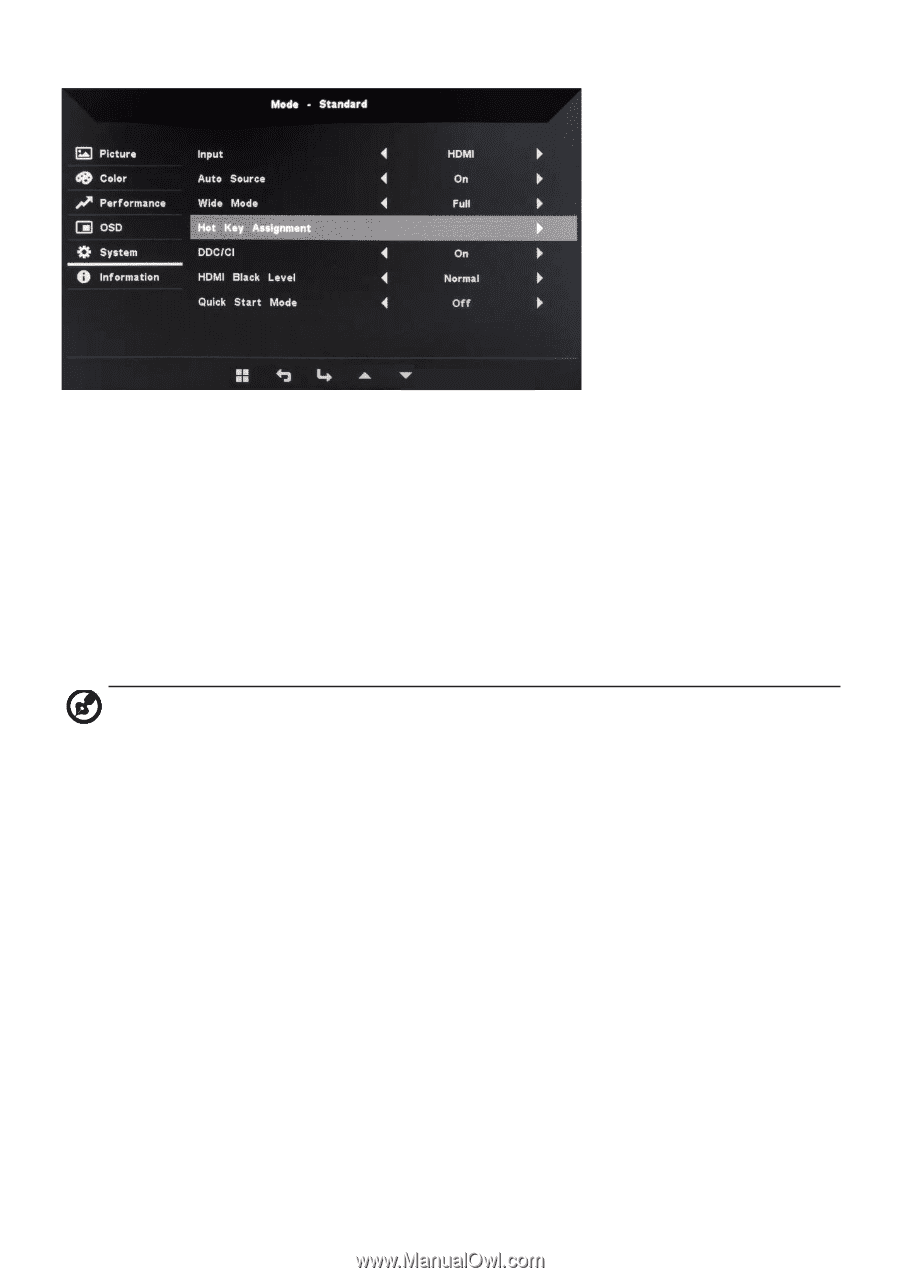
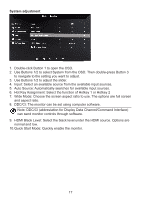
System adjustment 1. Double-click Button 1 to open the OSD. 2. Use Buttons 1/2 to select System from the OSD. Then double-press Button 3 to navigate to the setting you want to adjust. 3. Use Buttons 1/2 to adjust the slider. 4. Input: Select an available source from the available input sources. 5. Auto Source: Automatically searches for available input sources. 6. Hot Key Assignment: Select the function of Hotkey 1 or Hotkey 2 7. Wide Mode: Choose the screen aspect ratio to use. The options are full screen and aspect ratio. 8. DDC/CI: The monitor can be set using computer software. Note: DDC/CI (abbreviation for Display Data Channel/Command Interface) can send monitor controls through software. 9. HDMI Black Level: Select the black level under the HDMI source. Options are normal and low. 10.Quick Start Mode: Quickly enable the monitor. 17
-
 1
1 -
2
-
3
-
4
-
5
-
6
-
7
-
8
-
9
-
10
-
11
-
12
-
13
-
14
-
15
-
16
-
17
-
18
-
19
-
20
-
21
-
 22
22 -
 23
23 -
 24
24 -
 25
25 -
 26
26 -
 27
27 -
 28
28 -
 29
29 -
 30
30
 |
 |