Acer TravelMate 230 TM 230/280 User Guide - Page 71
Acer TravelMate 230 Manual
 |
View all Acer TravelMate 230 manuals
Add to My Manuals
Save this manual to your list of manuals |
Page 71 highlights
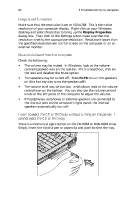
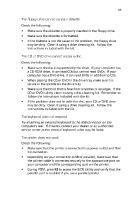
63 The floppy drive cannot access a diskette. Check the following Make sure the diskette is properly inserted in the floppy drive. Make sure the diskette is formatted. If the diskette is not the cause of the problem, the floppy drive may be dirty. Clean it using a drive cleaning kit. Follow the instructions included with the kit. The CD or DVD drive cannot access a disc. Check the following: • Make sure the disc is supported by the drive. If your computer has a CD-ROM drive, it can read CDs but cannot read DVDs. If your computer has a DVD drive, it can read DVDs in addition to CDs. When placing the CD or DVD in the drive tray, make sure it is secure in the spindle on the drive tray. Make sure the CD or DVD is free from scratches or smudges. If the CD or DVD is dirty, clean it using a disc cleaning kit. Remember to follow the instructions included with the kit. If the problem does not lie with the disc, your CD or DVD drive may be dirty. Clean it using a drive cleaning kit. Follow the instructions included with the kit. • • • The keyboard does not respond. Try attaching an external keyboard to the USB connector on the computer's rear. If it works, contact your dealer or an authorized service center as the internal keyboard cable may be loose. The printer does not work. Check the following: • • Make sure that the printer is connected to a power outlet and that it is turned on. Depending on your connection (USB or parallel), make sure that the printer cable is connected securely to the appropriate port on your computer and the corresponding port on the printer. During POST, press F2 to access the BIOS Utility and verify that the parallel port is enabled if you use a parallel printer. •
-
 1
1 -
2
-
3
-
4
-
5
-
6
-
7
-
8
-
9
-
10
-
11
-
12
-
13
-
14
-
15
-
16
-
17
-
18
-
19
-
20
-
21
-
22
-
23
-
24
-
25
-
26
-
27
-
28
-
29
-
30
-
31
-
32
-
33
-
34
-
35
-
36
-
37
-
38
-
39
-
40
-
41
-
42
-
43
-
44
-
45
-
46
-
47
-
48
-
49
-
50
-
51
-
52
-
53
-
54
-
55
-
56
-
57
-
58
-
59
-
60
-
61
-
62
-
63
-
64
-
65
-
 66
66 -
 67
67 -
 68
68 -
 69
69 -
 70
70 -
 71
71 -
 72
72 -
 73
73 -
 74
74 -
 75
75 -
 76
76 -
77
-
78
-
79
-
80
-
81
-
82
-
83
-
84
-
85
-
86
-
87
-
88
-
89
-
90
-
91
-
92
-
93
-
94
-
95
 |
 |
