Acer TravelMate 3300 Service Guide
Acer TravelMate 3300 Manual
 |
View all Acer TravelMate 3300 manuals
Add to My Manuals
Save this manual to your list of manuals |
Acer TravelMate 3300 manual content summary:
- Acer TravelMate 3300 | Service Guide - Page 1
Acer TravelMate 3300/Extensa 3100 Series Service Guide Service guide files and updates are available on the ACER/CSD web; for more information, please refer to http://csd.acer.com.tw PRINTED IN TAIWAN - Acer TravelMate 3300 | Service Guide - Page 2
History Please refer to the table below for the updates made on TravelMate 3300/Extensa 3100 service guide. Date 2005/11/25 2005/12/15 Chapter All Chapter 1 Updates Revise TravelMate 3300/Extensa 3100 battery spec. on page 25 and page 26. Add "WFM" to BIOS support protocols on page 23. II - Acer TravelMate 3300 | Service Guide - Page 3
specifically disclaims any warranties of merchantability or fitness for any particular purpose. Any Acer Incorporated software described in this manual servicing, repair, and any incidental or consequential damages resulting from any defect in the software. Acer is a registered trademark of Acer - Acer TravelMate 3300 | Service Guide - Page 4
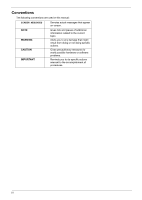
appear on screen. NOTE WARNING CAUTION IMPORTANT Gives bits and pieces of additional information related to the current topic. Alerts you to any damage that might result from doing or not doing specific actions. Gives precautionary measures to avoid possible hardware or software problems. Reminds - Acer TravelMate 3300 | Service Guide - Page 5
Preface Before using this information and the product it supports, please read the following general information. 1. This Service Guide provides you with all technical information relating to the BASIC CONFIGURATION decided for Acer's "global" product offering. To better fit local market - Acer TravelMate 3300 | Service Guide - Page 6
VI - Acer TravelMate 3300 | Service Guide - Page 7
Specifications Features This computer was designed with the user PRO/Wireless 2200BG BIOS Display and graphics T 14.1" WXGA Acer Audio T T T T T Audio system with two built-in speakers Intel® AC'97 audio support Sound Blaster Pro and MS Sound LAN: gigabit Ethernet; Wake-on-Ring ready Chapter 1 1 - Acer TravelMate 3300 | Service Guide - Page 8
.11b/g) Wi-Fi CERTIFIEDTM solution, supporting Acer SignalUpTM wireless technology, or T Integrated Acer InviLinkTM 802.11b/g Wi-Fi CERTIFIEDTM solution, supporting Acer SignalUpTM wirelss technology T WPAN (optional): Integrated Bluetooth® I/O Ports T T T T T T T T T T T T T T Three USB 2.0 port - Acer TravelMate 3300 | Service Guide - Page 9
Layout Top View 1 Fan Connector (FAN1) 6 5-in-1 Card Reader Slot (CARD1) 2 LCD Cable Connector (LCD1) 7 RTC Battery Connector (RTC1) 3 IEEE 1394 Connector (SKT1) 8 Bluetooth Module Connector (BT1) 4 USB Port (SKT2) 9 Touchpad FFC Connector (TPAD1) 5 PC Card Slot (PCH1 or U22) 10 - Acer TravelMate 3300 | Service Guide - Page 10
Jack (DCIN1) 11 HDD Connector (HDD1) 3 VGA Port (CRT1) 12 DIMM Slot (DM2) 4 ezDock Port (DOCK1) 13 DIMM Slot (DM1) 5 IO Controller-PC 87392 (U27) 14 South Bridge-Intel ICH6-M (U44) 6 Wireless LAN Card Slot (WIN1) 15 Switch (SW8) 7 Keyboard Controller (U32) 16 Cardbus/1394/Card - Acer TravelMate 3300 | Service Guide - Page 11
Board Layout Top View 1 Microphone Connector (INTMIC1) 7 Microphone-in Port (MIC1) 2 Cover Switch Cable Connector 8 Line-in Port (LINT1) (LID1) 3 Audio Codec-Realtek ALC655 (U1) 9 USB Port (USB1) 4 IO Board to Main Board Connector 10 USB Port (USB2) (BTB1) 5 Speaker Set Connector - Acer TravelMate 3300 | Service Guide - Page 12
Bottom View 1 Modem Board Connector (MDC 1) 2 MDC Cable Connector (RING1) 6 Chapter 1 - Acer TravelMate 3300 | Service Guide - Page 13
,25 MS/MS Pro/ xD/ MMC/SD 5 in 1 26 PCMCIA SLOT Support TypeII 26 1394 6pin Conn 27 LAN 22, 23 Giga BCM5788-M Mini-PCI 802.11A/B/G (only smaller)30 TXFM HDD 20 21 MINI USB Blue-tooth NS SIO 87392 31 KBC Renesas RE144B 30 BIOS ROM 4M BITS PM49F004T-33VC 33 FIR IO Board Touch INT. Pad 32 KB - Acer TravelMate 3300 | Service Guide - Page 14
7 8 9 Item Display screen Microphone Status indicators Touchpad Click buttons (Left, center and right) Palmrest Keyboard Power button Easy-launch buttons buttons; the center button serves as a 4-way scroll button. Comfortable support area for your hands when you use the computer. For entering data - Acer TravelMate 3300 | Service Guide - Page 15
atudiioo onutput. Lights up when the battery is being charged. Description Lights up Bluetooth communications. indicator (for TM4600 only) 7 Wireless Press to enable/disable Wireless function. Lights to communications indicate the status of wireless LAN - Acer TravelMate 3300 | Service Guide - Page 16
). # Icon Item Description 4 Two USB 2.0 ports Connect to USB 2.0 devices (e.g., USB mouse, USB camera). 5 Line-in jack Accepts audio line-in devices (e.g., audio CD player, stereo walkman). 6 Microphone jack Accepts input from external microphones. 7 Headphones/speaker/ Connects to - Acer TravelMate 3300 | Service Guide - Page 17
# Icon 1 # Icon Item External display port Item Description Description Connects to a display device (e.g., external monitor, LCD projector). Description # Icon Item124-pin Acer ezDock ConnectsDtoeAsccerreizpDtoicok.n connector Battery bay Houses the computer's battery pack. Chapter 1 11 - Acer TravelMate 3300 | Service Guide - Page 18
lock Cooling fan Mini PCI card bay Memory and hard disk bay Battery release latch Description Houses the computer's battery pack. Locks the battery in position. Helps keep the computer cool. Note: Do not cover or obstruct the opening of the fan. Houses the computer's Mimi PCI card. Houses - Acer TravelMate 3300 | Service Guide - Page 19
charged. Power Lights up when the computer is on. Bluetooth Indicates the status of Bluetooth communication. Wireless LAN Indicates the status of wireless LAN communication. NOTE: 1. Charging: The light shwos amber when the battery is charging. 2. Fully charged: The light shows green when - Acer TravelMate 3300 | Service Guide - Page 20
Easy-launch buttons Located at the upper-right, above the keyboard are four buttons. These buttons are called easy-launch buttons. The are: mail, Web Browser, Empowering Key < > and one user-programmable button. Press < > to run the Acer Empowering Technology. The mail and Web browser buttons are - Acer TravelMate 3300 | Service Guide - Page 21
touchpad. The central location on the palmrest provides optimum comfort and support. Touchpad Basics Use the touchpad as follows: T Move your This button mimics your cursor pressing on the right scroll bar of windows applications. Function Execute Select Left button (1) Quickly click twice. Click - Acer TravelMate 3300 | Service Guide - Page 22
Function Drag Access context menu Scroll Left button (1) Click and hold, then use finger on the touchpad to drag the cursor. Right button (4) Click one. Main touchpad (2) Tap twice (at the same speed as double-clicking a mouse button); rest your finger on the touchpad on the second tap and drag - Acer TravelMate 3300 | Service Guide - Page 23
solution would be to connect an external keypad. When Scroll Lock is on, the screen moves one line up or down when you press the up or down arrow keys respectively Type the letters in a normal manner. Windows Keys The keyboard has two keys that perform Windows-specific functions. Chapter 1 17 - Acer TravelMate 3300 | Service Guide - Page 24
the Start menu. It can also be used with other keys to provide a variety of function: + Activates next taskbar button. + Opens the My Computer window + Opens Help and Support. + Opens the Find: All Files dialog box. + Opens the Run dialog box. + Minimizes all - Acer TravelMate 3300 | Service Guide - Page 25
Screen blank Touchpad toggle Switches display output between the display screen, external monitor (if connected) and both. Turns the display screen backlight . Fn-x Brightness up Increases the screen brightness. Fn-z Brightness down Decreases the screen brightness Special Key You can locate - Acer TravelMate 3300 | Service Guide - Page 26
, or hold and then press the key at the upper-center of the keyboard. NOTE: This function varies by the operating system version. NOTE: Some fonts and software do not support the Euro symbol. Please refer to www.microsoft.com/ typography/faq/faq12.htm for more information. 20 Chapter - Acer TravelMate 3300 | Service Guide - Page 27
System Utilities Acer eManager Innovative Acer eManagement software is designed for easy access to frequently used functions. At the press of Acer Empowering Key, the Acer eManager user interface appears, featuring four main settings -- Acer eSetting, Acer ePresentation, Acer ePowerManagement and - Acer TravelMate 3300 | Service Guide - Page 28
Launch Manager Launch Manager allows you to set the two launch keys located above the keyboard. You can access the Launch Manager by clicking on Start, All Programs,Satnadrtthen Launch Manager to start thAelal pPprliocagtiorna.ms Launch Manager 22 Chapter 1 - Acer TravelMate 3300 | Service Guide - Page 29
Super I/O controller Audio controller Video controller Hard disk drive controller Keyboard controller FIR controller PCMCIA / card reader / 1394 controller DDR-soDIMM controller BIOS Item BIOS vendor BIOS Version BIOS ROM type BIOS ROM size BIOS package Supported protocols BIOS password control L2 - Acer TravelMate 3300 | Service Guide - Page 30
. LAN Interface Item Supports LAN protocol LAN connector type Wireless LAN LAN connector location . Modem/Bluetooth Interface Item Data modem data baud rate (bps) Supports modem/bluetooth protocol Modem connector type Modem connector location Intel® 915GM 256MB/512MB/1GB 2 1024 MB Specification - Acer TravelMate 3300 | Service Guide - Page 31
keyboard Yes T four inverted "T" cursor keys T Hot key controls (12 function keys) T two Windows functions T Lock keys and embedded numeric keypad T special keys T international language support T Web Browser T Mail T Empowering key T One user-programmable button T WLAN LED button T Bluetooth - Acer TravelMate 3300 | Service Guide - Page 32
Specification NOTE: Extensa 3100 has second battery. When the battery is running out of power, the user can replace the battery with the second battery for prolong usage. LCD 14.1" WXGA Item Vendor & model name Screen channel LVDS 262K colors (RGB 6-bit data driver) 45/45 20/45 QDI QD14TL0102 358. - Acer TravelMate 3300 | Service Guide - Page 33
5% AC Adapter Item Vendor & model name Input Requirements Maximum input current (A, @100Vac, full load) Nominal frequency (Hz) Frequency variation range (Hz) Specification LITEON PA-1650-02WR (3pin, 65W) LISHIN SLS0335A19A54LF (3pin, 65W) 1.8A [email protected]/100Vac and 240 Vac 47 - 63 47 - 63 Chapter - Acer TravelMate 3300 | Service Guide - Page 34
Leakage current Regulatory Requirements Specification 90 - 264 full load) 25V Output can be shorted without damage, and auto recovery 15kV (at air discharge) 8kV (at contact discharge) 4242 Vdc in this state. CPU Power Down VGA Power Down PCMCIA Suspend Audio Power Down Hard Disk Power Down Super - Acer TravelMate 3300 | Service Guide - Page 35
Item Temperature Operating Non-operating Package storage Humidity Operating Non-operating Package storage Altitude Specification +5°C ~ +35°C -10°C ~ +60°C -20°C ~ 60°C formatted Data Heads Number of Disks Logical Configuration Heads Cylinders User Sectors/Track at zone 0 Logical Blocks (LBA) Data - Acer TravelMate 3300 | Service Guide - Page 36
30 Chapter 1 - Acer TravelMate 3300 | Service Guide - Page 37
also refer to Chapter 4 Troubleshooting when problem arises. To activate the BIOS Utility, press m during POST (when "Press to enter Setup" message is prompted on the bottom of screen). The setup screen displays BIOS as follows:Navigating the BIOS Utility Function Information Main Advanced - Acer TravelMate 3300 | Service Guide - Page 38
System BIOS Ver: VGA BIOS Ver KBC Ver Serial Number Asset Tag Number Produce Name Manufacturer Name: UUID: Intel (R) Pentium (R) M processor 2.0GHz 2000MHz ST9100825A - (PM) None None None V0.08 1232 01.00 xxxxxxxxxxxxxxxxxxxxxx N/A TravelMate 3300/Extensa 3100 Acer xxxxxxxxxxxxxxxxxxxxxxxxxxxxxxxx - Acer TravelMate 3300 | Service Guide - Page 39
of the system. This field will show product name. This field will show manufacturer name. This will be visible only when there is an internal LAN device present. Chapter 2 33 - Acer TravelMate 3300 | Service Guide - Page 40
Recovery Item Specific Help [23:47:44] [11/23/2005] , , or 640 KB selects field. Shows system base memory size 1022 MB Shows extended memory size [128MB] VGA both the integrated LCD screen and the system's external video port (for an external CRT or projector). 34 - Acer TravelMate 3300 | Service Guide - Page 41
Parameter Network boot F12 Boot Menu D2D Recovery Description When this is selected, Boot from LAN feature is enabled. When this is not selected, Boot from LAN feature is then disabled. When this is selected, users can modify device boot priority by pressing F12 key during POST. When this is not - Acer TravelMate 3300 | Service Guide - Page 42
Exit Infrared Port (FIR) Parallel port: Serial port [Enabled] [Enabled] [Enabled] Item Specific Help Configure Infrared Port using options: [Disable] No configuration [Enabled] User configuration [Auto] BIOS or OS chooses configuration (OS Controlled) Displayed when controlled by OS F1 Help Esc - Acer TravelMate 3300 | Service Guide - Page 43
chooses configuration (OS Controlled) Displayedd when controlled by OS Configure serial port B using options: [Disabled]: No configuration [Enabled]: User configuration [Auto]: BIOS or OS chooses configuration (OS Controlled) Displayedd when controlled by OS Set the mode for the parallel port using - Acer TravelMate 3300 | Service Guide - Page 44
table below describes the parameters in this screen. Settings in boldface are the default and suggested parameter settings. Parameter Supervisor Password Is User Password Is HDD Password Is HDD Master ID Set Supervisor Password Set User Password Description N/A N/A N/A N/A Press Enter to set the - Acer TravelMate 3300 | Service Guide - Page 45
and should be grayed out if the user password was used to enter setup. Allows the user to specify whether or not a password is required to boot. Option Enter Disabled Enabled Set Supervisor/User Password If password on boot is required, the password must be set otherwise it cannot be enabled - Acer TravelMate 3300 | Service Guide - Page 46
setting is complete after user presses enter. Setup Notice Changes have been saved. [ continue] If the current password entered does not match the actual current password: Setup Warning Invalid password Re-enter Password [ continue] If the new password and confirm new password strings do not match - Acer TravelMate 3300 | Service Guide - Page 47
, the onboard hard disk drive and the CD-ROM in module bay and onboard LAN device. PhoenixBIOS Setup Utility Information Main Security Boot Exit +Hard Drive Floppy Devices CD-ROM/DVD Drive Network Boot Item Specific Help Keys used to view or configure devices: to expands or collapses - Acer TravelMate 3300 | Service Guide - Page 48
Save Changes Item Specific Help Exit System Setup and save your changes to CMOS. F1 Help Esc Exit ↑ ↓ Select Item ← → Select Menu F5/F6 Change Values Enter Select 4 Sub-Menu F9 Setup Defaults F10 Save and Exit The table below describes the parameters in this screen. Parameter Exit Saving - Acer TravelMate 3300 | Service Guide - Page 49
the notebook computer for maintenance and troubleshooting. To disassemble the computer, you need the following tools: T Wrist grounding strap and conductive mat for preventing electrostatic discharge T Small Philips screw driver T Philips screwdriver T Plastic flat head screw driver - Acer TravelMate 3300 | Service Guide - Page 50
General Information Before You Begin Before proceeding with the disassembly procedure, make sure that you do the following: 1. Turn off the power to the system and all peripherals. 2. Unplug the AC adapter and all power and signal cables from the system. 3. Remove the battery pack. 44 Chapter 3 - Acer TravelMate 3300 | Service Guide - Page 51
sequence and instructs you on the components that need to be removed during servicing. For example, if you want to remove the system board, you must first remove the keyboard, then disassemble the inside assembly frame in that order. Start Battery Pack B*4 Memory HDD Module Wireless LAN A*1 Card - Acer TravelMate 3300 | Service Guide - Page 52
LCD Module R*2 LCD Bezel S*2 T*2 LCD Inverter LCD U*2 Assembly V*2 X*8 2 hinges LCD Brackets LCD Cable Wireless W*2 Antenna Set LCD Screw List Item Description Part Number A SCW HEX NYL I#R-40/ 34.4C210.001 O#4-40 L5.9 B SCREW MACH WAFER 86.T39V1.002 M2* - Acer TravelMate 3300 | Service Guide - Page 53
Removing the Battery Pack 1. Release the battery lock. 2. Slide the battery latch as shown then remove the battery pack. Chapter 3 47 - Acer TravelMate 3300 | Service Guide - Page 54
Card 1. Remove the screw fastening the mini PCI cover. 2. Detach teh mini PCI cover. 3. Disconnect the main and the auxiliary wireless antenna. 4. Pop out the wireless LAN card then remove it. Removing the Memory and the HDD Module 1. Remove the five screws that secure the HDD cover. 2. Detach the - Acer TravelMate 3300 | Service Guide - Page 55
Module 1. Open the notebook as shown. 2. Detach the middle cover from the main unit. 3. Remove the two screws that secure the keyboard. 4. Turn over the keyboard as shown. 5. Disconnect the keyboard cable then remove the keyboard. 6. Tear off the tape fastening the wireless antenna, then pull out - Acer TravelMate 3300 | Service Guide - Page 56
10. Then remove two screws fastening the LCD module. 11. Detach the LCD module from the main unit carefully. 50 Chapter 3 - Acer TravelMate 3300 | Service Guide - Page 57
case assembly carefully. Disassembling the Lower Case Assembly 1. Disconnect the bluetooth cable from the main board then detach the bluetooth module. 2. Disconnect the RTC battery cable from the main board then detach the RTC battery. 3. Disconnect the speaker cable from the IO board. 4. Disconnect - Acer TravelMate 3300 | Service Guide - Page 58
5. Disconnect the microphone cablem from the IO board then detach the microphone. 6. Disconnect the Lid switch cable from the IO board as shown. 7. Remove the four screws fastening the mian board to the lower case. 8. Remove two screws fastening the IO board and one screw holding the modem board. 9. - Acer TravelMate 3300 | Service Guide - Page 59
18. Disconnect the modem board from the IO board. 19. Disconnect the modem board cable from the modem board. Disassembling the Upper Case Assembly 1. Disconnect the touchpad FFC from the touchpad then remove it. 2. Remove the five screws fastening the touchpad plate. 3. Detach the scroll key rubber - Acer TravelMate 3300 | Service Guide - Page 60
two screws fastening the hinges to the LCD panel. . 10. Remove the two hinges from the LCD panel. 11. Remove the two screws holding the wireless antenna set. 12. Then detach the wireless antenna set from the LCD panel. 54 Chapter 3 - Acer TravelMate 3300 | Service Guide - Page 61
13. Remove the four screws fastening the LCD right bracket. 14. Detach the LCD right bracket from the LCD. 15. Remove the four screws fastening the LCD left bracket. 16. Detach the LCD left bracket from the LCD. 17. Tear off the tape fastening the LCD cable then disconnect the LCD cable. Chapter 3 - Acer TravelMate 3300 | Service Guide - Page 62
Disassembling the External Modules Disassembling the HDD Module 1. Detach the HDD sponge. 2. Turn over the HDD module. 3. Tear off the HDD module copper (shielding). 4. Then detach the HDD from the HDD copper (shielding) as shown. 56 Chapter 3 - Acer TravelMate 3300 | Service Guide - Page 63
Troubleshooting Chapter 4 Use the following procedure as a guide for computer problems. NOTE: The diagnostic tests are intended to test only Acer products. Non-Acer products, prototype cards, or modified options can give false errors and invalid system responses. 1. Obtain the failing symptoms in - Acer TravelMate 3300 | Service Guide - Page 64
Follow the instructions in the message window. If an keyboard problem, do the following one at a time to correct the problem. Do not replace a non-defective FRU: 1. Reconnect the keyboard cables. 2. Replace the keyboard. 3. Replace the main board. The following auxiliary input devices are supported - Acer TravelMate 3300 | Service Guide - Page 65
Press F2 in the test items. 4. Follow the instructions in the message window. NOTE: Make sure that the DIMM is fully installed into the connector. A loose connection can cause an error. Power System Check To verify the symptom of the problem, power on the computer using each of the following power - Acer TravelMate 3300 | Service Guide - Page 66
doesn't work, do the following actions one at a time to correct the problem. Do not replace a non-defective FRU: 1. Reconnect the touchpad cables. 2. system board. After you use the touchpad, the pointer drifts on the screen for a short time. This self-acting pointer movement can occur when - Acer TravelMate 3300 | Service Guide - Page 67
also help you determine the next possible FRU to be replaced when servicing a computer. If the symptom is not listed, see "Undetermined Problems" on page 73. The following lists the error messages that the BIOS displays on the screen and the error symptoms classified by function. NOTE: Most of the - Acer TravelMate 3300 | Service Guide - Page 68
external keyboard Monitor type does not match CMOS - Run Setup Run "Load Default Settings" in BIOS Setup Utility. Shadow RAM Failed at offset: nnnn BIOS ROM System board System RAM Failed at offset: nnnn DIMM System board Extended RAM Failed at offset: nnnn DIMM System board System battery - Acer TravelMate 3300 | Service Guide - Page 69
CPU ID: System board DMA Test Failed DIMM System board Software NMI Failed DIMM System board Fail-Safe Timer NMI Failed DIMM System board Device Address Conflict Run "Load Default Settings" in BIOS Setup Utility. RTC battery System board Allocation Error for device Run "Load Default - Acer TravelMate 3300 | Service Guide - Page 70
Error Message List No beep Error Messages FRU/Action in Sequence No beep, power-on indicator turns off and LCD is blank. Power source (battery pack and power adapter). See "Power System Check" on page 59. Ensure every connector is connected tightly and correctly. Reconnect the DIMM. LED board. - Acer TravelMate 3300 | Service Guide - Page 71
refresh Test 8742 Keyboard Controller Set ES segment register to 4 GB Enable A20 line Autosize DRAM Initialize POST Memory Manager Clear 215 KB base RAM RAM failure on address line xxxx RAM failure on data bits xxxx of low byte of memory bus Enable cache before system BIOS shadow RAM failure on data - Acer TravelMate 3300 | Service Guide - Page 72
EISA board Test keyboard Set key click if enabled Test for unexpected interrupts Initialize POST display service Display prompt "Press F2 to enter SETUP" Disable CPU cache Test RAM between 512 and 640 KB Test extended memory Test extended memory address lines Jump to User Patch1 Configure advanced - Acer TravelMate 3300 | Service Guide - Page 73
optional) Check password (optional) Prepare Boot Initialize DMI parameters Initialize PnP Option ROMs Clear parity checkers Display MultiBoot menu Clear screen (optional) handler PnPnd dual CMOS (optional) Initialize notebook docking (optional) Initialize notebook docking late Force check (optional) - Acer TravelMate 3300 | Service Guide - Page 74
Initialize the chipset Initialize the bridge Initialize the CPU Initialize the system timer Initialize system I/O Check force recovery boot Checksum BIOS ROM Go to BIOS Set Huge Segment Initialize Multi Processor Initialize OEM special code Initialize PIC and DMA Initialize Memory type Initialize - Acer TravelMate 3300 | Service Guide - Page 75
Missing pels in characters Abnormal screen Wrong color displayed LCD has extra horizontal or vertical lines displayed. Action in Sequence Enter BIOS Utility to execute "Load Setup Default Settings", then reboot system. Reconnect the LCD connectors. Keyboard (if contrast and brightness function - Acer TravelMate 3300 | Service Guide - Page 76
BIOS Setup Utility to execute "Load Default Settings, then reboot system. DIMM System board Speaker-Related Symptoms Symptom / Error In Windows, multimedia programs, no sound comes from the computer. Internal speakers make noise or emit no sound. Audio driver mode. Touchpad Keyboard Hard disk - Acer TravelMate 3300 | Service Guide - Page 77
does not work correctly Print problems. Serial or parallel port device problems. Action in Sequence Enter BIOS Setup Utility to execute "Load " of BIOS Setup Utility is set to Enabled. Device driver Device cable Device System board Keyboard/Touchpad-Related Symptoms Symptom / Error Keyboard (one - Acer TravelMate 3300 | Service Guide - Page 78
to do with a hardware defect, such as: cosmic radiation, electrostatic discharge, or software errors. FRU replacement should be considered only when a recurring problem exists. When analyzing an intermittent problem, do the following: 1. Run the advanced diagnostic test for the system board in - Acer TravelMate 3300 | Service Guide - Page 79
non-defective FRU). NOTE: Verify that all attached devices are supported by the computer. NOTE: Verify that the power supply being used problems are found, replace the FRU. 3. Remove or disconnect all of the following devices: T Non-Acer devices T Printer, mouse, and other external devices T Battery - Acer TravelMate 3300 | Service Guide - Page 80
74 Chapter 4 - Acer TravelMate 3300 | Service Guide - Page 81
2 LCD1 LCD Cable Connector 3 SKT1 IEEE 1394 Connector 4 SKT2 USB Port 5 U22 or PC Card Slot PCH1? ?) Chapter 5 6 CARD1 5-in-1 Card Reader Slot 7 RTC1 RTC Battery Connector 8 BT1 Bluetooth Module Connector 9 TPAD1 Touchpad FFC Connector 10 KB1 Keyboard Connector 75 - Acer TravelMate 3300 | Service Guide - Page 82
Power Jack 11 HDD1 HDD Connector 3 CRT1 VGA Port 12 DM2 DIMM Slot 4 DOCK ezDock Port 1 13 DM1 DIMM Slot 5 U27 IO Controller-PC 87392 14 U44 South Bridge-Intel ICH6-M 6 WIN1 Wireless LAN Card Slot 15 SW8 Switch 7 U32 Keyboard Controller 16 U52 Cardbus/1394/Card Reader - Acer TravelMate 3300 | Service Guide - Page 83
IO Board Layout Top View 1 INTMIC1 Microphone Connector 2 LID1 Cover Switch Cable Connector 3 U1 Audio Codec-Realtek ALC655 4 BTB1 IO Board to Main Board Connector 5 SPKR1 Speaker Set Connector 6 LOUT1 Line-out Port 7 MIC1 Microphone-in Port 8 LINT1 Line-in - Acer TravelMate 3300 | Service Guide - Page 84
Bottom View 1 MDC1 Modem Board Connector 2 RING1 MDC Cable Connector 78 Chapter 5 - Acer TravelMate 3300 | Service Guide - Page 85
Switch Settings Please see the bottom view of the main board layout for switch location. The image bleow is switch enlarged image. Switch Settings SW8-1 SW8-2 SW8-3 SW8-4 Switch Function Clear Password Bootblock Keyboard Matrix ID1 Keyboard Matrix ID2 Chapter 5 79 - Acer TravelMate 3300 | Service Guide - Page 86
80 Chapter 5 - Acer TravelMate 3300 | Service Guide - Page 87
the FRU (Field Replaceable Unit) listing in global configurations of TravelMate 3300/ Extensa 3100. Refer to this chapter whenever ordering for made, it will not be noted on the printed Service Guide. For ACER AUTHORIZED SERVICE PROVIDERS, your Acer office may have a DIFFERENT part number code from - Acer TravelMate 3300 | Service Guide - Page 88
Exploded Diagram Image ADAPTER BATTERY Part Name Description Acer P/N ADAPTER 65W LITEON PA-165002WR ADAPTER 65W LISHIN SLS0335A19A54LF ADT 65W LITEON PA1650-02WR ADT 65W LISHIN SLS0335A19A54LF AP.06503.011 AP.06506.003 BATTERY PACK LI+ 6CELL 2.4MAH SONY BTY PACK LI+ 6C 2.4AH SONY BT.00604 - Acer TravelMate 3300 | Service Guide - Page 89
.01 MODEM MDC1.5 (AC97) T60M845.01 Acer P/N BT.00603.012 BT.00903.004 54.A56V1.001 TOUCHPAD BOARD SYNAPTIC TM51-389 TOUCHPAD SYNAPTICS TM51-389 56.TB1V1.001 CABLE WIRELESS LAN BOARD 802.11BG INTEL WLAN 802.11BG INTEL867074 LF KI.CAX01.013 BLUETOOTH BOARD FOXCONN BCM2045 BT MODULE FOXCONN - Acer TravelMate 3300 | Service Guide - Page 90
Image Part Name MODEM CABLE Description CABLE MODEM US W/ RECYCLE Acer P/N 50.TB1V1.002 TOUCHPAD CABLE C.A. T/P FFC JH MYNA2 50.TB1V1.003 POWER CODE 5A 250V 3P UK BK POWER CORD 2.5A 125V USA BLYETOOTH CABLE - Acer TravelMate 3300 | Service Guide - Page 91
Image Part Name TOUCHPAD PLATE Description ASSY T/P PLATE MYNA2 Acer P/N 33.TB1V1.001 LOWER CASE ASSY L-CASE FOR CARD BUS MYNA2 60.TB1V1.001 SPEAKER LEFT/ RIGHT SPEAKER MYNA-2 23.TB1V1.001 MICROPHONE MICROPHONE MYNA2 - Acer TravelMate 3300 | Service Guide - Page 92
ASSY HDD COVER MYNA2 Acer P/N 42.TB1V1.001 MINI PCI COVER ASSY MINIPCI COVER MYNA-2 42.TB1V1.002 COMBO MODULE COMBO 24X PANASONIC UJDA770 COMBO 24X PAC/ UJDA770 MYNA EXT KO.02406.014 COMMUNICATION MODULE COMBO 24X LITEON SOSC-2483K COMBO LIT/SOSC2483K LF EXT WIRELESS ANTENNA LEFT/RIGHT - Acer TravelMate 3300 | Service Guide - Page 93
Image FAN Part Name DVD-RW DRIVE 8X PANASONIC UJ-840B DUAL Description DUAL PAN/UJ-840B LF 8X DVD Acer P/N KU.00807.030 FAN FAN FORCECON 23.A74V1.001 MORAR HDD MODULE HDD MODULE 40G HDD MYLAR W/ CUPPER HDD MODULE 40G ASSY HDD CHASSIS MYNA-2 - Acer TravelMate 3300 | Service Guide - Page 94
HDD 100GB SEAGATE ST9100825A Description ASSY HDD CHASSIS MYNA-2 HDD 100GB HGST HTS421210H9AT00 HDD 100GB TOSHIBA MK1031GAS HDD 100GB SEAGATE ST9100825A Acer P/N 33.TB1V1.002 KH.10007.002 KH.10004.001 KH.10001.003 KEYBOARD 88KEY DARFON NSK-AEN1D US-INT KB DARFON NSKAEN1D US-INT 88K KB.TB107.001 - Acer TravelMate 3300 | Service Guide - Page 95
Description TM3300 KEYBOARD DANISH TM3300 KEYBOARD TURKISH TM3300 KEYBOARD TURKISH F TYPE TM3300 KEYBOARD CANADIAN FRENCH TM3300 KEYBOARD JAPANESE TM3300 KEYBOARD GREEK TM3300 KEYBOARD HEBREW TM3300 KEYBOARD RUSSIAN TM3300 KEYBOARD SLOVENIA (SLO) TM3300 KEYBOARD CROATIA (CR ) Acer P/N KB.TB107 - Acer TravelMate 3300 | Service Guide - Page 96
L MYNA2 Acer P/N 33.TB1V1.004 LCD BEZEL 14.1" ASSY LCD 14.1" BEZEL MYNA-2 60.TB1V1.005 LCD BEZEL 14.1" LCD PANEL 14.1" ASSY LCD 14.1" BEZEL MYNA-2 (for Extensa 3100) with model name printing on it ASSY LCD 14.1" PANEL MYNA-2 60.E31V1.001 (this is different item from TravelMate 3300) 60.TB1V1 - Acer TravelMate 3300 | Service Guide - Page 97
14.1" R MYNA2 BRKT LCD 14.1" L MYNA2 ASSY LCD 14.1" BEZEL MYNA-2 ASSY LCD 14.1" PANEL MYNA-2 HINGE PACK LEFT/ RIGHT LCD 14.1" WXGA N141C1-L02 Acer P/N 33.TB1V1.003 33.TB1V1.004 60.TB1V1.005 60.TB1V1.006 6K.TB1V1.001 LK.1410D.008 ASSY QDI 14.1" WXGA (N-GLAR 6M.TB1V1 - Acer TravelMate 3300 | Service Guide - Page 98
14.1" WXGA QD14TL01-02 LCD 14" WXGA QDIQD14TL01-03 Acer P/N LK.1410D.009 LK.14109.005 LK.14109.004 MAINBOARD MYNA 2 BATTERY MAINBOARD MYNA 2 2.13GMHZ(CPU ON BOARD) W/CPU HEATSINK & PCMCIA SLOT & RTC BATTERY MAINBOARD MYNA 2 2.0GMHZ(CPU ON BOARD) W/CPU HEATSINK & PCMCIA SLOT & RTC BATTERY RTC BATTERY - Acer TravelMate 3300 | Service Guide - Page 99
M470T3354CZ3-CD5 SODIMM512M NT512T64UH8A1FN37B SODIMM 512M M470T6554CZ3-CD5 SODIMM 512M HYMP564S64P6-C4 RUB LCD RUBBER CUSHION BOLSENA Note: See the upper two rubber cushion. Acer P/N KN.51202.021 KN.2560B.016 KN.51203.023 KN.5120B.015 KN.5120G.005 47.A46V1.002 LCD SCREW RUBBER RUBBER SCREW Note - Acer TravelMate 3300 | Service Guide - Page 100
Image Part Name HDD SPONGE Description HDD SPONGE MYNA-2 Acer P/N 47.TB1V1.003 SCREW SCREW SCREW SCREW SCREW SCREW SCREW SCREW SCREW SCREW SCREW SCW HEX NYL I#R-40/ O#4-40 L5.9 SCREW MACH WAFER M2*L4
-
 1
1 -
 2
2 -
 3
3 -
 4
4 -
 5
5 -
 6
6 -
 7
7 -
8
-
9
-
10
-
11
-
12
-
13
-
14
-
15
-
16
-
17
-
18
-
19
-
20
-
21
-
22
-
23
-
24
-
25
-
26
-
27
-
28
-
29
-
30
-
31
-
32
-
33
-
34
-
35
-
36
-
37
-
38
-
39
-
40
-
41
-
42
-
43
-
44
-
45
-
46
-
47
-
48
-
49
-
50
-
51
-
52
-
53
-
54
-
55
-
56
-
57
-
58
-
59
-
60
-
61
-
62
-
63
-
64
-
65
-
66
-
67
-
68
-
69
-
70
-
71
-
72
-
73
-
74
-
75
-
76
-
77
-
78
-
79
-
80
-
81
-
82
-
83
-
84
-
85
-
86
-
87
-
88
-
89
-
90
-
91
-
92
-
93
-
94
-
95
-
96
-
97
-
98
-
99
-
100
 |
 |

Acer TravelMate 3300/Extensa 3100 Series
Service Guide
PRINTED IN TAIWAN
Service guide files and updates are available
on the ACER/CSD web; for more information,
please refer to