Adaptec 2221000 Quick Installation Guide - Page 4
Installing into an Equipment Rack, supplied screws, as shown below.
 |
UPC - 760884149805
View all Adaptec 2221000 manuals
Add to My Manuals
Save this manual to your list of manuals |
Page 4 highlights
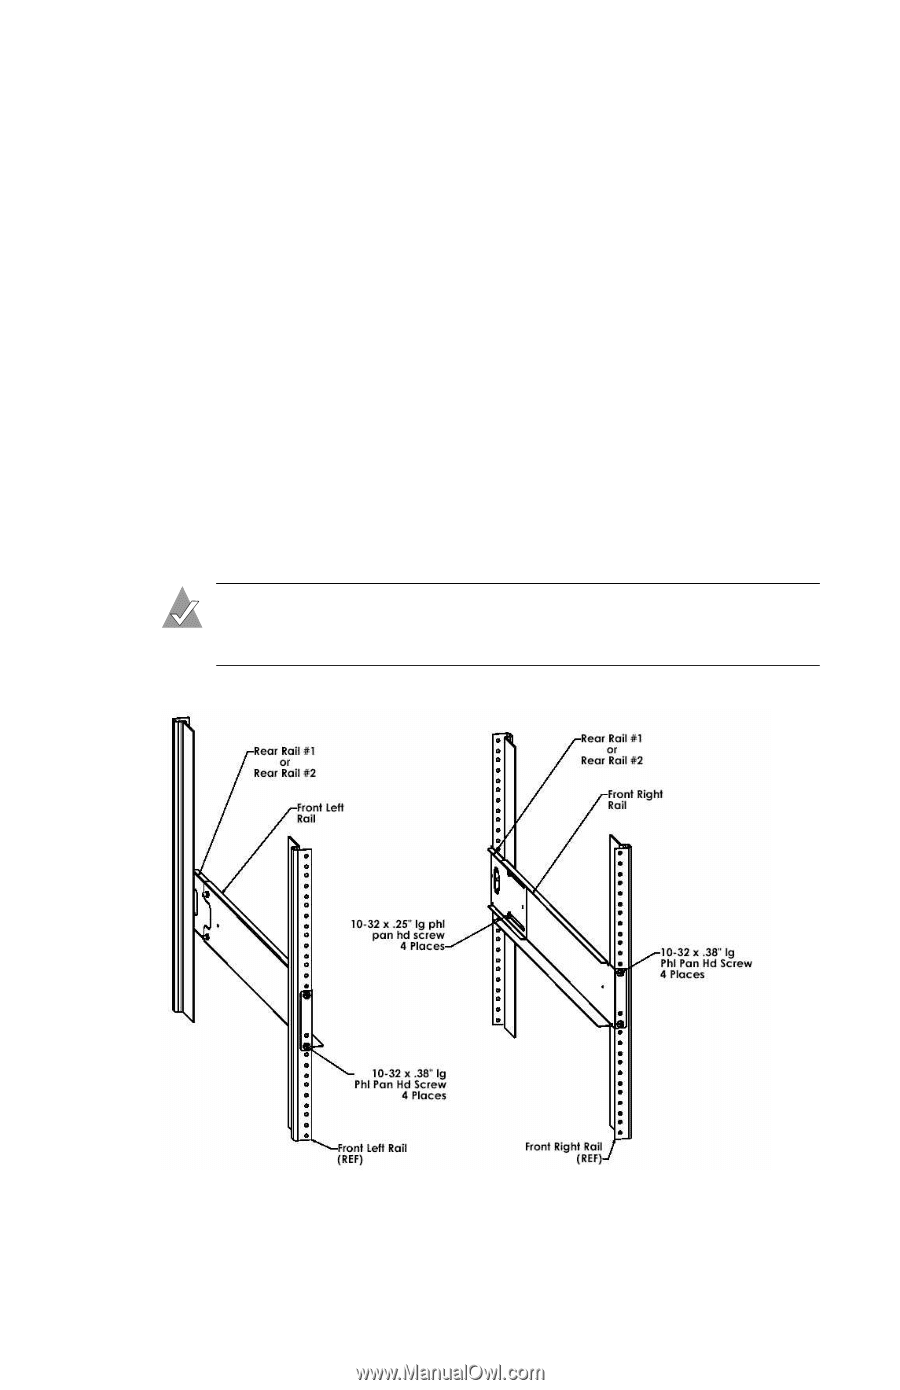
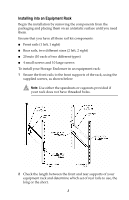
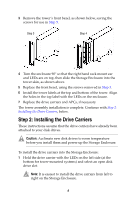
Installing into an Equipment Rack Begin the installation by removing the components from the packaging and placing them on an antistatic surface until you need them. Ensure that you have all these rail kit components: ■ Front rails (1 left, 1 right) ■ Rear rails, two different sizes (2 left, 2 right) ■ 20 nuts (10 each of two different types) ■ 4 small screws and 10 large screws To install your Storage Enclosure in an equipment rack: 1 Secure the front rails to the front supports of the rack, using the supplied screws, as shown below. Note: Use either the speednuts or cagenuts provided if your rack does not have threaded holes. 2 Check the length between the front and rear supports of your equipment rack and determine which set of rear rails to use, the long or the short. 3
-
 1
1 -
 2
2 -
 3
3 -
 4
4 -
 5
5 -
 6
6 -
 7
7 -
 8
8 -
 9
9 -
 10
10 -
11
-
12
-
13
 |
 |