Alesis DM7X Kit User Guide - Page 3
User Guide English - drum kit
 |
View all Alesis DM7X Kit manuals
Add to My Manuals
Save this manual to your list of manuals |
Page 3 highlights
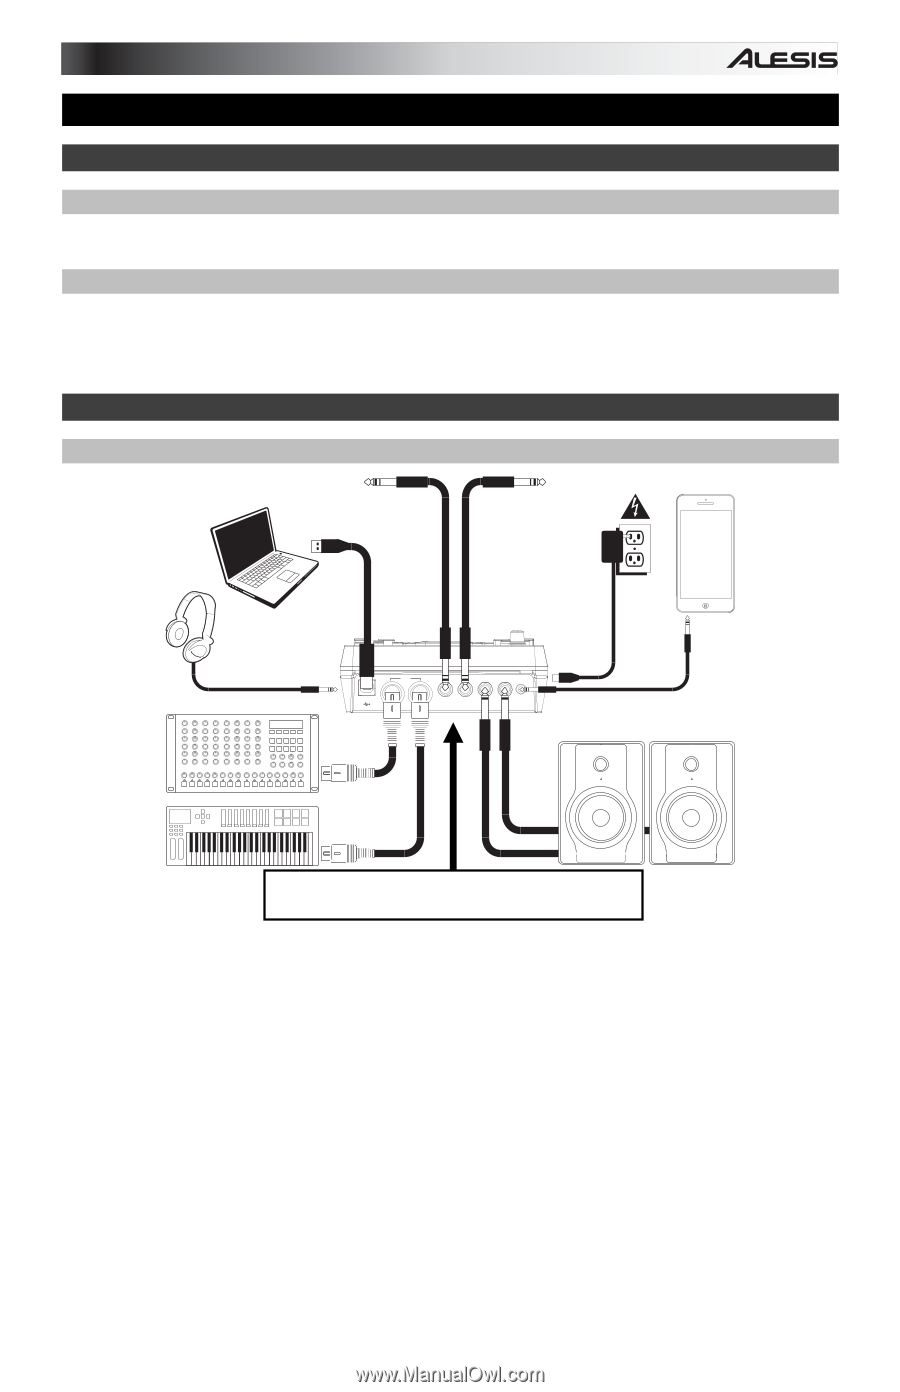
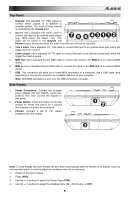
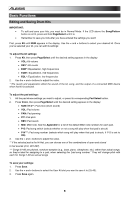
User Guide (English) Introduction Box Contents DM7X Module; Cable Snake; Power Adapter; User Guide; Safety & Warranty Manual Support For the latest information about this product (system requirements, compatibility information, etc.) and product registration, visit alesis.com. For additional product support, visit alesis.com/support. Quick Start / Connection Diagram Setup and Playing * sold separately Tom 4 Drum Pad* Crash 2 Cymbal Pad* Computer* Headphones* Power Smartphone, MP3 player, etc.* External sound module* MIDI OUTPUT USB OUT TOM 4 CRASH 2 R L / MONO AUX IN IN Monitors* MIDI keyboard* Use the cable snake to connect the drum module to the drum/cymbal pads of your electronic drum kit. 1. Connect your electronic drum kit's pads to the cable snake, then connect the cable snake to the Cable Snake Input on the module's rear panel. 2. Optional: If you have any additional pads (e.g., an extra tom, an extra crash cymbal), connect them to the module's Tom 4 Input or Crash 2 Input. 3. Connect speakers (sold separately) to the Outputs and/or connect 1/8" stereo headphones (sold separately) to the Phones output. Turn the Volume knob all the way down (counterclockwise). 4. Connect the module to a power source, using the included power adapter (9 VDC, 500 mA, center positive). 5. Press the Power Switch to turn the module on. 6. Adjust the Volume knob to an appropriate level and play some drums! Selecting a Drum Kit: After powering on the module, or after pressing the Kit button, you will see the Kit indicator and NUM in the display. Use the < and > buttons to select a drum kit, and start playing! You can also preview the sounds (at a fixed velocity) by pressing the Pad Select buttons. Kits 01-24 are Preset Kits. Kits 25-40 are User Kits (see Editing and Saving Drum Kits for more information). Note: If the LED above the Song/Pattern button is not lit, press and hold Page/Select until it is. Using the Metronome: You can turn the metronome ("click track") on or off by pressing the Click button. Adjust its tempo by pressing Tempo and using the < and > buttons to set the new BPM (beats per minute). See Adjusting The Metronome for more information about metronome features. 3
-
 1
1 -
 2
2 -
 3
3 -
 4
4 -
 5
5 -
 6
6 -
 7
7 -
 8
8 -
 9
9 -
10
-
11
-
12
-
13
-
14
-
15
-
16
-
17
-
18
-
19
-
20
-
21
-
22
-
23
-
24
-
25
-
26
-
27
-
28
-
29
-
30
-
31
-
32
-
33
-
34
-
35
-
36
-
37
-
38
-
39
-
40
 |
 |