Alesis Elevate 6 Passive User Guide - Page 5
Connection, Acoustic Compensation - monitors
 |
View all Alesis Elevate 6 Passive manuals
Add to My Manuals
Save this manual to your list of manuals |
Page 5 highlights
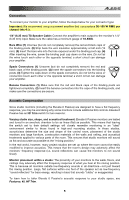
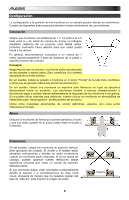
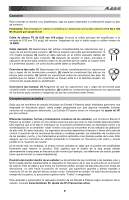
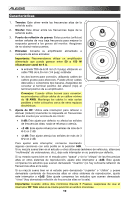
Connection To connect your monitor to your amplifier, follow the steps below for your connector type: Important: We recommend using a powered amplifier that can produce 50-150 W RMS per channel into 4 Ω. 1/4" (6.35 mm) TS Speaker Cable: Connect the amplifier's main output to the monitor's 1/4" (6.35 mm) input. Make sure the cable has a minimum gauge of 18 AWG. Bare Wire: (1) Unscrew (but do not completely remove) the red and black caps of the binding posts. (2) Strip back the wire insulation approximately a half-inch (13 mm). (3) Insert the bare wire into the hole exposed under the binding post cap. (4) After inserting the wire, screw the binding post cap down on the wire. Do not let the wires touch each other or the opposite terminal; a short circuit can damage your amplifier. Spade Connectors: (1) Unscrew (but do not completely remove) the red and black caps of the binding posts. (2) Insert the spade connectors into the binding posts. (3) Tighten the caps down on the spade connectors. Do not let the wires or connectors touch each other or the opposite terminal; a short circuit can damage your amplifier. Banana Connectors: (1) Make sure that the red and black caps of the binding posts are tightened completely. (2) Insert the banana connectors into the caps of the binding posts, and make sure the connections are secure. Acoustic Compensation Since studio monitors (including the Elevate 6 Passive) are designed to have a flat frequency response, you may be wondering why some monitors include additional EQ controls. Elevate 6 Passive has an HF Trim switch for two reasons: Varying studio size, shape, and acoustical treatment: Elevate 6 Passive monitors are tested and tuned in an anechoic chamber to be as linear (flat) as possible. This means that leaving the switch set to their default settings will closely resemble monitoring in an "ideal" environment similar to those found in high-end recording studios. In these studios, acousticians determine the size and shape of the control room, placement of the studio monitors and large furniture, construction materials of the walls and ceiling, and acoustical treatments applied to various parts of the room. This ensures that studio monitors will sound as flat and accurate as possible at the "mixing position." In the real world, however, many project studios are set up where the room cannot be easily modified to improve acoustics. This means that the room's design may adversely affect the monitors' frequency response (i.e, sound reflections can cause the monitors to not sound linear). Monitor placement within a studio: The proximity of your monitors to the walls, floors, and ceilings may adversely affect the frequency response of what you hear at the mixing position. This is because all monitors radiate low-frequency sounds in all directions-not just toward the mixing position. Large, flat surfaces within one foot of the speaker act as low-frequency "sound reflectors" for bass energy, resulting in bass that sounds "tubby" or exaggerated. To learn how to tailor Elevate 6 Passive's acoustic response to your studio space, see Features: #5. HF Trim. 5
-
 1
1 -
 2
2 -
 3
3 -
 4
4 -
 5
5 -
 6
6 -
 7
7 -
 8
8 -
 9
9 -
 10
10 -
 11
11 -
12
-
13
-
14
-
15
-
16
-
17
-
18
-
19
-
20
-
21
-
22
-
23
-
24
 |
 |