Alesis RA500 User Manual - Page 24
Rotect, Ndicators, Eters, Oltage, Witch, Tereo, Ridged - power amplifier fuse
 |
View all Alesis RA500 manuals
Add to My Manuals
Save this manual to your list of manuals |
Page 24 highlights
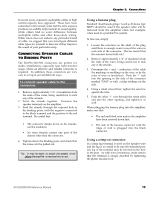
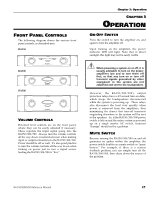
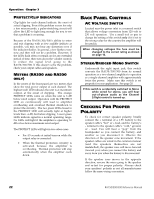
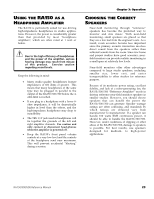
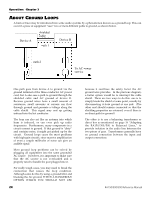
Operation: Chapter 3 PROTECT/CLIP INDICATORS Clip lights for each channel indicate the onset of actual clipping. Even if the problem occurs for only a few microseconds, a pulse-stretching circuit will allow the LED to light long enough for you to see that a problem is occurring. Because of the RA150/300/500's ability to enter and exit clipping with as few audible artifacts as possible, you may not hear any distortion even if the indicator flashes. In general, a few flashes every now and then will not be a problem. However, if the LEDs flash often or remain on for any extended period of time, then turn down the volume controls to reduce the signal level going to the RA150/300/500. If this doesn't solve the problem, check your output cables and speakers. METERS (RA300 AND RA500 ONLY) In the center of the front panel are two meters that show the total power output of each channel. The highest (red) LED indicates the unit is at maximum output, at the onset of clipping. The orange PROTECT LEDs come on when the unit is 6 dB below rated output. Operation with the PROTECT LED on continuously will lead to amplifier overheating and eventual thermal shutdown to protect the circuitry. The two green LEDs closest to the PROTECT LED will actually light at higher levels than -6 dB, but before clipping. Lower green LEDs indicate signal in a normal operating range. No LEDs will light if the amplifier is operating 33 dB or less below maximum rated output. The PROTECT LEDs will light in two other cases: • For 4.5 seconds at initial turn-on while the output relay is connected. • When the thermal protection circuitry is activated because the amplifier is overheating. Thermal protection will stop automatically when the amplifier cools down. BACK PANEL CONTROLS AC VOLTAGE SWITCH Located near the power inlet is a recessed switch that allows voltage conversion from 120 volt to 230 volt operation. Use a small tool or pen to change the setting of this switch only if it is set to the wrong value for the country the amplifier will be used in. When changing voltages the fuse must be changed to the correct rating as shown on page 10. STEREO/BRIDGED MONO SWITCH Underneath the right input jack, this switch converts the RA150/300/500 from its normal operation as a two-channel amplifier to operation as a single-channel amplifier with approximately twice the power. Make sure this switch is set properly for your application. See page 20. If this switch is accidentally switched to Mono while wired for stereo, you will hear out-of-phase audio as the Channel 2/Right control is turned up. CHECKING FOR PROPER POLARITY To check for correct speaker polarity, briefly connect the + terminal of a 1.5V battery to the speaker cable's "hot" or + lead, and the battery's - terminal to the speaker cable's "cold," ground, or - lead. You will hear a "pop" from the loudspeaker as you connect the battery, and another as you disconnect it. Observe the direction of the speaker cone movement. If the speaker cables are wired in the common manner (and the speakers themselves are not mislabelled), the speaker cone will move forward (toward you) when you connect the battery and away from you when the battery is disconnected. If the speaker cone moves in the opposite direction, reverse the wires going to the speaker and re-test for proper polarity. Always check your speakers' polarity as not all manufacturers follow the same wiring convention. 22 RA150/300/500 Reference Manual
-
 1
1 -
2
-
3
-
4
-
5
-
6
-
7
-
8
-
9
-
10
-
11
-
12
-
13
-
14
-
15
-
16
-
17
-
18
-
 19
19 -
 20
20 -
 21
21 -
 22
22 -
 23
23 -
 24
24 -
 25
25 -
 26
26 -
 27
27 -
 28
28 -
 29
29 -
30
-
31
-
32
-
33
-
34
-
35
-
36
-
37
-
38
 |
 |