Alesis Recital Pro User Guide - Page 4
Features, Top Panel, Rear Panel, Bottom Panel - used
 |
View all Alesis Recital Pro manuals
Add to My Manuals
Save this manual to your list of manuals |
Page 4 highlights
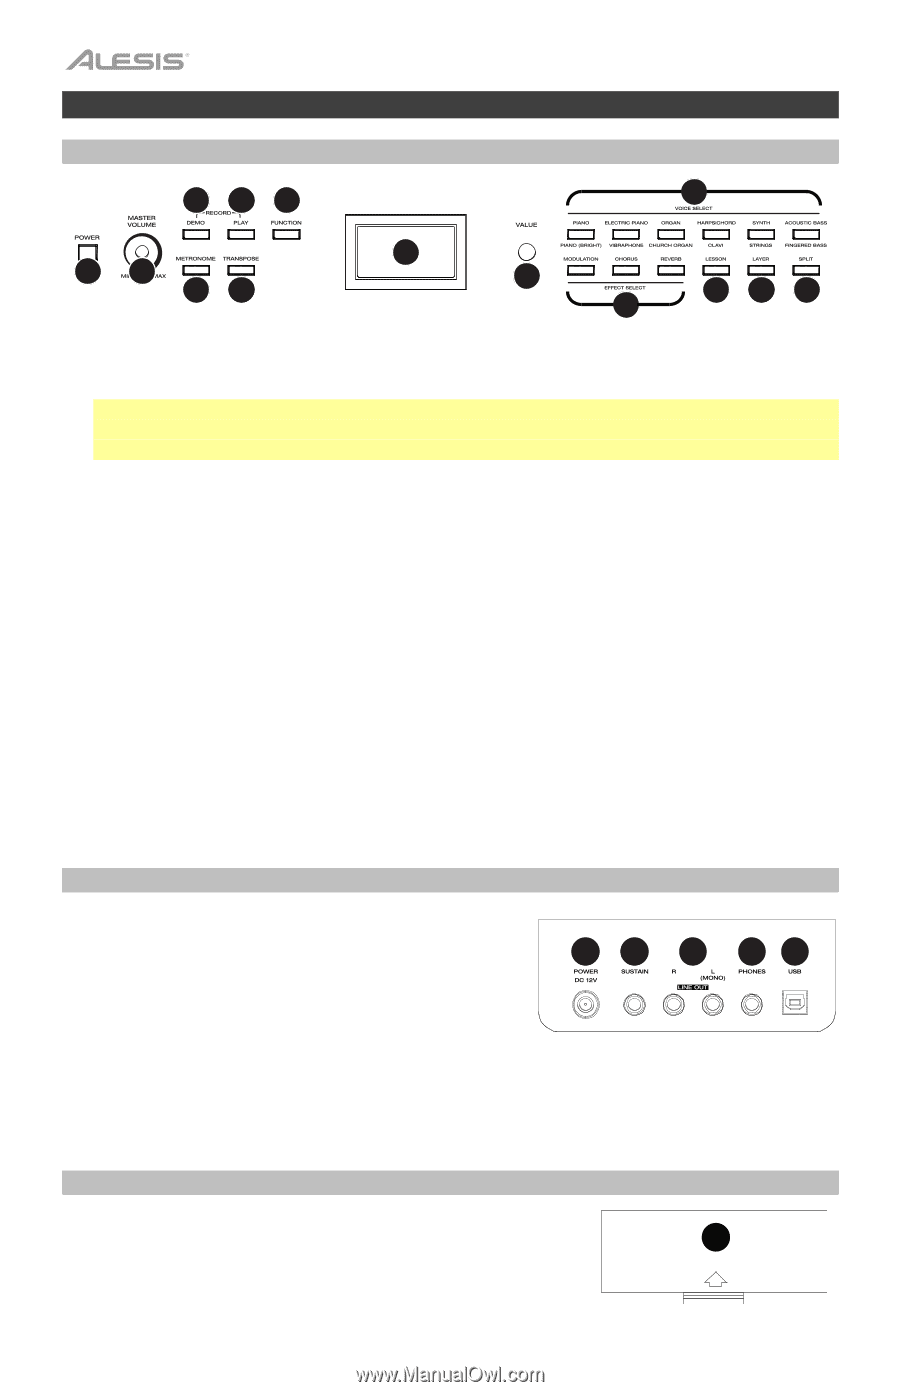
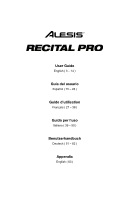
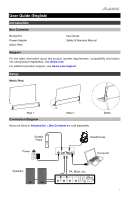
Features Top Panel 345 10 12 67 8 9 12 13 14 11 1. Power Switch: Turns the piano's power on or off. To save energy, the piano will automatically shut down after 30 minutes if it is not used. 2. Master Volume Knob: Adjusts the master volume for the Line Output and Headphone Output. Note: If the internal speakers do not produce any sound, check that the Master Volume knob is not set too low or if headphones are plugged into the Headphone Output. The speakers will be muted if there are headphones plugged into the Headphone Output. 3. Demo Button: Press this button to start or stop Demo playback. Press the Demo button and the Play button at the same time to enter Record Mode. 4. Play Button: Press this button to start or stop playback of the user-recorded song. Press the Play button and the Demo button at the same time to enter Record Mode. 5. Function Button: Press this button to enter Function mode, which enables you to edit various settings. 6. Metronome Button: Press this button to turn the metronome on or off. 7. Transpose Button: Press this button to edit the Transpose setting. 8. Display: Use this display to view Recital Pro's menus, parameters, and settings. 9. Value Dial: Use this dial to navigate menus and change parameter values in the Display. 10. Voice Select Buttons: Press one of these buttons to select a preset voice. See Operation > Voices to learn more. 11. Effect Select Buttons: Press these buttons to turn the Modulation, Chorus, and Reverb effects on or off. See Operation > Effects to learn more. 12. Lesson Button: Press this button to turn the Lesson Mode on or off. 13. Layer Button: Press this button to enter or exit Layer Mode. 14. Split Button: Press this button to enter or exit Split Mode. Rear Panel 1. Power Connector: Connect the included power adapter here. 2. Sustain Pedal Input: Connect a standard 1/4" (6.35 mm) sustain pedal here. 1 2 3 45 3. Line Output: Connect external audio equipment such as an amplifier, mixer, or recorder. Use the R and L outputs for stereo output or just the L output for mono output. 4. Headphone Output: Connect stereo headphones with a 1/4" (6.35 mm) stereo (TRS) connector. When headphones are connected, the internal speakers will automatically turn off and sound will only be heard from the headphones. 5. USB Port: Allows for transfer of MIDI data to a computer. Bottom Panel 1. Battery Compartment: Install 6 "D" batteries here to power the Recital digital keyboard if you are not using the power adapter. 1 4
-
 1
1 -
 2
2 -
 3
3 -
 4
4 -
 5
5 -
 6
6 -
 7
7 -
 8
8 -
 9
9 -
 10
10 -
11
-
12
-
13
-
14
-
15
-
16
-
17
-
18
-
19
-
20
-
21
-
22
-
23
-
24
-
25
-
26
-
27
-
28
-
29
-
30
-
31
-
32
-
33
-
34
-
35
-
36
-
37
-
38
-
39
-
40
-
41
-
42
-
43
-
44
-
45
-
46
-
47
-
48
-
49
-
50
-
51
-
52
-
53
-
54
-
55
-
56
-
57
-
58
-
59
-
60
-
61
-
62
-
63
-
64
 |
 |