Alesis Strike Drum Module Strike Editor Software V1.1 - User Guide - Page 3
Introduction, Support, Installation, Getting Started - strike performance drum module
 |
View all Alesis Strike Drum Module manuals
Add to My Manuals
Save this manual to your list of manuals |
Page 3 highlights
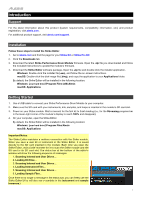
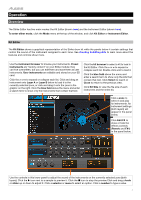
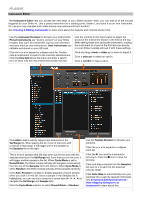
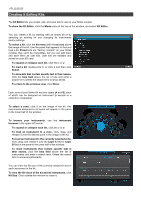
Introduction Support For the latest information about this product (system requirements, compatibility information, etc.) and product registration, visit alesis.com. For additional product support, visit alesis.com/support. Installation Follow these steps to install the Strike Editor: 1. Go to alesis.com and find the page for your Strike Kit or Strike Pro Kit. 2. Click the Downloads tab. 3. Download the latest Strike Performance Drum Module firmware. Open the .zip file you downloaded and follow the included instructions to update the module's firmware. 4. Download the Strike Editor software package. Open the .zip file and double-click the installer application. Windows: Double-click the installer file (.exe), and follow the on-screen instructions. macOS: Double-click the disk image file (.dmg), and copy the application to your Applications folder. By default, the Strike Editor will be installed in the following location: Windows: [your hard drive]\Program Files (x86)\Alesis macOS: Applications Getting Started 1. Use a USB cable to connect your Strike Performance Drum Module to your computer. 2. Make sure the SD card with your instruments, kits, samples, and loops is inserted in the module's SD card slot. 3. Power on your Strike module. Wait a moment for the first kit to finish loading (i.e., for the Streaming progress bar in the lower-right corner of the module's display to reach 100% and disappear). 4. On your computer, open the Strike Editor. By default, the Strike Editor will be installed in the following location: Windows: [your hard drive]\Program Files\Alesis macOS: Applications Important Notes: The Strike Editor maintains a realtime connection with the Strike module. When you save a user kit or instrument in the Strike Editor, it is saved directly to the SD card inserted in the module. Each time you open the Strike Editor, wait a brief moment for it to scan the Strike module and the SD card in its SD card slot. The status bar at the bottom of the editor's window will show the following sequence of messages: • 1. Scanning Internal and User Drives... • 2. Loading Kit Files... • 3. Scanning Internal and User Drives... • 4. Loading Instrument Files... • 5. Scanning Internal and User Drives... • 6. Loading Sample Files... Once there is no longer a message in the status bar, you can freely use the Strike Editor! (You will also see > symbols in the instrument and sample browsers.) 3
-
 1
1 -
 2
2 -
 3
3 -
 4
4 -
 5
5 -
 6
6 -
 7
7 -
 8
8 -
 9
9 -
10
-
11
-
12
-
13
-
14
-
15
-
16
-
17
-
18
-
19
-
20
-
21
-
22
-
23
 |
 |