Alpine CDA 9885 Owners Manual - Page 21
Audio Setting - video
 |
UPC - 793276711366
View all Alpine CDA 9885 manuals
Add to My Manuals
Save this manual to your list of manuals |
Page 21 highlights
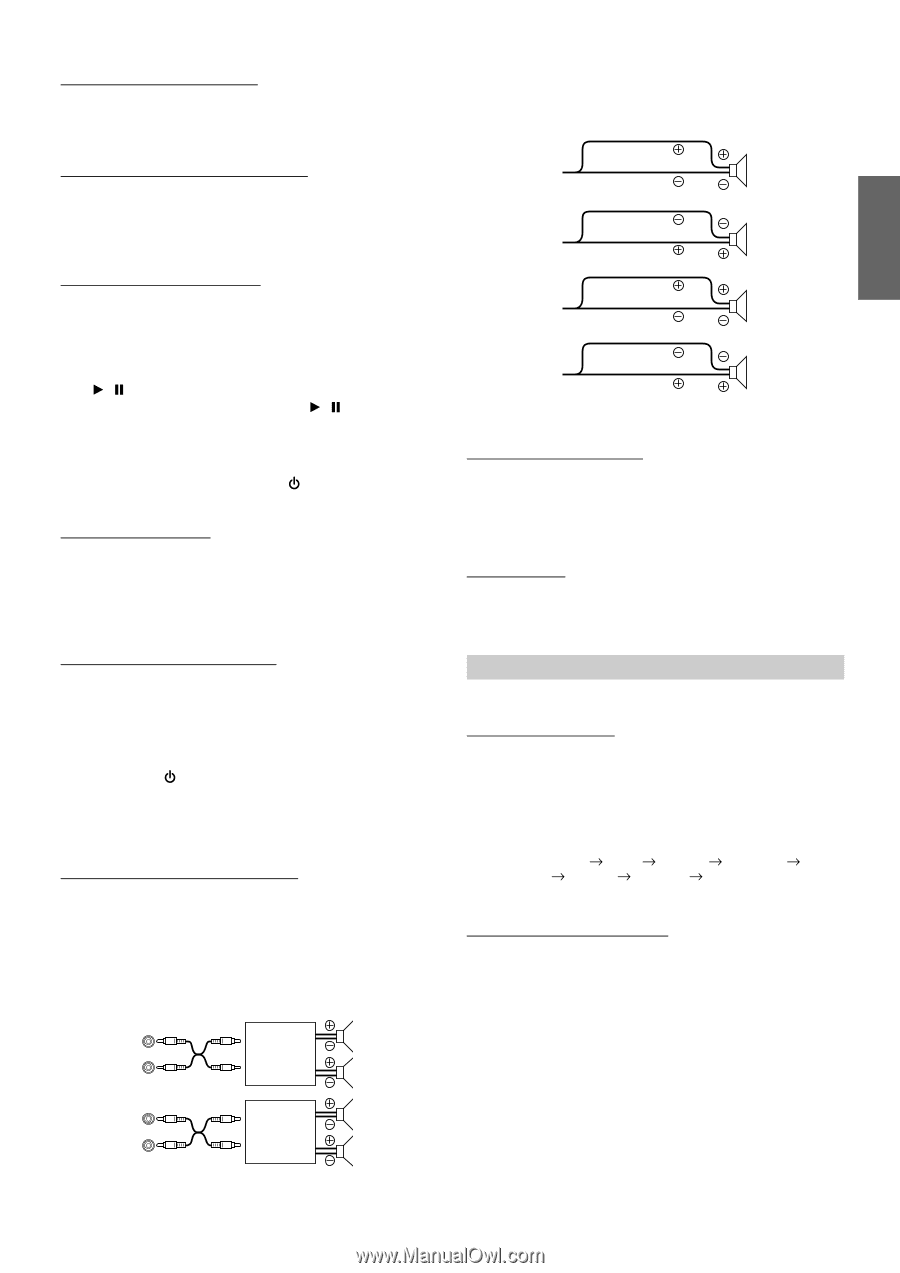
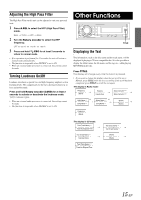
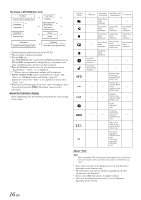
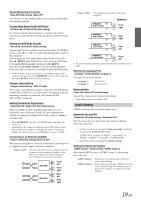
Sound (Beep) Guide Function Beep ON (Initial setting) / Beep OFF This function will give audible feedback with varying tones depending upon the button pressed. Turning Mute Mode On/Off (INT Mute) INT Mute ON / INT Mute OFF (Initial setting) If a device having the interrupt feature is connected, audio will be automatically muted whenever the interrupt signal is received from the device. Setting the AUX Mode (V-Link) AUX IN ON / AUX IN OFF (Initial setting) You can input TV/video sound by connecting an optional Ai-NET/RCA Interface cable (KCA-121B) or Versatile Link Terminal (KCA-410C) to this component. You can change the AUX name display when AUX IN is set to ON. Press / /ENT when AUX IN is set to ON, and select AUX Name by turning the Rotary encoder, and then press / /ENT. After that, turn the Rotary encoder to select the desired AUX name. If the KCA-410C is connected, it is possible to select two AUX names. • Via KCA-410C, up to 2 external devices with RCA output can be connected. In this case, press SOURCE/ to select AUX mode and then press BAND to select your desired device. Changer Name Setting Changer (Initial Setting) / USB / Portable This setting is used when the head unit is connected to the USB Adapter for MP3 (KCA-620M). You can set the name to be displayed on the unit depending on the device to which the USB Adapter for MP3 (KCA-620M) is connected. Setting the External Digital Input Digital AUX ON / Digital AUX OFF (Initial setting) When an ALPINE Ai-NET compatible digital audio processor (PXA-H701) and a DVD player (DVE-5207) not compatible with Ai-NET are connected, set Digital AUX to ON to enjoy 5.1-channel surround sound. • Press SOURCE/ , and select the D.AUX mode, and adjust the volume, etc. • Depending on the connected audio processor, DVD player sound may continue to be output, even though the source is changed to another one. If this occurs, set the DVD player's power to OFF. Connecting to an External Amplifier Power IC ON (Initial setting) / Power IC OFF When an external amplifier is connected, sound quality can be improved by stopping the power supply of the built-in amplifier. Power IC OFF : Use this mode when the line output of this unit is used to drive an external amplifier. In this setting, the head unit's internal amplifier is turned OFF and can not drive speakers. Amplifier Amplifier Front left Front right Rear left Rear right Power IC ON : The speakers are driven by the built-in amplifier. Speakers SPEAKER RIGHT FRONT Front right SPEAKER RIGHT REAR Rear right SPEAKER LEFT REAR Rear left SPEAKER LEFT FRONT Front left • No sound is produced by the system when the power output is set to OFF. Setting the Language Font Language 1 (Initial Setting) / Language 2 Two types of font can be selected. Language 1 : Language 2 : Normal Font European Font Demonstration Demo ON / Demo OFF (Initial setting) This unit has a demonstration feature for the display. • To quit Demo mode, set to Demo OFF. Audio Setting AUDIO is selected on the setup main menu in step 2. Subwoofer On and Off Subwoofer ON (Initial setting) / Subwoofer OFF When the subwoofer is on, perform the steps below to adjust the subwoofer output level. 1 In the normal mode, press the Rotary encoder repeatedly to select the SUBWOOFER mode. SUBWOOFER BASS TREBLE BALANCE FADER DEFEAT VOLUME SUBWOOFER 2 Adjust the level by turning the Rotary encoder. Setting the Subwoofer System SUBW. System 1 (Initial setting) / SUBW. System 2 Select either SUBW. System 1 or SUBW. System 2 for the desired subwoofer effect. SUBW. System 1 : Subwoofer level changes according the main volume setting. SUBW. System 2 : Subwoofer level change is different from the main volume setting. For example, even at low volume settings, the subwoofer is still audible. 19-EN
-
 1
1 -
2
-
3
-
4
-
5
-
6
-
7
-
8
-
9
-
10
-
11
-
12
-
13
-
14
-
15
-
 16
16 -
 17
17 -
 18
18 -
 19
19 -
 20
20 -
 21
21 -
 22
22 -
 23
23 -
 24
24 -
 25
25 -
 26
26 -
27
-
28
-
29
-
30
-
31
-
32
-
33
-
34
-
35
-
36
-
37
-
38
-
39
-
40
-
41
-
42
-
43
-
44
-
45
-
46
-
47
-
48
-
49
-
50
-
51
-
52
-
53
-
54
-
55
-
56
-
57
-
58
-
59
-
60
-
61
-
62
-
63
-
64
-
65
-
66
-
67
-
68
-
69
-
70
-
71
-
72
-
73
-
74
-
75
-
76
-
77
-
78
-
79
-
80
-
81
-
82
-
83
-
84
-
85
-
86
-
87
-
88
-
89
-
90
-
91
-
92
-
93
-
94
-
95
-
96
-
97
-
98
-
99
-
100
-
101
-
102
-
103
-
104
-
105
-
106
-
107
-
108
-
109
-
110
-
111
-
112
-
113
-
114
-
115
-
116
-
117
-
118
 |
 |