Alpine IVE-W530 Owner's Manual (english) - Page 37
Setting the Navigation Mode, Setting the Navigation Interruption, Setting the AUX Mode
 |
View all Alpine IVE-W530 manuals
Add to My Manuals
Save this manual to your list of manuals |
Page 37 highlights
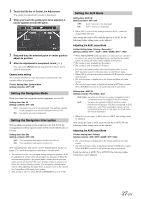
1 Touch the title bar of Guide Line Adjustment. The guide line adjustment screen is displayed. 2 When you touch the guide pylon to be adjusted, a border appears around the pylon. 3 Drag and drop the selected pylon or center guide to adjust its position. 4 After the adjustment is completed, touch [ ]. You can touch [Reset] during adjustment to return to the default adjustment. Camera mute setting You can set whether to mute the source volume when the camera video is displayed. Further Setting item: Camera Mute Setting Contents: OFF / ON Setting the Navigation Mode When you connect an optional navigation equipment, set it to ON. Setting item: Nav. IN Setting contents: OFF / ON OFF: Navigation source is not displayed. The settings related to the navigation can not be changed from this unit. ON: Navigation source is displayed. Setting the Navigation Interruption With an Alpine navigation system connected to the IVE-W530, the voice guidance of the navigation system will be mixed with the radio or CD play. Setting item: Nav. Mix Setting contents: OFF / ON OFF: The navigation interruption mode is turned off. ON: The navigation interruption mode is on. See "Adjusting Nav. Mix Level" under "Adjusting the Audio" on page 27 to set the navigation interruption volume level. • The volume level for voice prompts during navigation guidance is set by adjusting its volume while the prompts are announced. When the announcement finishes, the normal audio volume and the previous audio screen are restored. The voice prompt volume is always at or below the current listening volume. If a navigation announcement cuts in while adjusting the audio level, it always resets to the current level regardless of the audio level setting. • This setting is effective when Nav.IN of SYSTEM list screen is ON. Setting the AUX Mode Setting item: AUX1 IN Setting contents: OFF / ON OFF: ON: AUX-1 source is not displayed. AUX-1 source is displayed. • When OFF is selected, the settings related to AUX-1 cannot be changed from this unit. After setting this item to ON, touch the title bar of AUX1 IN, the following further setting items can be adjusted. Adjusting the AUX1 name Mode Further Setting items: Primary / Secondary*1 Setting contents: OFF*2 / AUX*3 / DVD / GAME / DTV*3 / NAV. *1 When TUE-T200DVB (sold separately) is connected, you can use it to connect one more External Input device. Setting the Secondary name can change the source name display of this device. *2 The setting is only available for Secondary. *3 The setting is only available for Primary. • You can set Secondary name only when Primary name is set to DTV. And you cannot set the same name as in Primary name. • When OFF is selected, the settings related to AUX cannot be changed from this unit. • The selected name is displayed on the Visual and Rear selection screen. • The selected source name is displayed instead of AUX source name. Select SOURCE to switch to the guide function of each mode. Setting item: AUX2 IN Setting contents: iPod Video / AUX iPod Video: Set when an iPhone or a video compatible iPod is connected to the iPod (V)/AUX Input Connector. AUX: Set when an optional AV/RCA interface cable (4-pole mini AV plug to 3-RCA) is connected. A DVD player etc., with RCA audio/video output can be connected to this unit. In this case, the iPod video will not be displayed. • When the current source is iPod video or AUX-2, this setting cannot be adjusted. After setting this item to AUX, touch the title bar of AUX2 IN, the following further setting items can be adjusted. Adjusting the AUX2 name Mode Further Setting item: Primary Setting contents: AUX / DVD / GAME / DTV / NAV. • The selected name is displayed on the Visual and Rear selection screen. • The selected source name is displayed instead of AUX source name. Select SOURCE to switch to the guide function of each mode. Touch the title bar of AUX1 IN or AUX2 IN, the following further setting items can be adjusted. 37-EN
-
 1
1 -
2
-
3
-
4
-
5
-
6
-
7
-
8
-
9
-
10
-
11
-
12
-
13
-
14
-
15
-
16
-
17
-
18
-
19
-
20
-
21
-
22
-
23
-
24
-
25
-
26
-
27
-
28
-
29
-
30
-
31
-
 32
32 -
 33
33 -
 34
34 -
 35
35 -
 36
36 -
 37
37 -
 38
38 -
 39
39 -
 40
40 -
 41
41 -
 42
42 -
43
-
44
-
45
-
46
-
47
-
48
-
49
-
50
-
51
-
52
-
53
-
54
-
55
-
56
-
57
-
58
-
59
-
60
-
61
-
62
-
63
-
64
-
65
-
66
-
67
-
68
-
69
-
70
 |
 |
