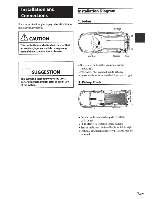
Alpine VPX-B104R Owners Manual - Page 11
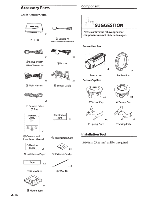
Painting, Sensor Cover, Sensor
 |
View all Alpine VPX-B104R manuals
Add to My Manuals
Save this manual to your list of manuals |
Page 11 highlights
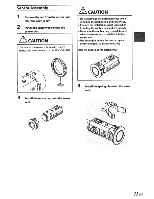
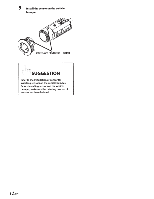
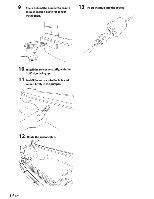
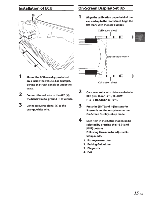
Painting Sensor Cover and Sensor Unit Please follow the instructions in this manual for painting and assembling, in order to get the best performance. ~CAUTION • Use only the painting and assembling methods detailed in this manual. • Damages resulting from the failure to use the methods detailed in this manual are not our responsibility. • Install sensors on the vehicle bumper after painting and assembling. • Please refer to the Installation Manual for installing sensors on the vehicle bumper. • Immediately clean the surface of the sensors with a soft cloth if they contact any fuel, oil, coolant, battery acid, sealants, adhesives, car care products, or any other substance that could cause damage. Sensor Assembly Painting Method 1 Remove the sensor box cap. 2 Check if any accessories are missing and all accessories are aligning/ assembling properly. 3 Remove the spring plate from the sensor cap box to avoid painting. 4 Remove the rubber ring from the sensor unit box to avoid painting. 5 Evenly apply 2 or 3 base coats,allow each coat to dry before recoating. Note: Avoid painting the rubber ring around the sensor. i,~ .i( i/"'../ -- ' . I 0.~-(i,Ut- .....!!!l!!"""-"!1 Tilt 015 *&tt.e I 6 Evenly apply 2 or 3 clear coats. For temperatures under 60° F, allow each coat to dry for 30 minutes before recoating. 7 When completely dried and hardened, proceed to the sensor installation instructions. CoatingThickness Suggestion: Base coat: (15 ,.... 30 IJm); Clear coat: (25 ,.... 30 IJm) ~CAUTION • Limit the use of"Spray Paint" to apply the coatings. • Depending on the paint manufacturer, the instructions for painting will vary. • The sensor unit has been pre-painted with a base coat, but additional coats are required. • Before painting, make sure the box is free of all oil and dust. • Apply the coats from a distance of 0.5 to 0.8 ft, with a tilt of 45 degrees. • Do not let the coating adhere to the terminal and rubber during the time of painting. • The sensor's performance will be reduced if the coating's thickness is uneven. 10-EN
-
 1
1 -
2
-
3
-
4
-
5
-
 6
6 -
 7
7 -
 8
8 -
 9
9 -
 10
10 -
 11
11 -
 12
12 -
 13
13 -
 14
14 -
 15
15 -
 16
16 -
17
-
18
-
19
-
20
-
21
-
22
-
23
-
24
-
25
-
26
-
27
-
28
 |
 |