Amana NTW4800XQ Installation Instruction - Page 5
Connect Drain Hose - parts
 |
UPC - 883049227535
View all Amana NTW4800XQ manuals
Add to My Manuals
Save this manual to your list of manuals |
Page 5 highlights
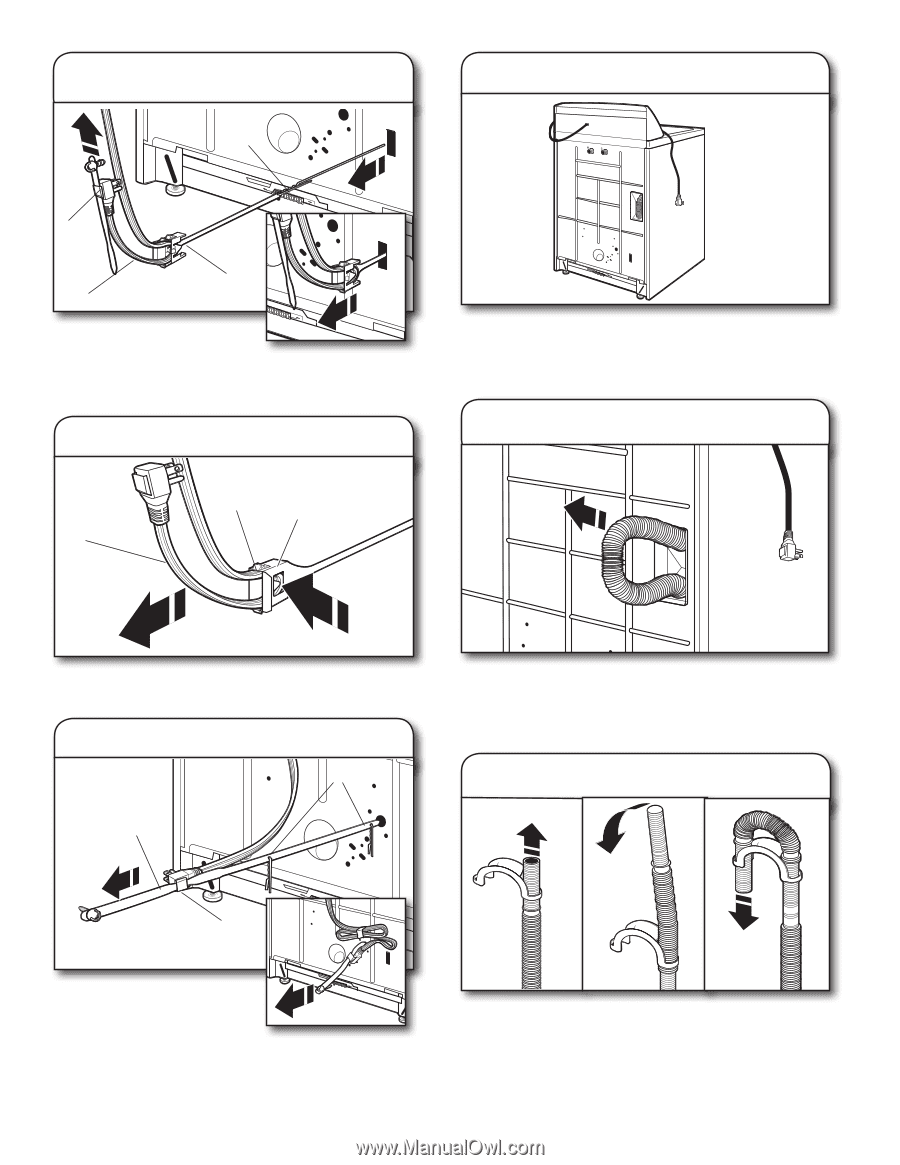
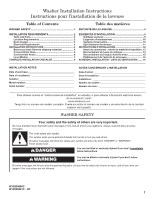
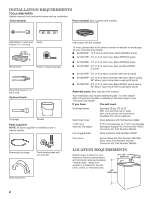
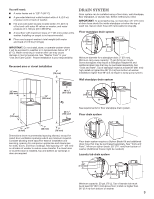
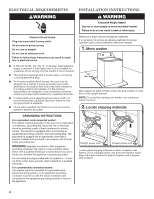
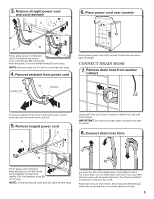
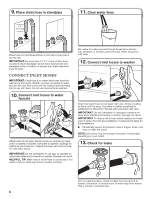
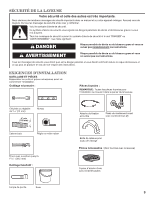
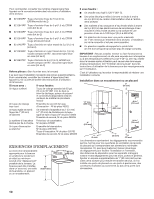
3. Remove straight power cord and cord restraint C 6. Place power cord over console D B A Firmly grasp power cord (A) and pull to completely free power cord, cord restraint (B), and pin (C) from rear panel. Pull cord restraint strap (D) out of plug. NOTE: Remove cotter pin if it did not come free with strap. 4. Remove restraint from power cord Gently place power cord over console to allow free access to back of washer. Connect Drain Hose 7. Remove drain hose from washer cabinet power cord tab restraint To remove restraint from power cord: push power cord in, press tab, and then pull power cord out. 5. Remove looped power cord C A Gently pull hose out of back of washer cabinet from top until end emerges. IMPORTANT: Do not force excess drain hose back into rear of washer. 8. Connect drain hose form B Firmly grasp yellow shipping strap (A) and pull until both ends are completely removed from washer. Pull cord restraint strap (B) out of plug. NOTE: Check that two (2) cotter pins (C) came off with strap. For a laundry tub or standpipe drain, follow steps 8 and 9. For a floor drain, do not install drain hose form. You may need alternate parts with separate directions. See "Tools and Parts" to determine what you may need. Feed hose into one end of form. Bend hose and feed through other side, anchoring form on smooth sections of hose. 5
-
 1
1 -
 2
2 -
 3
3 -
 4
4 -
 5
5 -
 6
6 -
 7
7 -
 8
8 -
 9
9 -
 10
10 -
 11
11 -
12
-
13
-
14
-
15
-
16
 |
 |