Amana NTW4800XQ Installation Instruction - Page 8
Complete Installation, Checklist
 |
UPC - 883049227535
View all Amana NTW4800XQ manuals
Add to My Manuals
Save this manual to your list of manuals |
Page 8 highlights
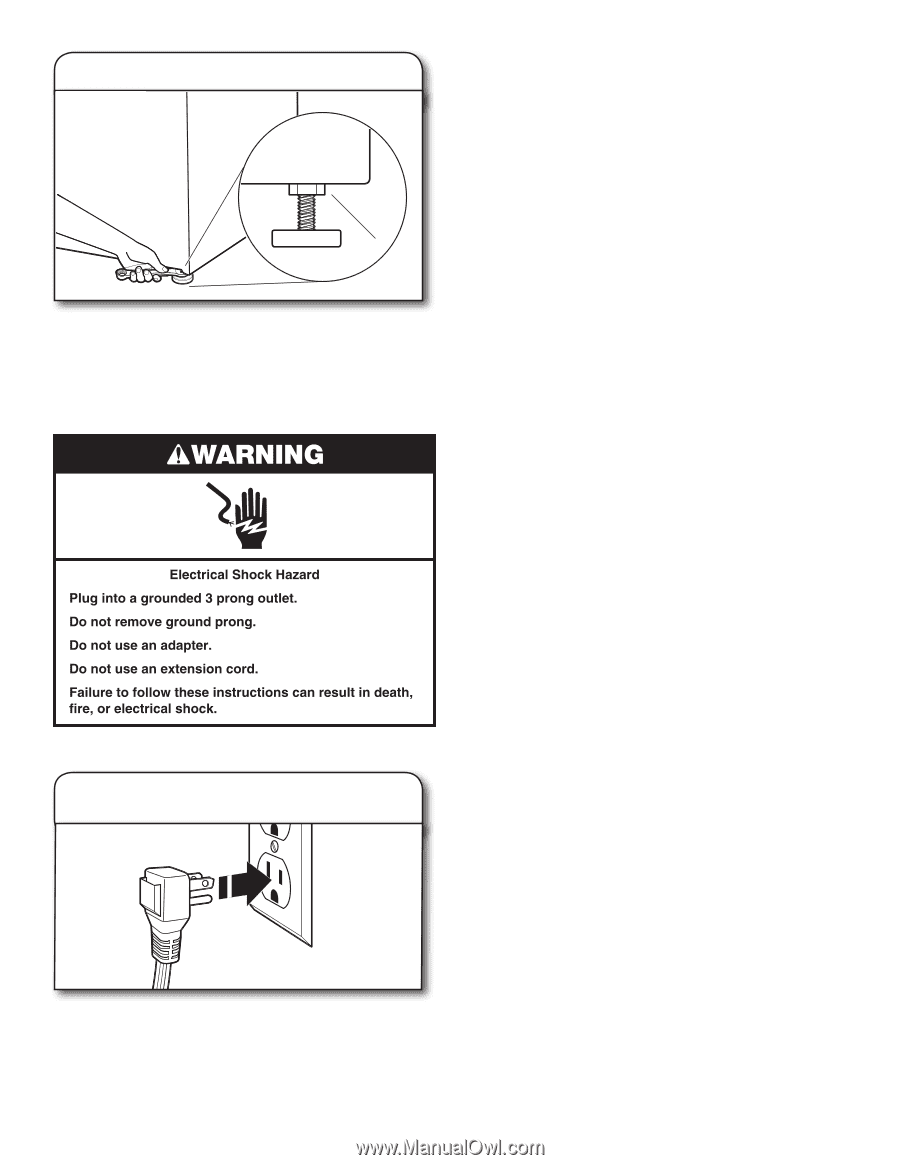
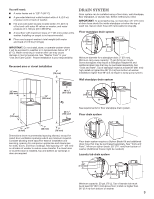
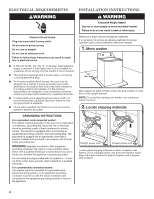
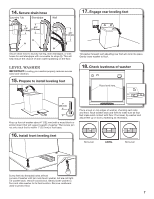
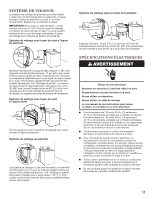
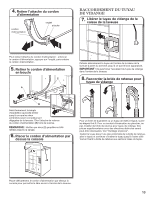
19. Tighten leveling feet A When washer is level, hold the leveling foot to keep it from turning and use a 9/16" or 14 mm open-end or adjustable wrench to tighten jam nut (A) counterclockwise on foot securely against washer cabinet. HELPFUL TIP: You may want to prop washer again with wooden block, then make sure to recheck for levelness. Complete Installation CHECKLIST ■■ Check electrical requirements. Be sure you have correct electrical supply and recommended grounding method. ■■ Check that all parts are now installed. If there is an extra part, go back through steps to see what was skipped. ■■ Check that you have all of your tools. ■■ Check that yellow shipping materials were completely removed from back of washer. ■■ Check that both water faucets are on. ■■ Check for leaks around faucets and inlet hoses. ■■ Remove film from console and any tape remaining on washer. ■■ Check that washer is plugged into a grounded 3 prong outlet. ■■ Dispose of/recycle all packaging materials. ■■ Read "Washer Use" in your "Use and Care Guide". ■■ To test and clean your washer, measure 1/2 of normal recommended amount of powdered or liquid detergent and pour it into washer basket or detergent dispenser (on some models). Close lid. Select any cycle. Start washer and allow to complete full cycle. 20. Plug into a grounded 3 prong outlet 8
-
 1
1 -
2
-
 3
3 -
 4
4 -
 5
5 -
 6
6 -
 7
7 -
 8
8 -
 9
9 -
 10
10 -
 11
11 -
 12
12 -
 13
13 -
14
-
15
-
16
 |
 |