Amana NTW4800XQ Installation Instruction - Page 7
Level Washer
 |
UPC - 883049227535
View all Amana NTW4800XQ manuals
Add to My Manuals
Save this manual to your list of manuals |
Page 7 highlights
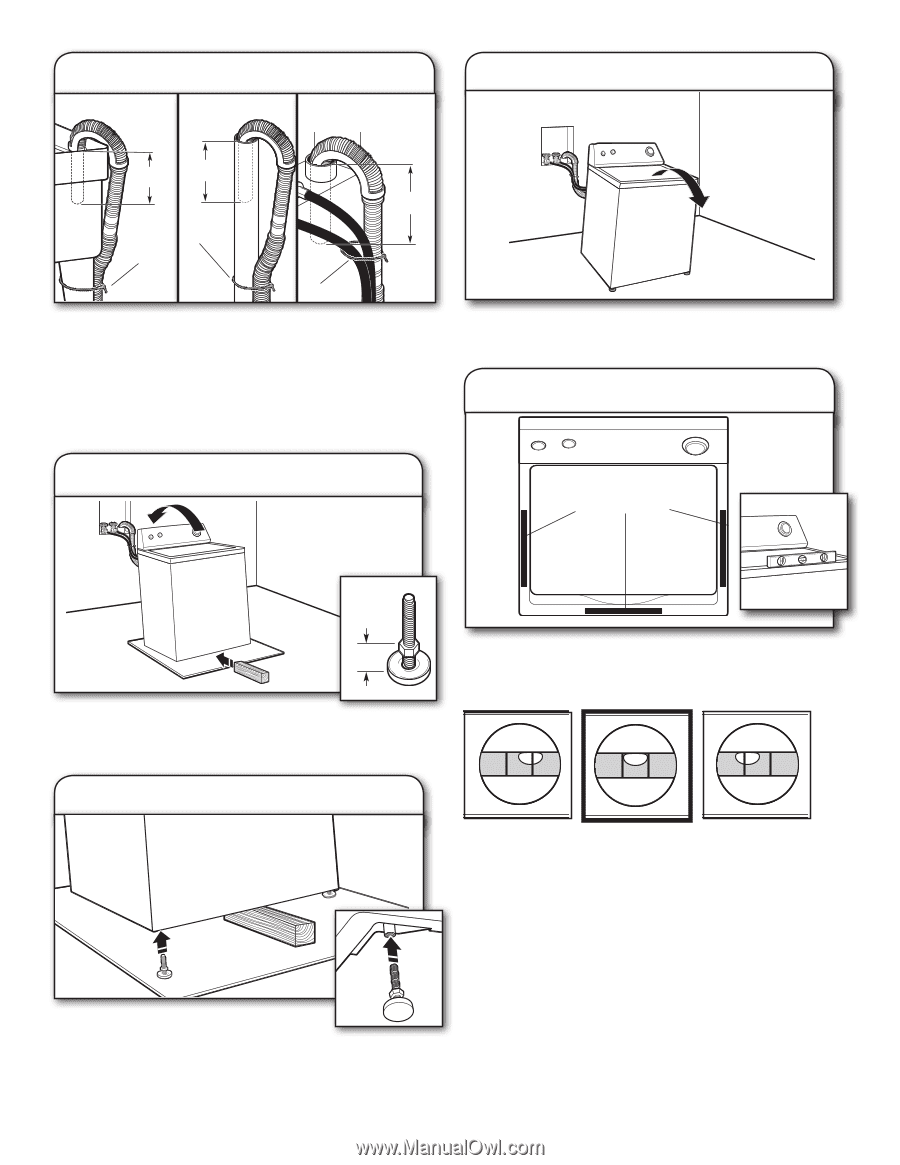
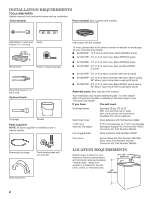
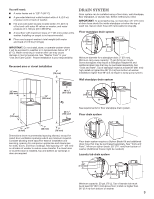
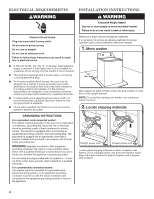
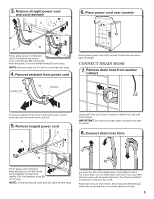
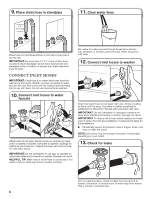
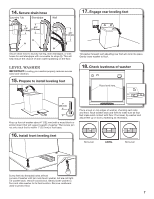
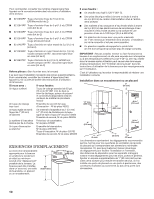
14. Secure drain hose Laundry Tub Standpipe Wall 17. Engage rear leveling feet 4.5" (113 mm) 4.5" (113 mm) 4.5" (113 mm) A A A Secure drain hose to laundry tub leg, drain standpipe, or inlet hoses for wall standpipe with removable tie strap (A). This will help reduce the chance of drain water splashing on the floor. Tilt washer forward; self-adjusting rear feet will click into place. Gently lower washer to floor. Level Washer IMPORTANT: Leveling your washer properly reduces excess noise and vibration. 15. Prepare to install leveling feet 18. Check levelness of washer Place level here 1" (25 mm) Prop up front of washer about 4" (102 mm) with a wood block or similar object that will support weight of washer. Then screw jam nut onto each foot to within 1" (25 mm) of foot base. Place a level on top edges of washer, checking each side and front. Rock washer back and forth to make sure all four feet make solid contact with floor. If not level, tip washer and adjust feet up or down, repeating as necessary. 16. Install front leveling feet Not Level LEVEL Not Level Screw feet into threaded holes at front corners of washer until jam nuts touch washer, but are not tight. Tilt washer back, remove wood block. Gently lower washer to floor and slide washer to its final location. Remove cardboard used to protect floor. 7
-
 1
1 -
 2
2 -
 3
3 -
 4
4 -
 5
5 -
 6
6 -
 7
7 -
 8
8 -
 9
9 -
 10
10 -
 11
11 -
 12
12 -
13
-
14
-
15
-
16
 |
 |