Archos 501570 User Manual - Page 5
Making A Wifi Connection
 |
View all Archos 501570 manuals
Add to My Manuals
Save this manual to your list of manuals |
Page 5 highlights
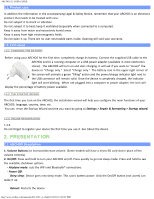
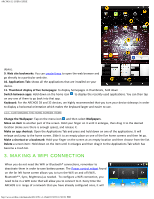
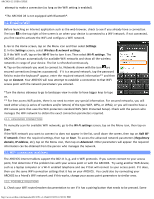
ARCHOS 32 USER GUIDE device. 9. Web site bookmarks: You can create these to open the web browser and go directly to a particular web site. 10. Applications Tab: shows all the applications that are installed on your device. 11. Thumbnail display of five homepages: to display homepages in thumbnails, hold down . Switch between apps: Hold down on the home icon to display the recently used applications. You can then tap on any one of them to go back into that app. Keyboard: For the ARCHOS 28 and 32 devices, we highly recommended that you turn your device sideways in order to display a horizontal orientation which makes the keyboard larger and easier to use. 2.2.1. CUSTOMIZING THE HOME SCREEN ITEMS Change the Wallpaper: Tap on the menu icon and then select Wallpapers. Move an item to another part of the screen. Hold your finger on it until it enlarges, then drag it to the desired location (make sure there is enough space), and release it. Make an app shortcut: Open the Applications Tab and press and hold down on one of the applications. It will enlarge and jump to the home screen. Slide it to an empty place on one of the five home screens and then let go. Make a shortcut or a bookmark: Hold your finger on the screen at an empty location and then choose from the list. Delete a screen item: Hold down on the item until it enlarges and then drag it to the Applications Tab which has become a trash bin. 3. MAKING A WIFI CONNECTION When you do not need the WiFi or Bluetooth® connections, remember to deactivate them in order to save battery power. The Power control widget found on the far left home screen allows you to turn the WiFi on and off (WiFi, Bluetooth®*, Sync, Brightness) as needed. To configure a WiFi connection, you need to be in a WiFi zone that will allow you to connect to it. Every time the ARCHOS is in range of a network that you have already configured once, it will http://www.archos.com/manuals/A32_EN_v1.1.htm[2/24/2011 2:40:21 PM]
-
 1
1 -
 2
2 -
 3
3 -
 4
4 -
 5
5 -
 6
6 -
 7
7 -
 8
8 -
 9
9 -
 10
10 -
 11
11 -
12
-
13
-
14
-
15
-
16
-
17
-
18
-
19
-
20
-
21
-
22
-
23
-
24
-
25
-
26
-
27
 |
 |
