Asus A7V266 Motherboard DIY Troubleshooting Guide - Page 20
ASUS A7V266 User's Manual, I/O Voltage Settings JP1, JP2, CPU Type Frequency Setting PALO_FREQ - c motherboard
 |
View all Asus A7V266 manuals
Add to My Manuals
Save this manual to your list of manuals |
Page 20 highlights
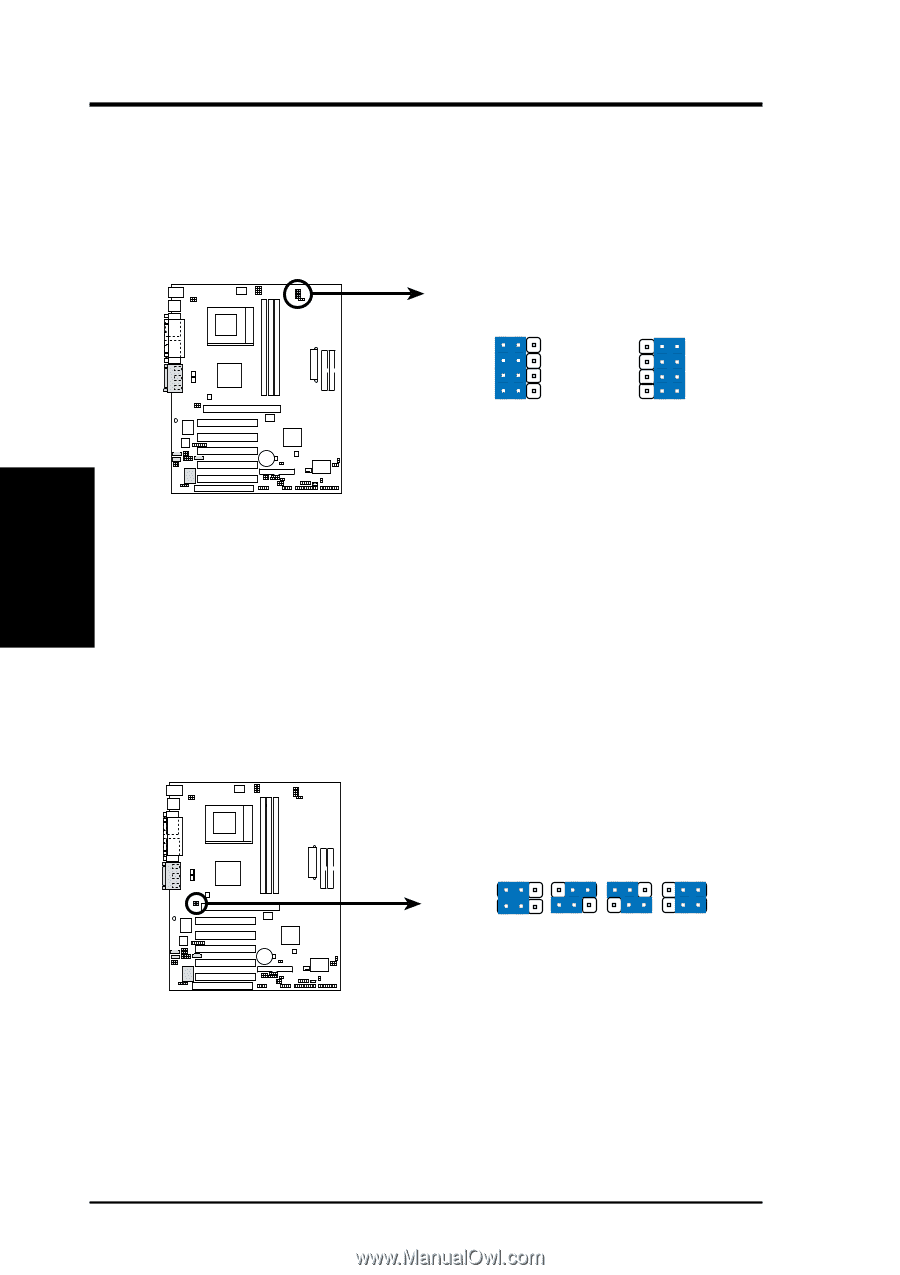
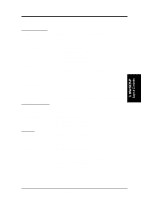
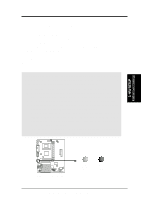
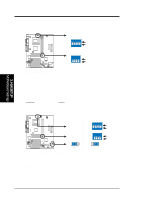
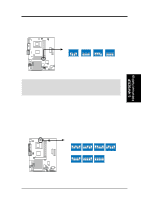
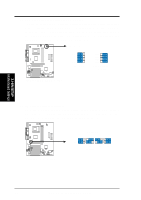
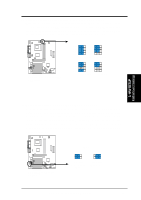
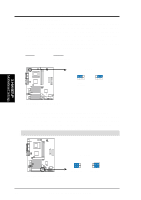
3. H/W SETUP Motherboard Settings 3. HARDWARE SETUP 4) CPU Type Frequency Setting (PALO_FREQ) This jumper setting accomodates the difference between the internal frequency between standard and new AMD CPUs. If changing from one type of CPU to another, the jumper caps must be adjusted. The factory default setting, [2-3], is for standard Athlon/Duron CPUs. The Palomino processor will only function on this motherboard after the jumpers are adjusted to [1-2]. PALO_FREQ FID0 FID1 FID2 FID3 123 123 FID0 FID1 FID2 FID3 PALOMINO ATHLON/DURON A7V266 (Default) A7V266 PALO_FREQ Setting 01 01 01 01 01 01 5) I/O Voltage Settings (JP1, JP2) These jumpers allow you to select the voltage supplied to the DRAM, chipset, AGP, and PCI. The default setting for the jumpers is: JP1 [2-3] and JP2 [1-2], 2.65 volts. Use the default setting for better system reliability. A7V266 A7V266 Voltage Setting JP1/JP2 12 3 JP1 JP2 12 3 12 3 2.5V 2.65V 2.75V (Default) 12 3 2.8V 20 ASUS A7V266 User's Manual
-
 1
1 -
2
-
3
-
4
-
5
-
6
-
7
-
8
-
9
-
10
-
11
-
12
-
13
-
14
-
 15
15 -
 16
16 -
 17
17 -
 18
18 -
 19
19 -
 20
20 -
 21
21 -
 22
22 -
 23
23 -
 24
24 -
 25
25 -
26
-
27
-
28
-
29
-
30
-
31
-
32
-
33
-
34
-
35
-
36
-
37
-
38
-
39
-
40
-
41
-
42
-
43
-
44
-
45
-
46
-
47
-
48
-
49
-
50
-
51
-
52
-
53
-
54
-
55
-
56
-
57
-
58
-
59
-
60
-
61
-
62
-
63
-
64
-
65
-
66
-
67
-
68
-
69
-
70
-
71
-
72
-
73
-
74
-
75
-
76
-
77
-
78
-
79
-
80
-
81
-
82
-
83
-
84
-
85
-
86
-
87
-
88
-
89
-
90
-
91
-
92
-
93
-
94
-
95
-
96
-
97
-
98
-
99
-
100
-
101
-
102
-
103
-
104
-
105
-
106
-
107
-
108
-
109
-
110
 |
 |