Asus A7V266 Motherboard DIY Troubleshooting Guide - Page 21
ASUS A7V266 User's Manual, Voltage Regulator Output Setting VID1, VID2, VID3, VID4, CPU Default, - c drivers
 |
View all Asus A7V266 manuals
Add to My Manuals
Save this manual to your list of manuals |
Page 21 highlights
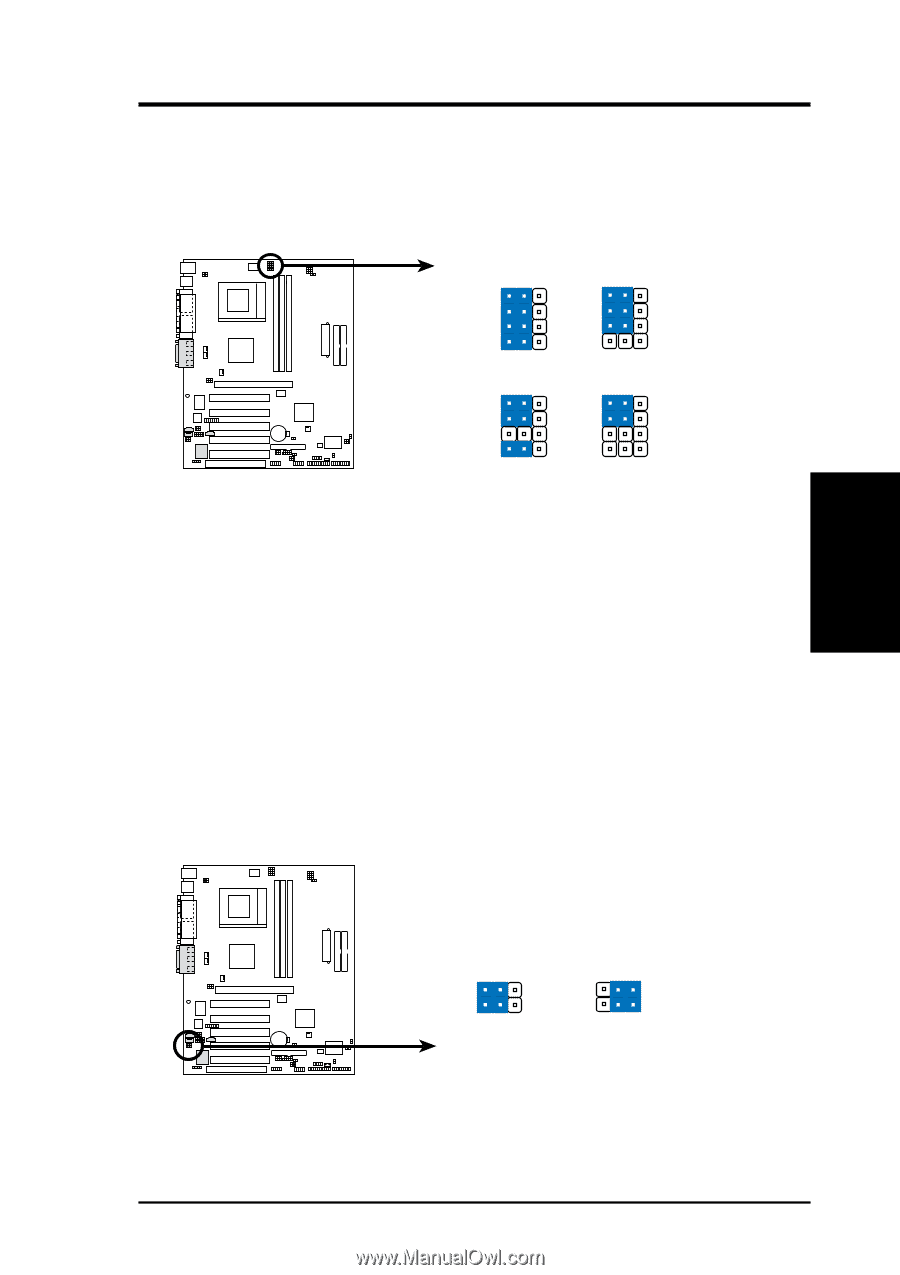
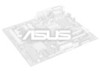
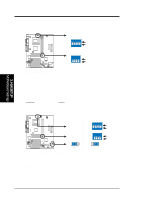
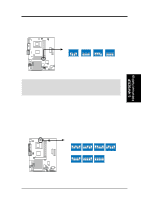
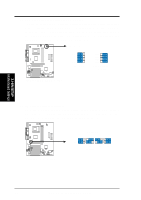
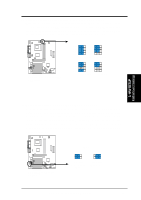
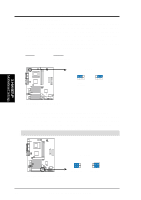
3. H/W SETUP Motherboard Settings 01 01 01 01 01 01 3. HARDWARE SETUP 6) Voltage Regulator Output Setting (VID1, VID2, VID3, VID4) This jumpers allow you to manually adjust the CPU core voltage. It is recommended to use CPU Default as the CPU core voltage. CPU Default means the Vcore is generated according to the CPU VID configuration. For each jumper setting, there are two voltage options, depending on the CPU used. A7V266 A7V266 CPU Core Voltage Selection 123 VID4 VID3 VID2 VID1 1.85/1.825Volts 123 1.8/1.775Volts 123 VID4 VID3 VID2 VID1 1.75/1.725Volts 123 1.7/1.675Volts 7) Bass Center Setting (CENTER/BASS, BASS/CENTER) Use these jumpers in conjunction with the C-Media PCI Audio Driver and to adjust output for 4 or 6 speaker audio. No audio standard exists for the three pick-up surfaces on male audio jacks, therefore it may be necessary to switch jumpers from the default position, type 1, to type 2, in order to help reroute signals among the internal leads in the Line-In, Line-Out, Mic female sockets. Make sure a test is made using the C-Media Audio Driver software setup available on the Support CD. A7V266 A7V266 Bass Center Setting BCS 12 23 type 1 Bass (CENTER/BASS) (Default) type 2 Bass (BASS/CENTER) ASUS A7V266 User's Manual 21
-
 1
1 -
2
-
3
-
4
-
5
-
6
-
7
-
8
-
9
-
10
-
11
-
12
-
13
-
14
-
15
-
 16
16 -
 17
17 -
 18
18 -
 19
19 -
 20
20 -
 21
21 -
 22
22 -
 23
23 -
 24
24 -
 25
25 -
 26
26 -
27
-
28
-
29
-
30
-
31
-
32
-
33
-
34
-
35
-
36
-
37
-
38
-
39
-
40
-
41
-
42
-
43
-
44
-
45
-
46
-
47
-
48
-
49
-
50
-
51
-
52
-
53
-
54
-
55
-
56
-
57
-
58
-
59
-
60
-
61
-
62
-
63
-
64
-
65
-
66
-
67
-
68
-
69
-
70
-
71
-
72
-
73
-
74
-
75
-
76
-
77
-
78
-
79
-
80
-
81
-
82
-
83
-
84
-
85
-
86
-
87
-
88
-
89
-
90
-
91
-
92
-
93
-
94
-
95
-
96
-
97
-
98
-
99
-
100
-
101
-
102
-
103
-
104
-
105
-
106
-
107
-
108
-
109
-
110
 |
 |