Asus AP120R User Guide - Page 27
Hard disk drive installation
 |
View all Asus AP120R manuals
Add to My Manuals
Save this manual to your list of manuals |
Page 27 highlights
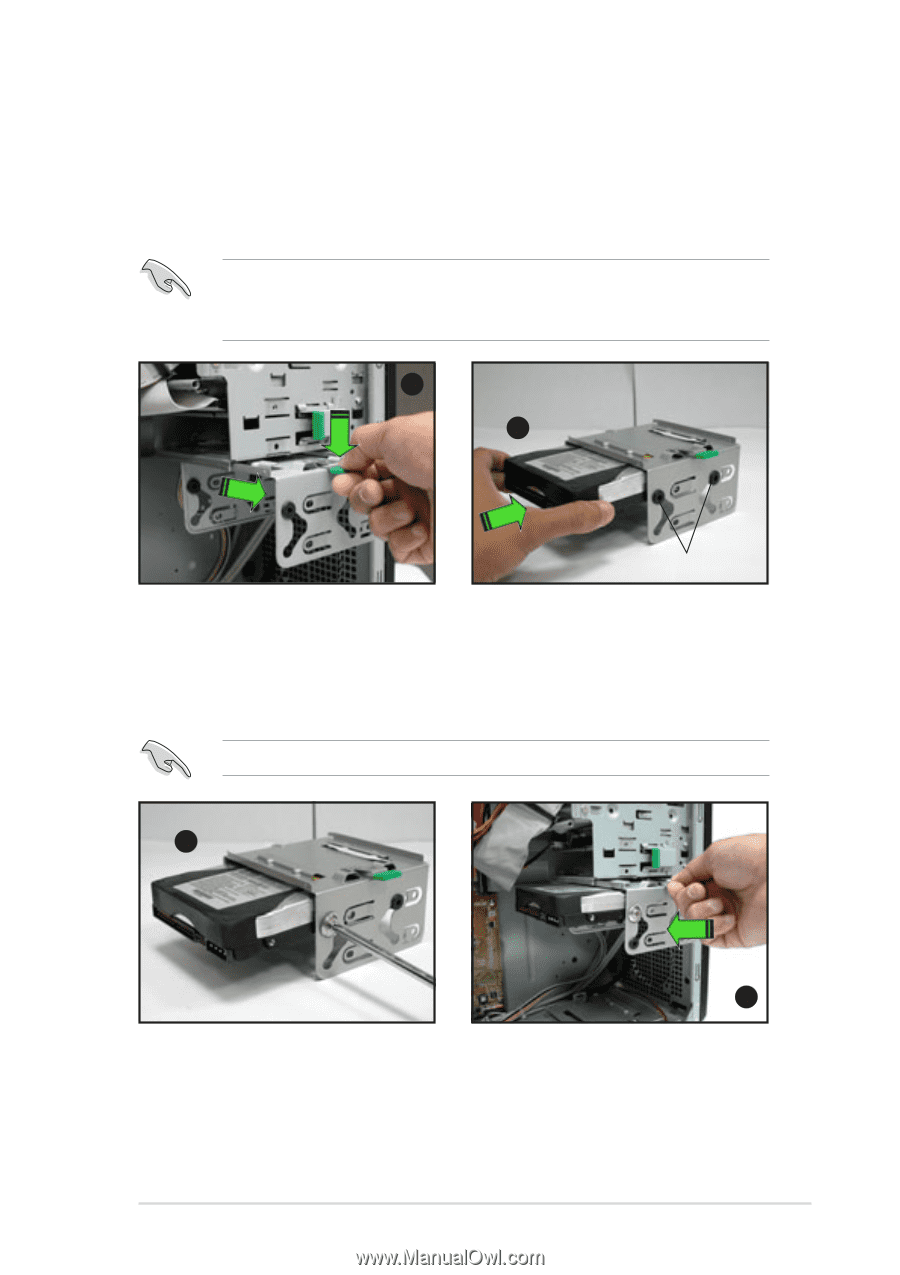
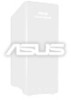
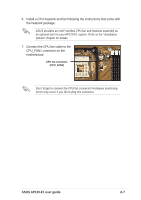
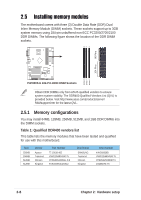
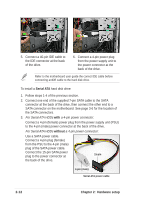
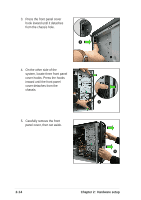
2.6.2 Hard disk drive installation The detachable hard disk drive cage can accommodate one IDE or Serial ATA hard disk drive. To install an IDE hard disk drive: Configure your hard disk drive as Master/Slave device before installing it to the drive cage. Refer to the HDD documentation on how to set the drive as a Master/Slave device. 1 2 Screw holes 1. Press the HDD cage lock while pulling the cage out from the chassis. Place the HDD cage in a flat surface. 2. Insert a HDD to the upper bay of the cage. Make sure that the HDD screw holes are aligned with the HDD cage screw holes (with black rubber stoppers). DO NOT install a hard disk drive to the lower bay of the cage. 3 3. Secure the HDD to the cage with two screws (with metal washers) on both sides of the cage. 4 4. Re-install the HDD cage to the chassis. Align the HDD cage and bay assembly rails, then carefully push the HDD cage until it is flushed to the chassis. ASUS AP120-E1 user guide 2-11
-
 1
1 -
2
-
3
-
4
-
5
-
6
-
7
-
8
-
9
-
10
-
11
-
12
-
13
-
14
-
15
-
16
-
17
-
18
-
19
-
20
-
21
-
 22
22 -
 23
23 -
 24
24 -
 25
25 -
 26
26 -
 27
27 -
 28
28 -
 29
29 -
 30
30 -
 31
31 -
 32
32 -
33
-
34
-
35
-
36
-
37
-
38
-
39
-
40
-
41
-
42
-
43
-
44
-
45
-
46
-
47
-
48
-
49
-
50
-
51
-
52
 |
 |