Asus CUA266 CUA266 User Manual - Page 58
Notes for JumperFree Mode
 |
View all Asus CUA266 manuals
Add to My Manuals
Save this manual to your list of manuals |
Page 58 highlights
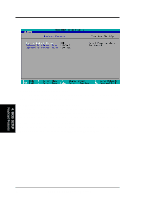
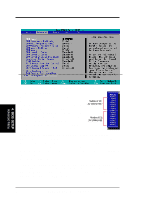
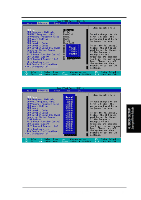
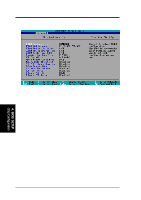
4. BIOS SETUP PS/2 Mouse Function Control [Auto] The default setting [Auto] allows the system to detect a PS/2 mouse at startup. If a mouse is detected, the BIOS assigns IRQ12 to the PS/2 mouse. Otherwise, IRQ12 can be used for expansion cards. When you set this field to [Enabled], BIOS always reserves IRQ12, whether or not a PS/2 mouse is detected at startup. Configuration options: [Enabled] [Auto] USB Legacy Support [Auto] This motherboard supports Universal Serial Bus (USB) devices. The default of [Auto] allows the system to detect a USB device at startup. If detected, the USB controller is enabled. If not detected, the USB controller is disabled. When you set this field to [Disabled], the USB controller is disabled whether you are using a USB device or not. Configuration options: [Disabled] [Enabled] [Auto] OS/2 Onboard Memory > 64M [Disabled] When using OS/2 operating systems with installed DRAM of greater than 64MB, you need to set this option to [Enabled]. Otherwise, leave to the default setting [Disabled]. Configuration options: [Disabled] [Enabled] Notes for JumperFree Mode CPU Upgrade/Reinstallation To ensure that the system can enter BIOS Setup after changing the processor, the system starts up running at a bus speed of 66MHz and a fail-safe CPU internal frequency (4x66MHz for the Intel Coppermine processor or 2x66MHz for non-Coppermine processors). Then it automatically takes you to the Advanced menu with a popup menu of all the possible CPU internal frequencies. Refer to the figures on the next page for illustrations of the configuration options for CPUs with locked and unlocked frequency multiplier. System Hangup If the system crashes or hangs due to improper frequency settings, power OFF the system and restart. The system starts up in safe mode running at a bus speed of 66MHz and enters the BIOS Setup. 4. BIOS SETUP JumperFree Mode 58 ASUS CUA266 User's Manual
-
 1
1 -
2
-
3
-
4
-
5
-
6
-
7
-
8
-
9
-
10
-
11
-
12
-
13
-
14
-
15
-
16
-
17
-
18
-
19
-
20
-
21
-
22
-
23
-
24
-
25
-
26
-
27
-
28
-
29
-
30
-
31
-
32
-
33
-
34
-
35
-
36
-
37
-
38
-
39
-
40
-
41
-
42
-
43
-
44
-
45
-
46
-
47
-
48
-
49
-
50
-
51
-
52
-
 53
53 -
 54
54 -
 55
55 -
 56
56 -
 57
57 -
 58
58 -
 59
59 -
 60
60 -
 61
61 -
 62
62 -
 63
63 -
64
-
65
-
66
-
67
-
68
-
69
-
70
-
71
-
72
-
73
-
74
-
75
-
76
-
77
-
78
-
79
-
80
-
81
-
82
-
83
-
84
-
85
-
86
-
87
-
88
-
89
-
90
-
91
-
92
-
93
-
94
 |
 |
