Asus Hummingbird User Guide - Page 83
Create Array, RAID Level
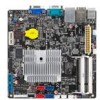 |
View all Asus Hummingbird manuals
Add to My Manuals
Save this manual to your list of manuals |
Page 83 highlights
4. The Create Array screen appears. ENTER/SPACE:Select, ESC:Back/Exit [Adapter] [Create] [Delete] Select free disks to create **I04NCDErXeRMCPTaaaao01tixpredatScALiireztrveyDSSae((iAAylMMsTTBBkAA))::N:::aHHmii2R2ett0A0aa0I00D0cc202hh44ii11 HDS721010KLA330 HDS721010KLA330 Stripe Size : 64KB Quick Init : No Cache Mode : Write Back Array Name : Disks ID : 0 1 NEXT Size Speed Status 1TB SATA II FREE 1TB SATA II FREE Marvell BIOS Setup (c) 2006 Marvell Technology, Ltd. 5. Use the arrow key to select the RAID Level item and press to display the available RAID set. Select a RAID set and press to create. ENTER/SPACE:Select, ESC:Back/Exit [Adapter] [Create] [Delete] Select free disks to create **I04NCDErXeRMCPTaaaao01tixpredatScALiireztrveyDSSae((iAAylMMsTTBBkAA))::N:::aHHmiiR22ettA00*aaI00RRD00ccAA022hhII44DDii1101 HDS721010KLA330 HDS721010KLA330 Stripe Size Quick Init Cache Mode Array Name Disks ID : 64KB : No : Write Back : : 0 1 NEXT Size Speed Status 1TB SATA II FREE 1TB SATA II FREE Marvell BIOS Setup (c) 2006 Marvell Technology, Ltd. • The available RAID sets vary with the number of disks you select. The RAID sets that you are not allowed to create are grayed out. • Except for the RAID Level item, we recommend you keep the default values for the other items in Create Array screen. ASUS Hummingbird 5-7
-
 1
1 -
2
-
3
-
4
-
5
-
6
-
7
-
8
-
9
-
10
-
11
-
12
-
13
-
14
-
15
-
16
-
17
-
18
-
19
-
20
-
21
-
22
-
23
-
24
-
25
-
26
-
27
-
28
-
29
-
30
-
31
-
32
-
33
-
34
-
35
-
36
-
37
-
38
-
39
-
40
-
41
-
42
-
43
-
44
-
45
-
46
-
47
-
48
-
49
-
50
-
51
-
52
-
53
-
54
-
55
-
56
-
57
-
58
-
59
-
60
-
61
-
62
-
63
-
64
-
65
-
66
-
67
-
68
-
69
-
70
-
71
-
72
-
73
-
74
-
75
-
76
-
77
-
 78
78 -
 79
79 -
 80
80 -
 81
81 -
 82
82 -
 83
83 -
 84
84 -
 85
85 -
 86
86 -
 87
87 -
 88
88 -
89
-
90
-
91
-
92
-
93
-
94
-
95
-
96
-
97
-
98
-
99
-
100
-
101
-
102
-
103
-
104
-
105
-
106
-
107
-
108
-
109
-
110
-
111
-
112
 |
 |
