Asus P3-P5G31 User Manual - Page 33
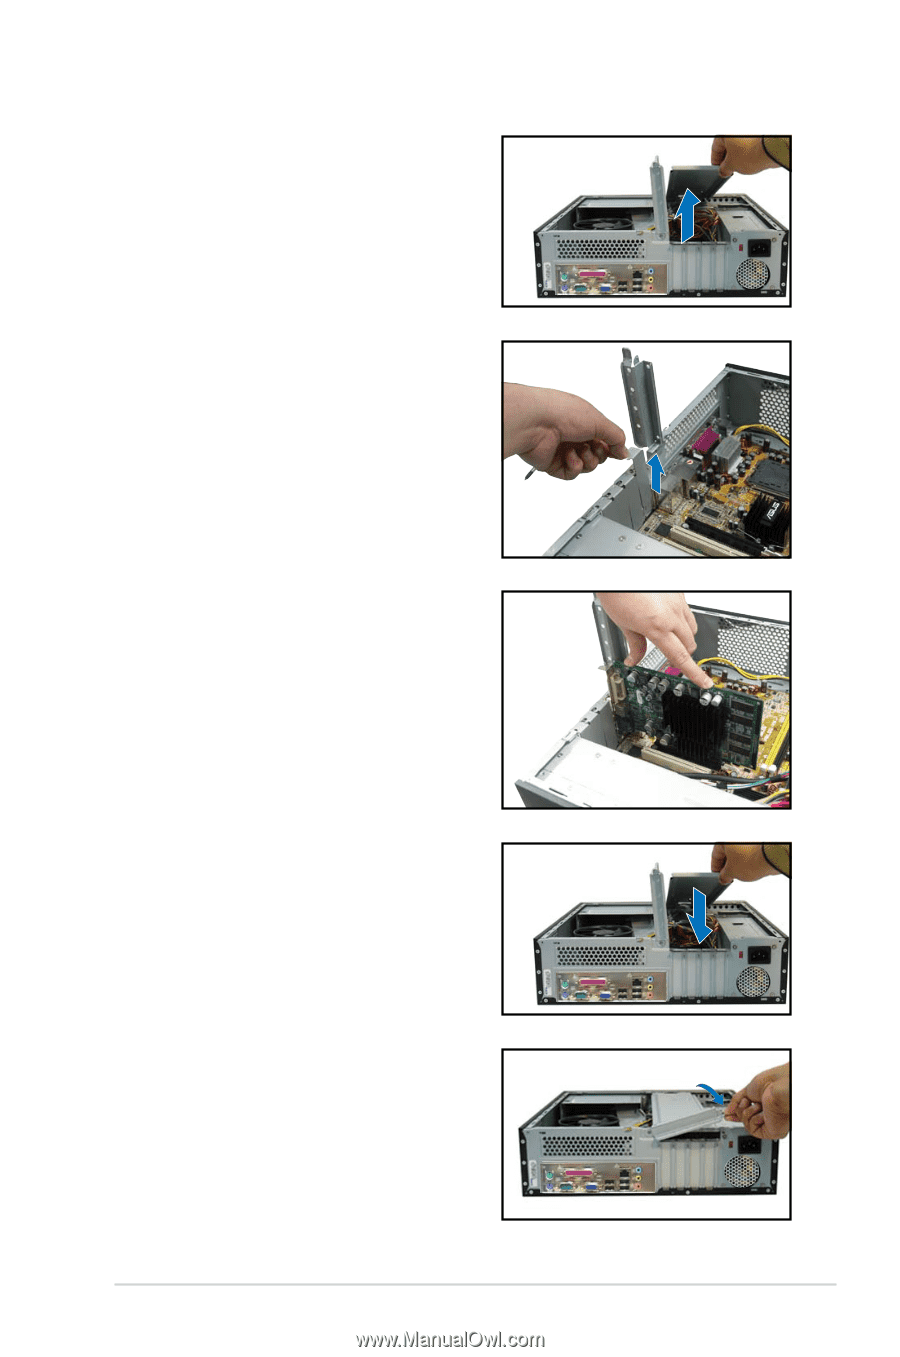
is completely seated on the slot.
 |
View all Asus P3-P5G31 manuals
Add to My Manuals
Save this manual to your list of manuals |
Page 33 highlights
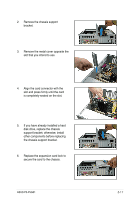
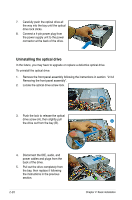
2. Remove the chassis support bracket. 3. Remove the metal cover opposite the slot that you intend to use. 4. Align the card connector with the slot and press firmly until the card is completely seated on the slot. 5. If you have already installed a hard disk drive, replace the chassis support bracket; otherwise, install other components before replacing the chassis support bracket. 6. Replace the expansion card lock to secure the card to the chassis. ASUS P3-P5G31 2-17
-
 1
1 -
2
-
3
-
4
-
5
-
6
-
7
-
8
-
9
-
10
-
11
-
12
-
13
-
14
-
15
-
16
-
17
-
18
-
19
-
20
-
21
-
22
-
23
-
24
-
25
-
26
-
27
-
 28
28 -
 29
29 -
 30
30 -
 31
31 -
 32
32 -
 33
33 -
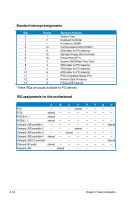 34
34 -
 35
35 -
 36
36 -
 37
37 -
 38
38 -
39
-
40
-
41
-
42
-
43
-
44
-
45
-
46
-
47
-
48
-
49
-
50
-
51
-
52
-
53
-
54
-
55
-
56
-
57
-
58
-
59
-
60
-
61
-
62
-
63
-
64
-
65
-
66
-
67
-
68
-
69
-
70
-
71
-
72
-
73
-
74
-
75
-
76
-
77
-
78
-
79
-
80
-
81
-
82
-
83
-
84
-
85
-
86
-
87
-
88
-
89
-
90
-
91
-
92
-
93
-
94
-
95
-
96
-
97
-
98
-
99
-
100
 |
 |
2-17
ASUS P3-P5G31
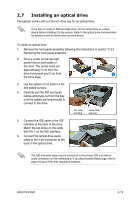
3.
Remove the metal cover opposite the
slot that you intend to use.
5.
If you have already installed a hard
disk drive, replace the chassis
support bracket; otherwise, install
other components before replacing
the chassis support bracket.
4.
Align the card connector with the
slot and press firmly until the card
is completely seated on the slot.
6.
Replace the expansion card lock to
secure the card to the chassis.
2.
Remove the chassis support
bracket.