Asus P5KPL SE User Manual - Page 40
Creating a bootable floppy disk - bios update download
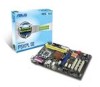 |
View all Asus P5KPL SE manuals
Add to My Manuals
Save this manual to your list of manuals |
Page 40 highlights
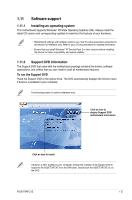
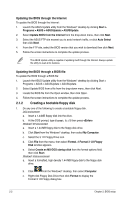
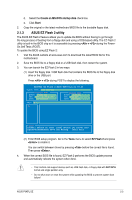
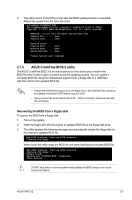
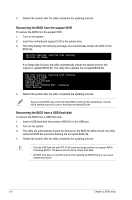
Updating the BIOS through the Internet To update the BIOS through the Internet: 1. Launch the ASUS Update utility from the Windows® desktop by clicking Start > Programs > ASUS > ASUSUpdate > ASUSUpdate. 2. Select Update BIOS from the Internet from the drop‑down menu, then click Next. 3. Select the ASUS FTP site nearest you to avoid network traffic, or click Auto Select then click Next. 4. From the FTP site, select the BIOS version that you wish to download then click Next. 5. Follow the screen instructions to complete the update process. The ASUS Update utility is capable of updating itself through the Internet. Always update the utility to avail all its features. Updating the BIOS through a BIOS file To update the BIOS through a BIOS file: 1. Launch the ASUS Update utility from the Windows® desktop by clicking Start > Programs > ASUS > ASUSUpdate > ASUSUpdate. 2. Select Update BIOS from a file from the drop‑down menu, then click Next. 3. Locate the BIOS file from the Open window, then click Open. 4. Follow the screen instructions to complete the update process. 2.1.2 Creating a bootable floppy disk 1. Do any one of the following to create a bootable floppy disk. DOS environment a. Insert a 1.44MB floppy disk into the drive. b. At the DOS prompt, type format A:/S then press . Windows® XP environment a. Insert a 1.44 MB floppy disk to the floppy disk drive. b. Click Start from the Windows® desktop, then select My Computer. c. Select the 3 1/2 Floppy Drive icon. d. Click File from the menu, then select Format. A Format 3 1/2 Floppy Disk window appears. e. Select Create an MS-DOS startup disk from the format options field, then click Start. Windows® Vista environment a. Insert a formatted, high density 1.44 MB floppy disk to the floppy disk drive. b. Click from the Windows® desktop, then select Computer. c. Right-click Floppy Disk Drive then click Format to display the Format 3 1/2 Floppy dialog box. 2-2 Chapter 2: BIOS setup
-
 1
1 -
2
-
3
-
4
-
5
-
6
-
7
-
8
-
9
-
10
-
11
-
12
-
13
-
14
-
15
-
16
-
17
-
18
-
19
-
20
-
21
-
22
-
23
-
24
-
25
-
26
-
27
-
28
-
29
-
30
-
31
-
32
-
33
-
34
-
 35
35 -
 36
36 -
 37
37 -
 38
38 -
 39
39 -
 40
40 -
 41
41 -
 42
42 -
 43
43 -
 44
44 -
 45
45 -
46
-
47
-
48
-
49
-
50
-
51
-
52
-
53
-
54
-
55
-
56
-
57
-
58
-
59
-
60
 |
 |