Asus RS720-E7-RS24-EG RS720-E7-RS24-EG User's Manual - Page 25
Air Duct, Removing the air duct, Installing the air duct
 |
View all Asus RS720-E7-RS24-EG manuals
Add to My Manuals
Save this manual to your list of manuals |
Page 25 highlights
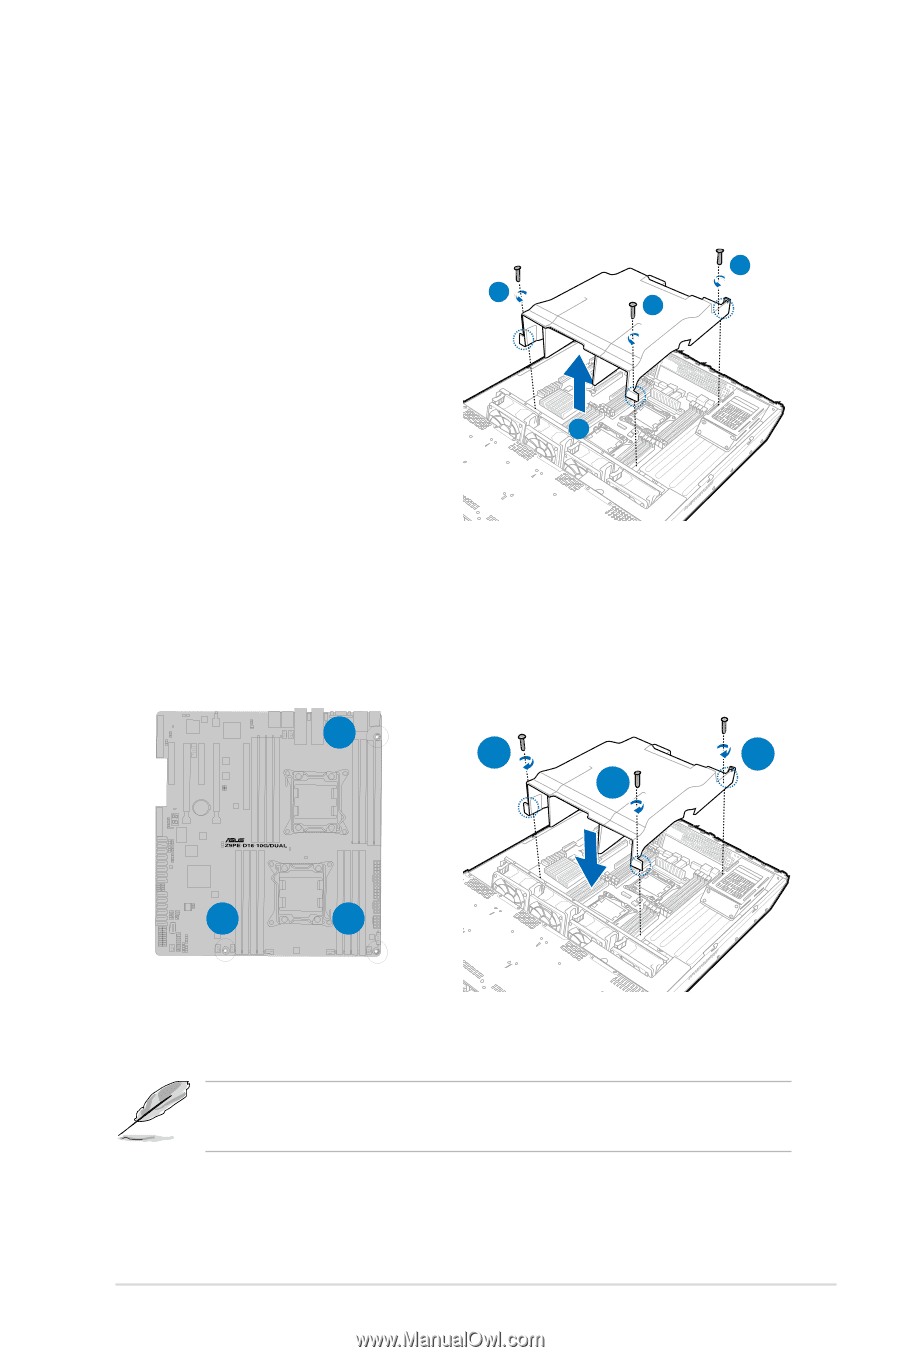
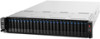
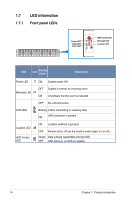
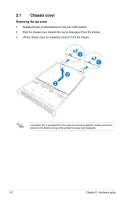
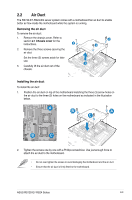
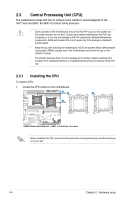
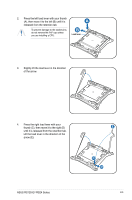
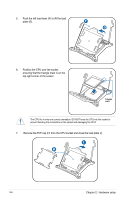
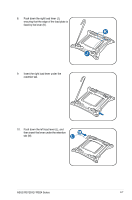
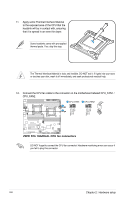
2.2 Air Duct The RS740-E7-RS24-EG server system comes with a motherboard fan air duct to enable better air flow inside the motherboard while the system is running. Removing the air duct To remove the air duct: 1. Remove the chassis cover. Refer to section 2.1 Chassis cover for the instructions. 2 2. Remove the three screws securing the air duct. 2 2 Set the three (3) screws aside for later use. 3 3. Carefully lift the air duct out of the chassis. Installing the air duct To install the air duct: 1. Position the air duct on top of the motherboard matching the three (3) screw holes on the air duct to the three (3) holes on the motherboard as indicated in the illustration below. A B A C B C 2. Tighten the screws one by one with a Phillips screwdriver. Use just enough force to attach the air duct to the motherboard. • Do not over tighten the screws to avoid damaging the motherboard and the air duct. • Ensure that the air duct is firmly fitted to the motherboard. ASUS RS720-E7-RS24 Series 2-3
-
 1
1 -
2
-
3
-
4
-
5
-
6
-
7
-
8
-
9
-
10
-
11
-
12
-
13
-
14
-
15
-
16
-
17
-
18
-
19
-
 20
20 -
 21
21 -
 22
22 -
 23
23 -
 24
24 -
 25
25 -
 26
26 -
 27
27 -
 28
28 -
 29
29 -
 30
30 -
31
-
32
-
33
-
34
-
35
-
36
-
37
-
38
-
39
-
40
-
41
-
42
-
43
-
44
-
45
-
46
-
47
-
48
-
49
-
50
-
51
-
52
-
53
-
54
-
55
-
56
-
57
-
58
-
59
-
60
-
61
-
62
-
63
-
64
-
65
-
66
-
67
-
68
-
69
-
70
-
71
-
72
-
73
-
74
-
75
-
76
-
77
-
78
-
79
-
80
-
81
-
82
-
83
-
84
-
85
-
86
-
87
-
88
-
89
-
90
-
91
-
92
-
93
-
94
-
95
-
96
-
97
-
98
-
99
-
100
-
101
-
102
-
103
-
104
-
105
-
106
-
107
-
108
-
109
-
110
-
111
-
112
-
113
-
114
-
115
-
116
-
117
-
118
-
119
-
120
-
121
-
122
-
123
-
124
-
125
-
126
-
127
-
128
-
129
-
130
-
131
-
132
-
133
-
134
-
135
-
136
-
137
-
138
-
139
-
140
-
141
-
142
-
143
-
144
-
145
-
146
-
147
-
148
-
149
-
150
-
151
-
152
-
153
-
154
-
155
-
156
-
157
-
158
-
159
-
160
-
161
-
162
-
163
-
164
-
165
-
166
-
167
-
168
-
169
-
170
-
171
-
172
-
173
-
174
-
175
-
176
-
177
-
178
-
179
-
180
-
181
-
182
-
183
-
184
-
185
-
186
-
187
-
188
-
189
-
190
-
191
-
192
-
193
-
194
-
195
-
196
-
197
-
198
-
199
-
200
-
201
-
202
 |
 |