Asus TUSI-M TUSI-M User Manual - Page 19
ASUS TUSI-M User's Manual, Manual CPU Settings Table, SDRAM, Frequency Selection Switches
 |
View all Asus TUSI-M manuals
Add to My Manuals
Save this manual to your list of manuals |
Page 19 highlights
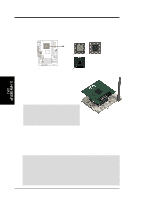
3. HARDWARE SETUP Manual CPU Settings Table Set the jumpers according to the internal speed of your processor as follows: CPU (MHz) 66 100 150 133 100 100 133 66 97 70 95 95 112 97 96 SDRAM (MHz) 100 100 100 100 133 150 133 66 97 105 95 126 112 129 96 Frequency Selection Switches JP3 JP1 JP2 JP0 [1-2] [1-2] [1-2] [1-2] [1-2] [1-2] [1-2] [2-3] [1-2] [2-3] [1-2] [1-2] [1-2] [2-3] [1-2] [2-3] [1-2] [1-2] [2-3] [2-3] [1-2] [2-3] [2-3] [1-2] [1-2] [2-3] [2-3] [2-3] [2-3] [1-2] [1-2] [1-2] [2-3] [1-2] [1-2] [2-3] [2-3] [2-3] [1-2] [1-2] [2-3] [2-3] [1-2] [2-3] [2-3] [1-2] [2-3] [1-2] [2-3] [1-2] [2-3] [2-3] [2-3] [2-3] [2-3] [1-2] [2-3] [2-3] [2-3] [2-3] For updated processor settings, visit ASUS's web site: WWW.ASUS.COM WARNING! Premature wearing of the processor may result when overclocking. Be sure that the DIMM you use can handle the specified SDRAM MHz or else bootup will not be possible. 3. H/W SETUP Motherboard Settings ASUS TUSI-M User's Manual 19
-
 1
1 -
2
-
3
-
4
-
5
-
6
-
7
-
8
-
9
-
10
-
11
-
12
-
13
-
 14
14 -
 15
15 -
 16
16 -
 17
17 -
 18
18 -
 19
19 -
 20
20 -
 21
21 -
 22
22 -
 23
23 -
 24
24 -
25
-
26
-
27
-
28
-
29
-
30
-
31
-
32
-
33
-
34
-
35
-
36
-
37
-
38
-
39
-
40
-
41
-
42
-
43
-
44
-
45
-
46
-
47
-
48
-
49
-
50
-
51
-
52
-
53
-
54
-
55
-
56
-
57
-
58
-
59
-
60
-
61
-
62
-
63
-
64
-
65
-
66
-
67
-
68
-
69
-
70
-
71
-
72
-
73
-
74
-
75
-
76
-
77
-
78
-
79
-
80
-
81
-
82
-
83
-
84
-
85
-
86
-
87
-
88
-
89
-
90
-
91
-
92
-
93
-
94
-
95
-
96
 |
 |