Asus TUSI-M TUSI-M User Manual - Page 41
Bios Setup
 |
View all Asus TUSI-M manuals
Add to My Manuals
Save this manual to your list of manuals |
Page 41 highlights
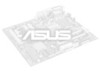
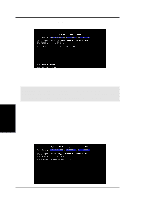
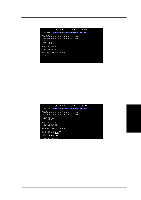
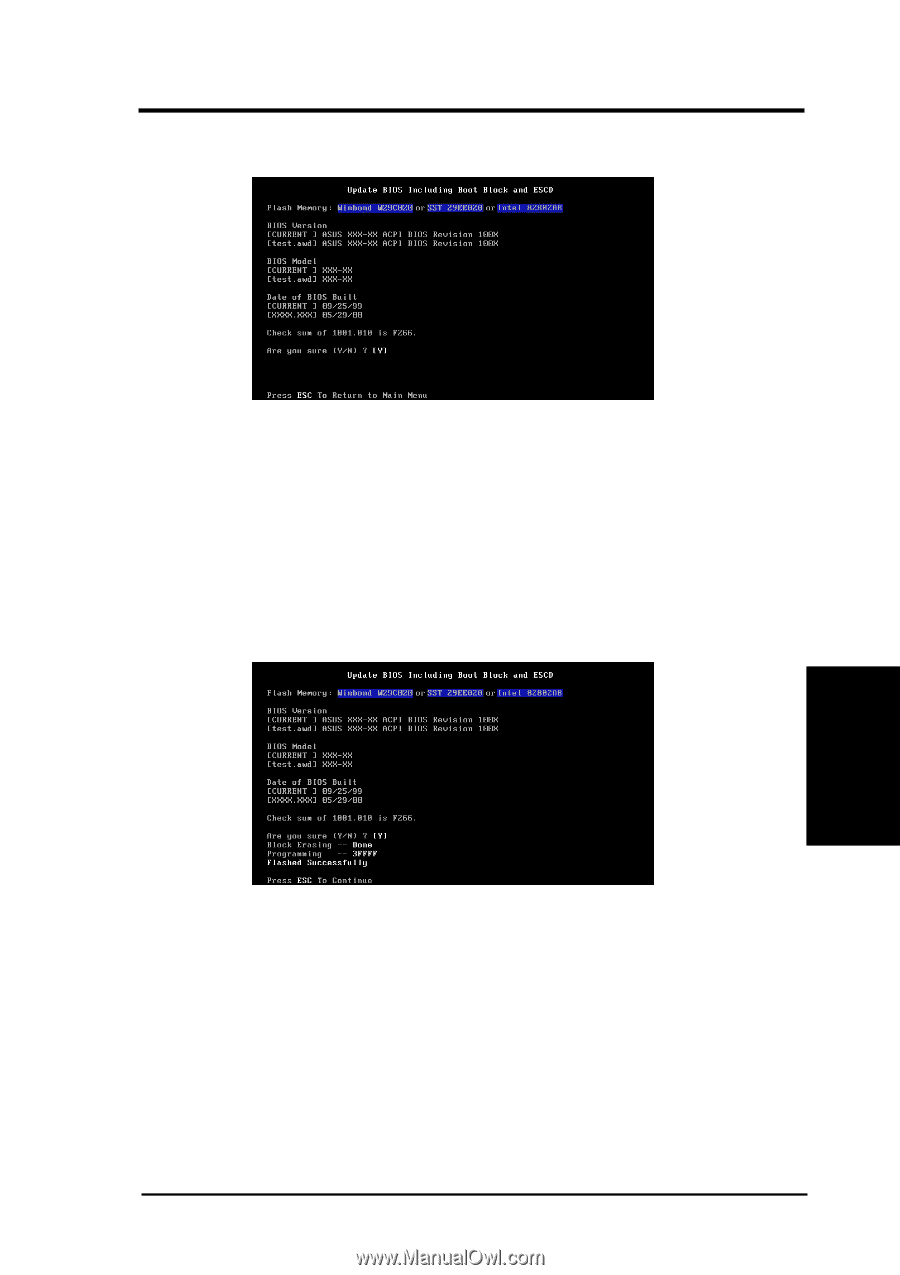
4. BIOS SETUP 6. When prompted to confirm the BIOS update, press Y to start the update. 7. The utility starts to program the new BIOS information into the flash ROM. The boot block will be updated automatically only when necessary. This will minimize the chance that a failed update will prevent your system from booting up. When the programming is finished, Flashed Successfully will be displayed. 4. BIOS SETUP Updating BIOS ASUS TUSI-M User's Manual 41
-
 1
1 -
2
-
3
-
4
-
5
-
6
-
7
-
8
-
9
-
10
-
11
-
12
-
13
-
14
-
15
-
16
-
17
-
18
-
19
-
20
-
21
-
22
-
23
-
24
-
25
-
26
-
27
-
28
-
29
-
30
-
31
-
32
-
33
-
34
-
35
-
 36
36 -
 37
37 -
 38
38 -
 39
39 -
 40
40 -
 41
41 -
 42
42 -
 43
43 -
 44
44 -
 45
45 -
 46
46 -
47
-
48
-
49
-
50
-
51
-
52
-
53
-
54
-
55
-
56
-
57
-
58
-
59
-
60
-
61
-
62
-
63
-
64
-
65
-
66
-
67
-
68
-
69
-
70
-
71
-
72
-
73
-
74
-
75
-
76
-
77
-
78
-
79
-
80
-
81
-
82
-
83
-
84
-
85
-
86
-
87
-
88
-
89
-
90
-
91
-
92
-
93
-
94
-
95
-
96
 |
 |
ASUS TUSI-M User’s Manual
41
4. BIOS SETUP
4. BIOS SETUP
6.
When prompted to confirm the BIOS update, press
Y
to start the update.
Updating BIOS
7.
The utility starts to program the new BIOS information into the flash
ROM. The boot block will be updated automatically only when neces-
sary. This will minimize the chance that a failed update will prevent
your system from booting up. When the programming is finished,
Flashed
Successfully
will be displayed.