Asus Z10PE-D16 WS User Guide - Page 29
ASUS Z10PE-D16 WS, Get the CPU.
 |
View all Asus Z10PE-D16 WS manuals
Add to My Manuals
Save this manual to your list of manuals |
Page 29 highlights
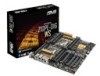
4. Push the left load lever to slightly lift the load plate (G). Do not insert the load lever into the retention tab. edge of the Load plate 5. Hold the edge then gently lift the load plate (H). Load plate 6. Get the CPU. 7. Align and position the CPU over the socket ensuring that the triangle mark on the CPU matches the triangle mark on the socket box. 8. Install the CPU into the slot. The CPU fits in only one correct orientation. DO NOT force the CPU into the socket to prevent bending the CPU pins on the socket. 9. Gently push the load plate just enough to let it sit on top of the CPU. Do not force to close the load plate as it may damage the CPU. Triangle mark ASUS Z10PE-D16 WS 2-9
-
 1
1 -
2
-
3
-
4
-
5
-
6
-
7
-
8
-
9
-
10
-
11
-
12
-
13
-
14
-
15
-
16
-
17
-
18
-
19
-
20
-
21
-
22
-
23
-
 24
24 -
 25
25 -
 26
26 -
 27
27 -
 28
28 -
 29
29 -
 30
30 -
 31
31 -
 32
32 -
 33
33 -
 34
34 -
35
-
36
-
37
-
38
-
39
-
40
-
41
-
42
-
43
-
44
-
45
-
46
-
47
-
48
-
49
-
50
-
51
-
52
-
53
-
54
-
55
-
56
-
57
-
58
-
59
-
60
-
61
-
62
-
63
-
64
-
65
-
66
-
67
-
68
-
69
-
70
-
71
-
72
-
73
-
74
-
75
-
76
-
77
-
78
-
79
-
80
-
81
-
82
-
83
-
84
-
85
-
86
-
87
-
88
-
89
-
90
-
91
-
92
-
93
-
94
-
95
-
96
-
97
-
98
-
99
-
100
-
101
-
102
-
103
-
104
-
105
-
106
-
107
-
108
-
109
-
110
-
111
-
112
-
113
-
114
-
115
-
116
-
117
-
118
-
119
-
120
-
121
-
122
-
123
-
124
-
125
-
126
-
127
-
128
-
129
-
130
-
131
-
132
-
133
-
134
-
135
-
136
-
137
-
138
-
139
-
140
-
141
-
142
-
143
-
144
-
145
-
146
-
147
-
148
-
149
-
150
-
151
-
152
-
153
-
154
-
155
-
156
-
157
-
158
-
159
-
160
-
161
-
162
-
163
-
164
-
165
-
166
-
167
-
168
-
169
-
170
-
171
-
172
-
173
-
174
-
175
-
176
-
177
-
178
-
179
-
180
-
181
-
182
-
183
-
184
-
185
-
186
-
187
-
188
-
189
-
190
-
191
-
192
-
193
-
194
 |
 |

ASUS Z10PE-D16 WS
2-9
9.
Gently push the load plate just enough
to let it sit on top of the CPU.
Do not force to close the load plate
as it may damage the CPU.
4.
Push the left load lever to slightly lift the
load plate (G).
Do not insert the load lever into the
retention tab.
The CPU fits in only one correct
orientation. DO NOT force the CPU
into the socket to prevent bending the
CPU pins on the socket.
6.
Get the CPU.
7.
Align and position the CPU over the
socket ensuring that the triangle mark on
the CPU matches the triangle mark on
the socket box.
Triangle mark
5.
Hold the edge then gently lift the load
plate (H).
8.
Install the CPU into the slot.
Load plate
edge of the Load plate