Audiovox VOD806 Operation Manual - Page 14
Press the FM Transmitter On/Off switch to turn the FM - fm modulator
 |
UPC - 044476005503
View all Audiovox VOD806 manuals
Add to My Manuals
Save this manual to your list of manuals |
Page 14 highlights
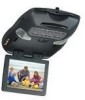
Wired Headphones There are two 1/8" headphone jacks on the VOD806 that can be used with any standard wired stereo headphones. These jacks are controlled by the volume up / down buttons on the VOD806 remote control. Remove the protective plastic cover to access the jacks. Remember to replace the cover when the jacks are not in use. Wired FM Modulator The VOD806 is equipped with an outboard RF modulator that allows you to listen to the VOD806 audio signal by tuning your vehicle's radio to the selected frequency, (88.3, 88.7 or 89.1). This feature is accessed by using the FM transmitter buttons on the remote (On/ Off, Select). Whenever the RF modulator is on, broadcast reception on the vehicle's radio will be poor. Switching off the FM modulator will allow normal radio reception. Press the FM Transmitter On/Off switch to turn the FM Modulator on. The LCD screen will display the frequency setting of the FM Modulator. Pressing the Select button will change the Frequency of the FM modulator (88.3/ 88.7/89.1) AV1 The AV1 input may be connected to a Video Cassette Player (VCP), video game system, or other audio / video device. To access the AV1 input, turn the VOD806 on and press the source button on the VOD806 or the Source button on the remote control until "AV1" is displayed on the screen. Turn the video source component on with its power button or remote control. The VOD806 is now ready to play the audio and video signals from the source connected to the AV1 input. AUX A video game system, Camcorder or other audio / video device may be connected to the AUX Input jacks (see Figure 1. for the location of these jacks) To access the AUX source, turn the VOD806 on and press the source button on the VOD806 or the Source button on the remote control until "AUX" is displayed on the screen. Turn the video source component on with its power button or remote control. The VOD806 is now ready to play the audio and video signals from the source connected to the AUX input. -11- 128-6258 14 of 28
-
 1
1 -
2
-
3
-
4
-
5
-
6
-
7
-
8
-
 9
9 -
 10
10 -
 11
11 -
 12
12 -
 13
13 -
 14
14 -
 15
15 -
 16
16 -
 17
17 -
 18
18 -
 19
19 -
20
-
21
-
22
-
23
-
24
-
25
-
26
-
27
-
28
 |
 |
