Behringer MOTOR 49 Quick Start Guide - Page 12
MOTÖR 61 / MOTÖR 49 Getting started
 |
View all Behringer MOTOR 49 manuals
Add to My Manuals
Save this manual to your list of manuals |
Page 12 highlights
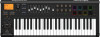
22 MOTÖR 61 / MOTÖR 49 MOTÖR 61 / MOTÖR 49 Getting started (EN) Step 3: Getting started OVERVIEW This 'Getting Started Guide' will help you set up the MOTÖR keyboard controller and briefly introduce its capabilities. The MOTÖR keyboard controller allows you to control your virtual instruments and Digital Audio Workstation (DAW) with the accurate touch and feel of a high quality keyboard, 8 rotary encoders, 9 touch-sensitive motorized 60 mm faders, and 8 backlit drum pads with velocity and pressure sensitivity. Generally the MOTÖR keyboard will operate in standard MIDI mode with free assignments by the user and preset handling; alternatively, the MOTÖR keyboard can operate in MC mode. SOFTWARE SETUP The MOTÖR controller is a USB Class Compliant MIDI device, and so no driver installation is required. HARDWARE SETUP Make all the connections in your system. Apply power to the MOTÖR keyboard controller using the supplied power adapter only. Alternatively, it can be powered using the USB connection to a live computer, instead of using the power adapter. (In this operation, the fader motors are disabled, and the display and button LEDs are dimmed.) Turn on the power switch. SETTING UP In your DAW, find and select the MOTÖR keyboard controller as the MIDI device. Follow the instructions in your DAW to map the features of the MOTÖR keyboard controller to operate the various functions and controls of your DAW. For example, the MOTÖR faders can be mapped to the DAW track volume controls, the encoders can be mapped to the DAW pan controls, the master fader mapped to the DAW master volume, the various transport controls mapped to the DAW transport controls. For an example within a typical mapping procedure, select a DAW parameter (such as track 1 volume) then the DAW will wait for you to move the appropriate MOTÖR control (fader 1). Then repeat until all functions are correctly mapped. Operate the MOTÖR controls and check that the DAW controls move accordingly. Repeat any mappings that are not working correctly. Note that for assignments such as the faders, pads, or encoders of Bank 9-16 (for example), make sure that the Bank 9-16 is selected during mapping to the DAW, and similarly for other banks. For alternative assignments for Fader Touch, make sure the Fader Shift, or Fader Focus button is held down while mapping the Fader Touch to your DAW. Save this in your DAW, so the MOTÖR keyboard controller mapping can be easily recalled. Make various copies so you can recall different configurations. The GLOBAL and EDIT menus allow you to customize the MOTÖR keyboard controller to your liking. The GLOBAL/MIDI/CHANGE CONTROL allows you to customize any of the MOTÖR controls to suit your DAW and your preferences. Your changes can then be saved as a PRESET for easy recall, using the EDIT/PRESETS menu. Up to 64 presets can be saved, and a list of your presets is shown in the EDIT/PRESETS/PRESET OVERVIEW menu. FIRMWARE UPDATE Check that the latest firmware in your unit is up to date (see the GLOBAL/DEVICE/FIRMWARE menu of the display). If not, then updating the firmware will give you the latest enhancements. Visit our website behringer.com, and download the latest firmware from the MOTÖR product page. IMPORTANT NOTE: Updating the firmware will also delete any user presets you have made! Press and hold both OCTAVE buttons at the same time, while powering on the keyboard. A firmware update screen will appear and you can release both buttons. Run the firmware application on your computer, and the computer screen will explain the firmware update procedure. 23 Quick Start Guide (ES) Paso 3: Puesta en marcha RESUMEN Este 'Manual de puesta en marcha' le ayudará a configurar su teclado controlador MOTÖR y le enseñará de forma resumida sus capacidades. El teclado controlador MOTÖR le permite controlar sus instrumentos virtuales y workstation de audio digital (DAW) gracias a la precisión y respuesta de su teclado de alta calidad, sus 8 mandos giratorios, 9 faders motorizados y sensibles al tacto de 60 mm de longitud y 8 parches de batería retroiluminados y con sensibilidad a la presión y la velocidad. Por lo general, el teclado MOTÖR funcionará en el modo MIDI standard con asignaciones libres y gestión de presets por parte del usuario; alternativamente, el teclado MOTÖR también puede funcionar en el modo MC. CONFIGURACIÓN DEL SOFTWARE El controlador MOTÖR es un dispositivo MIDI con capacidad USB, por lo que no requiere la instalación de ningún driver. CONFIGURACIÓN DEL HARDWARE Realice todas las conexiones de su sistema. Conecte a la corriente su teclado controlador MOTÖR usando únicamente el adaptador incluido. De forma alternativa, esta unidad también puede recibir corriente a través de la conexión USB a un ordenador encendido. (En este caso, los motores de los faders quedan anulados y la iluminación de la pantalla y los pilotos de los botones es reducida). Encienda la unidad con el interruptor POWER. CONFIGURACIÓN En su DAW, localice y elija el teclado controlador MOTÖR como dispositivo MIDI. Siga las instrucciones correspondientes en su DAW para mapear o asignar las funciones del teclado MOTÖR para que controlen las distintas funciones y botones de su DAW. Por ejemplo, puede asignar los faders del MOTÖR a los controles de volumen de pista del DAW, los mandos giratorios a los controles de panorama, el fader máster al volumen máster del DAW y los distintos controles de transporte a esos mismos controles del DAW. Como ejemplo de un proceso de asignación típico, elija un parámetro del DAW (como puede ser el volumen de la pista 1) y el DAW esperará a que mueva el control adecuado del MOTÖR (fader 1). Repita después este mismo proceso hasta que haya asignado todas las funciones que quiera. Use los distintos controles del MOTÖR y verifique que los controles del DAW se mueven o cambian correctamente. Repita el proceso de asignación si detecta que alguno de los controles no funciona correctamente. Tenga en cuenta esto para las asignaciones de los faders, parches o mandos giratorios del banco 9-16 (por ejemplo) y asegúrese de que haya elegido ese banco 9-16 durante la asignación de funciones del DAW, y actúe de la misma forma para el resto de bancos. Para una asignación de función alternativa (o secundaria) para el toque de fader, asegúrese de mantener pulsado el botón FADER SHIFT, o FADER FOCUS mientras realiza la asignación del toque de fader en su DAW. Almacene estos datos en su DAW para que pueda recargar con facilidad las asignaciones del teclado MOTÖR. Realice varias copias para que pueda recargar distintas configuraciones. Los menús GLOBAL y EDIT le permiten personalizar el comportamiento del teclado controlador MOTÖR de acuerdo a sus gustos. El menú GLOBAL/MIDI/CHANGE CONTROL le permite personalizar cualquiera de los controles del MOTÖR para adaptarlo a su DAW y a sus gustos personales. Posteriormente puede almacenar esos cambios como un PRESET para que pueda recargarlo fácilmente, usando para ello el menú EDIT/ PRESETS. Puede almacenar hasta 64 presets y encontrará un listado con un resumen de todos ellos en el menú EDIT/PRESETS/ PRESET OVERVIEW. ACTUALIZACIÓN DEL FIRMWARE Compruebe que el firmware instalado en su unidad sea la última versión disponible (verifíquelo en el menú GLOBAL/DEVICE/FIRMWARE). Si no lo es, la actualización de este firmware hará que tenga las últimas mejoras disponibles. Para ello, visite nuestra página web (behringer.com) y descárguese la última versión de firmware desde la página de producto del MOTÖR. NOTA IMPORTANTE: ¡El proceso de actualización del firmware eliminará cualquier preset que hubiese creado previamente! Mantenga pulsados a la vez los dos botones OCTAVE mientras enciende el teclado. Aparecerá una pantalla de actualización de firmware, tras lo cual podrá dejar de pulsar ambos botones. Ejecute entonces en su ordenador la aplicación de actualización y en la pantalla del ordenador aparecerán los pasos a seguir.
-
 1
1 -
2
-
3
-
4
-
5
-
6
-
 7
7 -
 8
8 -
 9
9 -
 10
10 -
 11
11 -
 12
12 -
 13
13 -
 14
14 -
 15
15 -
 16
16 -
 17
17 -
18
 |
 |
