Behringer RD-9 Manual - Page 17
Prefs
 |
View all Behringer RD-9 manuals
Add to My Manuals
Save this manual to your list of manuals |
Page 17 highlights
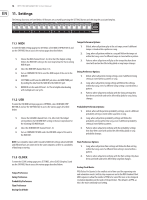
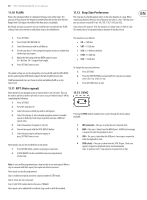
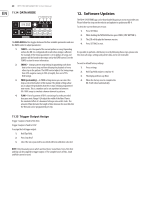
17 RHYTHM DESIGNER RD-9 User Manual This function allows communication with various analogue clock types as listed below: Clock Settings 1 PPS 1 PPQ 2 PPQ 4 PPQ 24 PPQ 48 PPQ NOTE: 1PPS advance's one sequencer step when one pulse is received. When working in 1PPS mode, your slave machine can advance one (and only one) sequencer step when receiving one pulse. Different step size can affect how the BPM be calculated. Working with 1/8 step size, 2 steps are equal to 1 beat, but working with 1/16 step size, 4 steps are equal to 1 beat, so the BPM number will be displayed differently in this mode on. 11.4 MAP The map function allows you to change the MIDI notes that trigger the RD-9 voices either via the USB or MIDI ports. The default numbers are listed in the table below. Voice Bass Drum Snare Drum Low Tom Mid Tom Hi Tom Rim Shot Clap Crash Ride Open Hat Closed Hat MIDI Note No. 36 38 45 47 50 37 39 49 51 46 42 To enter the MAP settings page press SETTINGS, select MAP (STEP BUTTON 4) and use the SELECT key for each voice to view the current MIDI note number. The DATA knob can be used to adjust the number from 0-127. The MIDI map is set globally and is the same for all songs and patterns. 11.5 PREFS To enter the PREFS settings page press SETTINGS, select PREFS (Step key 6) and use the DATA knob to adjust the various settings. Enhanced Mode This mode, when turned on activates the extra controls for the Bass Drum (P.DEPTH and PITCH) and the Hi-Hat pitch. To turn Enhanced Mode on: 1. Enter the PREFS settings. 2. Find Enhanced Mode by pressing the TAP/HOLD button. 3. Use the DATA control to turn on. 4. Press settings twice to exit. Chain Songs The Chain function allows you to link together songs. PREFS has three options: • Loop - Causes selected song to loop from beginning to end until the STOP button is pressed. Pressing the PLAY/PAUSE button will cause the next selected song to start from the beginning. • Hold - Causes the last bar of the selected song to repeat until stop is pressed. Pressing the PLAY/PAUSE button will cause the next selected song to start from the beginning. • Stop - The selected song will run from beginning to end, then stop at the end of the last bar. Pressing the PLAY/PAUSE will cause the next selected song to start from the beginning. Note that the above preferences are over-ridden when chaining songs (see section 8). Filter HPF Preference Set the HPF on/off state Globally, by Song or by Pattern. Filter Io Preference Set the Filters on/off state Globally, by Song or by Pattern. Filter Auto Preference Set the filters Automation state Globally, by Song or by Pattern. This determines how the filter uses recorded filter automation information. Poly Preference Set the Poly loop function to be controlled Globally, by Song or by Pattern (See section 11.7 for more information on polyrhythms). Step Size Preference Set the Step Size to be controlled Globally, by Song or by Pattern. Auto Advance Preference Set the Auto Advance Globally or by Song. Auto Scroll Preference Set the AUTO SCROLL function Globally or by Pattern. Bus Send Preference Set the bus send to Filter and Wave Designer Globally, by Song or by Pattern. Mute Preference Set the mute control preference Globally, by Song or by Pattern. Solo Preference Set the solo control preference Globally, by Song or by Pattern. Accent Preference Set the accent control preference Globally, by Song or by Pattern.
-
 1
1 -
2
-
3
-
4
-
5
-
6
-
7
-
8
-
9
-
10
-
11
-
 12
12 -
 13
13 -
 14
14 -
 15
15 -
 16
16 -
 17
17 -
 18
18 -
 19
19 -
 20
20 -
 21
21 -
 22
22 -
23
-
24
-
25
-
26
-
27
-
28
-
29
-
30
-
31
-
32
-
33
-
34
-
35
-
36
-
37
-
38
 |
 |
