Beko CEG5311Bio Owners Manual - Page 12
Installation, 2 Filling the water tank
 |
View all Beko CEG5311Bio manuals
Add to My Manuals
Save this manual to your list of manuals |
Page 12 highlights
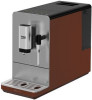
4 Preparation 4.1 Installation Remove any protective films, stickers and any other packing material on the appliance. 150mm . 150mm 150mm 150mm 150mm Choose a safe and stable surface with an easily reachable power supply and allow minimum distance from the sides of the machines. Insert the external drip tray. Make sure it is inserted correctly. 4.2 Filling the water tank Unwind and straighten the power cord and insert the plug into the socket located on the back of the machine. Insert the other end of the power cord into a wall socket with suitable power voltage. About the protect program: If the water tank is not fully placed into the machine, a protection mode will be activated in 15 seconds during brewing process. Hot water button will lights on control panel. 1. Make sure that the water tank is fully inserted into the machine. 2. Press the hot water button. After the hot water is dispensed, the machine will be in standby condition. WARNING: When is flashing, the water tank is at a low water level and requires filling. Lift the water tank by using the lid as the handle. 12 / EN Take the water tank out. Rinse the water tank with fresh water and then fill the tank to the Max level and place it back into the machine. Make sure it is fully inserted. Fully Automatic Coffee Machine / User Manual
-
 1
1 -
2
-
3
-
4
-
5
-
6
-
 7
7 -
 8
8 -
 9
9 -
 10
10 -
 11
11 -
 12
12 -
 13
13 -
 14
14 -
 15
15 -
 16
16 -
 17
17 -
18
-
19
-
20
-
21
-
22
-
23
-
24
 |
 |
