Belkin F1DM208T User Manual - Page 11
Step-by-step Installation Guide - user manual
 |
View all Belkin F1DM208T manuals
Add to My Manuals
Save this manual to your list of manuals |
Page 11 highlights
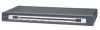
INSTALLATION STEP-BY-STEP INSTALLATION GUIDE Cautions and Warnings: Before attempting to connect anything to the MATRIX2 or your computer(s), please ensure that everything is powered off. Plugging and unplugging cables while computer(s) are powered on may cause irreversible damage to the computer(s) and/or the MATRIX2(s). Belkin Components is not responsible for damage caused in this way. Installing the MATRIX2 into a Server Rack: The MATRIX2 includes adjustable mounting brackets ideal for installation in 19-inch racks. The mounting brackets feature three adjustment positions to allow the faceplate of the MATRIX2 to mount flush to your rack-mounted servers, or to the rack. Please follow these simple steps to achieve the desired adjustment. 1. Determine how far you would like the MATRIX2 to protrude from the rack. Select a bracket-hole scheme. 2. Attach the bracket to the side of your MATRIX2 using the Phillips screws provided. (Refer to diagram above). 3. Mount the MATRIX2 to the rack rail assembly. Note: If this MATRIX2 will be daisy-chained to another MATRIX2, set the BANK address prior to installing on a rack. Refer to the section in this User Manual labeled "Connecting Multiple MATRIX2s (Daisy-Chaining)" (page 12). Your MATRIX2 is now mounted securely into the bracket and you are now ready to connect cables to it at the back. 9
-
 1
1 -
2
-
3
-
4
-
5
-
 6
6 -
 7
7 -
 8
8 -
 9
9 -
 10
10 -
 11
11 -
 12
12 -
 13
13 -
 14
14 -
 15
15 -
 16
16 -
17
-
18
-
19
-
20
-
21
-
22
-
23
-
24
-
25
-
26
-
27
-
28
-
29
-
30
-
31
-
32
-
33
-
34
-
35
-
36
-
37
-
38
-
39
-
40
 |
 |
