Belkin F6D3010 User Manual - Page 13
Step 3, Connect, Connect to a Network Using the Wireless Network Utility
 |
View all Belkin F6D3010 manuals
Add to My Manuals
Save this manual to your list of manuals |
Page 13 highlights
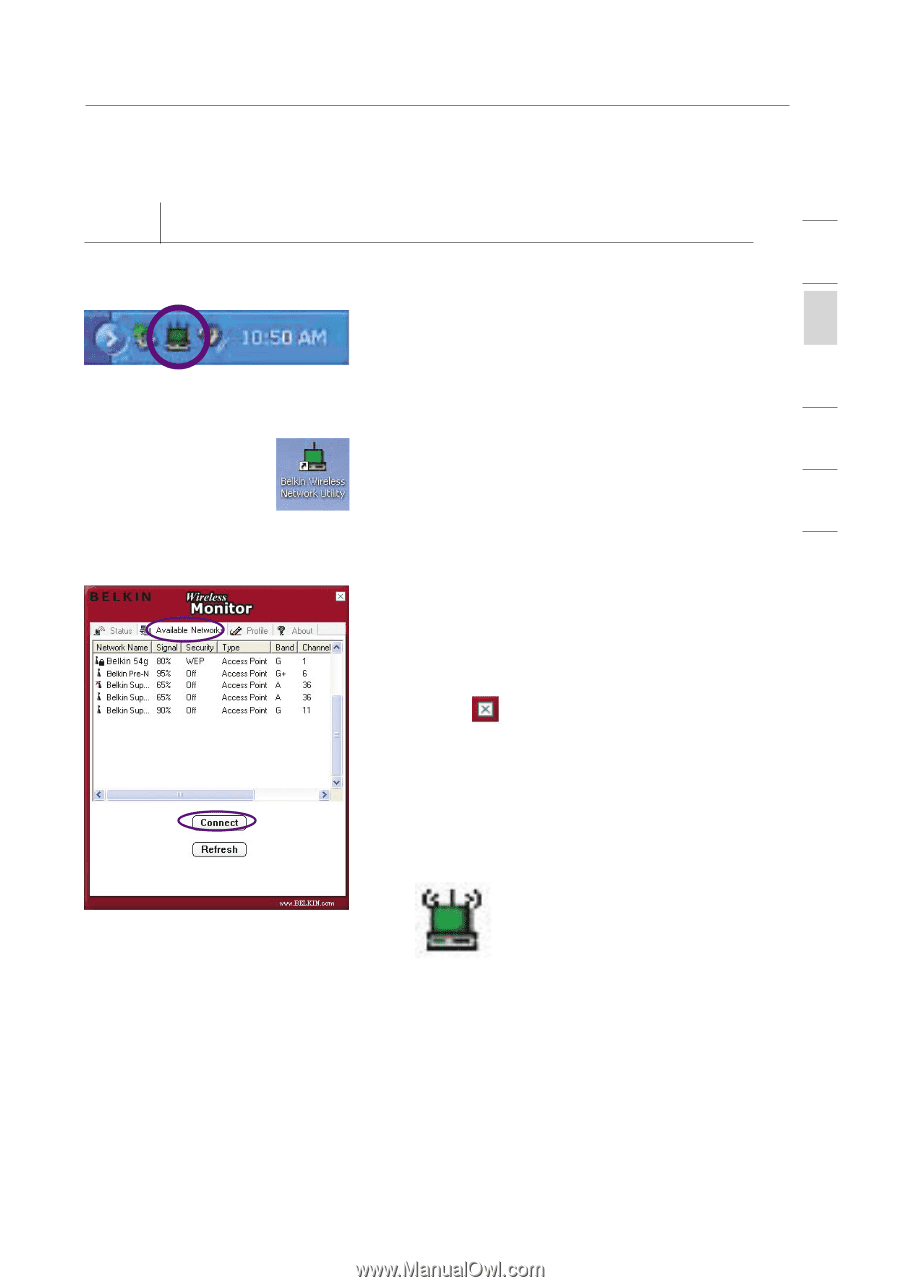
section Installing and Setting Up the Card 1 Step 3 Connect Connect to a Network Using the Wireless Network Utility 2 3.1 Double-click on the "Signal Indicator" icon located in the lower 3 right corner of your screen (in the system tray) to bring up the Belkin 4 Wireless Network Utility. If the "Signal Indicator" icon does not appear, double-click on the Belkin 5 Wireless Network Utility shortcut icon on your desktop window. 6 3.2 Click on the "Available Networks" tab in the Utility. Select a network to connect to and click "Connect". 3.3 Click to exit the Utility. The color of the "Signal Indicator" icon reflects the connection link-green indicates that the Card is connected and red indicates that the Card is not connected to a wireless network. Your setup is now complete! 11
-
 1
1 -
2
-
3
-
4
-
5
-
6
-
7
-
 8
8 -
 9
9 -
 10
10 -
 11
11 -
 12
12 -
 13
13 -
 14
14 -
 15
15 -
 16
16 -
 17
17 -
 18
18 -
19
-
20
-
21
-
22
-
23
-
24
-
25
-
26
-
27
-
28
-
29
-
30
-
31
-
32
-
33
-
34
-
35
-
36
-
37
-
38
-
39
-
40
-
41
-
42
-
43
-
44
-
45
-
46
-
47
-
48
-
49
 |
 |