BenQ PD2705UA User Manual - Page 24
Connect the power cable to the, monitor., Install the back cover., Organize the cables.
 |
View all BenQ PD2705UA manuals
Add to My Manuals
Save this manual to your list of manuals |
Page 24 highlights
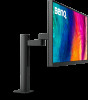
6. Connect the power cable to the monitor. Plug one end of the power cord into the socket labelled on the rear of the monitor. Do not connect the other end to a power outlet just yet. 7. Install the back cover. Gently lift the display up and extend it to the maximum extended position. Then tilt the monitor to install/remove the I/O cover easily. Align the back cover with the holes on the back of the monitor, and press both sides and the upper part of the cover against the holes to lock it into place as illustrated. Push the lower part of the back cover toward the monitor to secure it. 1 2 8. Organize the cables. Route the cables via the cable clip. 9. Connect-to and turn-on the power. Plug the other end of the power cord into a power outlet and turn it on. Picture may differ from product supplied for your region. 24
-
 1
1 -
2
-
3
-
4
-
5
-
6
-
7
-
8
-
9
-
10
-
11
-
12
-
13
-
14
-
15
-
16
-
17
-
18
-
 19
19 -
 20
20 -
 21
21 -
 22
22 -
 23
23 -
 24
24 -
 25
25 -
 26
26 -
 27
27 -
 28
28 -
 29
29 -
30
-
31
-
32
-
33
-
34
-
35
-
36
-
37
-
38
-
39
-
40
-
41
-
42
-
43
-
44
-
45
-
46
-
47
-
48
-
49
-
50
-
51
-
52
-
53
-
54
-
55
-
56
-
57
-
58
-
59
-
60
-
61
-
62
-
63
-
64
-
65
-
66
-
67
-
68
-
69
-
70
-
71
-
72
-
73
-
74
-
75
 |
 |
