BenQ PD2705UA User Manual - Page 32
Mount the monitor head., Attach the upper arm to the monitor as illustrated
 |
View all BenQ PD2705UA manuals
Add to My Manuals
Save this manual to your list of manuals |
Page 32 highlights
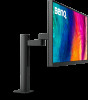
5. Mount the monitor head. Protect the monitor and screen by clearing a flat open area on your desk and placing a soft item like the monitor packaging bag on the desk for padding. Gently lay the screen face down on a flat clean padded surface. Please be careful to prevent damage to the monitor. Placing the screen surface on an object like a stapler or a mouse will crack the glass or damage the LCD substrate voiding your warranty. Sliding or scraping the monitor around on your desk will scratch or damage the monitor surround and controls. Attach the upper arm to the monitor as illustrated until it locks in place. 2 1 Align the upper arm with the monitor stand and place it properly without the metal part being seen. 32
-
 1
1 -
2
-
3
-
4
-
5
-
6
-
7
-
8
-
9
-
10
-
11
-
12
-
13
-
14
-
15
-
16
-
17
-
18
-
19
-
20
-
21
-
22
-
23
-
24
-
25
-
26
-
 27
27 -
 28
28 -
 29
29 -
 30
30 -
 31
31 -
 32
32 -
 33
33 -
 34
34 -
 35
35 -
 36
36 -
 37
37 -
38
-
39
-
40
-
41
-
42
-
43
-
44
-
45
-
46
-
47
-
48
-
49
-
50
-
51
-
52
-
53
-
54
-
55
-
56
-
57
-
58
-
59
-
60
-
61
-
62
-
63
-
64
-
65
-
66
-
67
-
68
-
69
-
70
-
71
-
72
-
73
-
74
-
75
 |
 |

32
5. Mount the monitor head.
Protect the monitor and screen by clearing a flat
open area on your desk and placing a soft item like
the monitor packaging bag on the desk for
padding.
Gently lay the screen face down on a flat clean
padded surface.
Please be careful to prevent damage to the monitor.
Placing the screen surface on an object like a stapler or
a mouse will crack the glass or damage the LCD
substrate voiding your warranty. Sliding or scraping the
monitor around on your desk will scratch or damage
the monitor surround and controls.
Attach the upper arm to the monitor as illustrated
until it locks in place.
Align the upper arm with the monitor stand and
place it properly without the metal part being seen.
1
2