Beretta SV10 Prevail III Beretta SV10 Perennia/Preveil User Manual - Page 25
Removing, Trigger, Group
 |
View all Beretta SV10 Prevail III manuals
Add to My Manuals
Save this manual to your list of manuals |
Page 25 highlights
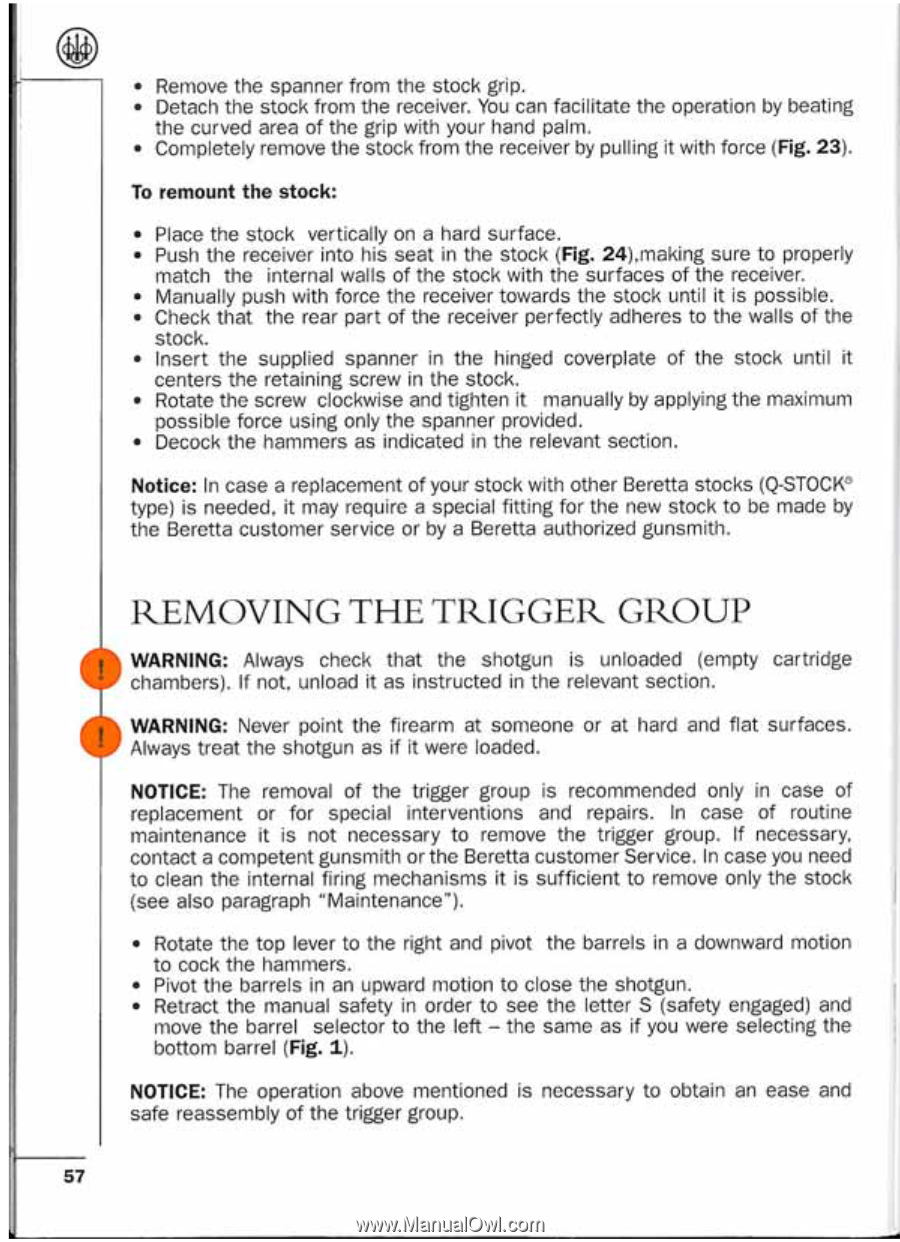
• Remove the spanner from the stock grip. • Detach the stock from the receiver. You can facilitate the operation by beating the curved area of the grip with your hand palm. • Completely remove the stock from the receiver by pulling it with force (Fig. 23). To remount the stock: • Place the stock vertically on a hard surface. • Push the receiver into his seat in the stock (Fig. 24).making sure to properly match the internal walls of the stock with the surfaces of the receiver. • Manually push with force the receiver towards the stock until it is possible. • Check that the rear part of the receiver perfectly adheres to the walls of the stock. • Insert the supplied spanner in the hinged coverplate of the stock until it centers the retaining screw in the stock. • Rotate the screw clockwise and tighten it manually by applying the maximum possible force using only the spanner provided. • Decock the hammers as indicated in the relevant section. Notice: In case a replacement of your stock with other Beretta stocks (Q-STOCK' type) is needed. it may require a special fitting for the new stock to be made by the Beretta customer service or by a Beretta authorized gunsmith. REMOVING THE TRIGGER GROUP WARNING: Always check that the shotgun is unloaded (empty cartridge chambers). If not. unload it as instructed in the relevant section. WARNING: Never point the firearm at someone or at hard and flat surfaces. Always treat the shotgun as if it were loaded. NOTICE: The removal of the trigger group is recommended only in case of replacement or for special interventions and repairs. In case of routine maintenance it is not necessary to remove the trigger group. If necessary. contact a competent gunsmith or the Beretta customer Service. In case you need to clean the internal firing mechanisms it is sufficient to remove only the stock (see also paragraph "Maintenance"). • Rotate the top lever to the right and pivot the barrels in a downward motion to cock the hammers. • Pivot the barrels in an upward motion to close the shotgun. • Retract the manual safety in order to see the letter S (safety engaged) and move the barrel selector to the left - the same as if you were selecting the bottom barrel (Fig. 1). NOTICE: The operation above mentioned is necessary to obtain an ease and safe reassembly of the trigger group. 57
-
 1
1 -
2
-
3
-
4
-
5
-
6
-
7
-
8
-
9
-
10
-
11
-
12
-
13
-
14
-
15
-
16
-
17
-
18
-
19
-
 20
20 -
 21
21 -
 22
22 -
 23
23 -
 24
24 -
 25
25 -
 26
26 -
 27
27 -
 28
28 -
 29
29 -
 30
30 -
31
-
32
 |
 |