Beretta SV10 Prevail III Beretta SV10 Perennia/Preveil User Manual - Page 26
Beretta SV10 Prevail III Manual
 |
View all Beretta SV10 Prevail III manuals
Add to My Manuals
Save this manual to your list of manuals |
Page 26 highlights
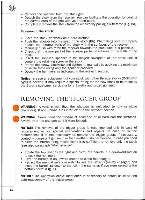
• Remove the stock as described in the previous paragraph. • Place the receiver/stock unit in a horizontal position on a flat surface, with the left side facing upwards. NOTICE: The operation above mentioned is necessary to obtain an ease and safe reassembly of the trigger group. • Insert the same spanner used to remove the stock in the screw positioned on the rear part of the receiver. and unscrew it counter clockwise of a half turn (Fig. 25). • Grasp the trigger group unit as shown in Fig. 26 and rotate it downwards until it can be completely detached and removed from its seat. To remount the trigger group: NOTICE: Ensure that the manual safety is In its rearmost position and shows the letter S (safety engaged) and that the barrel selector is moved to the left (Fig. 27) the same as if you were selecting the bottom barrel. Place the receiver on a plan in a horizontal position with its left side facing upwards. NOTICE: To ease the reassembly of the trigger group unit, make sure the hammers are cocked (fully retracted). If not, because they have been accidentally decocked (the trigger has been pulled), cock them manually by retracting with force until they can remain engaged in the rear position (Fig. 28). • Insert the trigger plate tang in its housing in the slots of the receiver (Fig. 29). • Rotate the trigger group upwards until it gets in contact with the receiver tang (Fig. 30). • Make sure the trigger group adheres perfectly with the points of contact of the receiver (Fig. 31). WARNING: Make sure that the barrel selector lever (Fig. 32 part A) is inserted in the inertia block (Fig. 32 part B). If the manual safety and the barrel selector have been set as previously recommended, the barrel selector lever automatically centers the inertia block when rotating upwards the trigger group (Fig. 33). • Once verified that the barrel selector lever is inserted in the inertia block move to the left and to the right the barrel selector to make sure that also the inertia block moves consequently (Fig. 34). WARNING: If you note that the barrel selector lever is not inserted in the inertia block, partially detach the trigger group from the receiver, move the safety and the selector as previously indicated until the selector lever centers the inertia block and rotate upwards the trigger group until it perfect adheres with the receiver. WARNING: In case you remount the trigger group with the barrel selector lever not inserted in the inertia block the barrel selector will not work properly! 58
-
 1
1 -
2
-
3
-
4
-
5
-
6
-
7
-
8
-
9
-
10
-
11
-
12
-
13
-
14
-
15
-
16
-
17
-
18
-
19
-
20
-
 21
21 -
 22
22 -
 23
23 -
 24
24 -
 25
25 -
 26
26 -
 27
27 -
 28
28 -
 29
29 -
 30
30 -
 31
31 -
32
 |
 |
