Beretta SV10 Prevail III Beretta SV10 Perennia/Preveil User Manual - Page 27
Replacing, Recoil
 |
View all Beretta SV10 Prevail III manuals
Add to My Manuals
Save this manual to your list of manuals |
Page 27 highlights
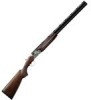
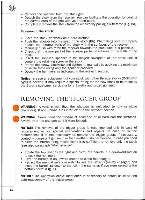
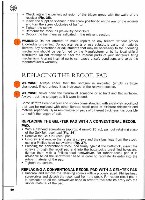
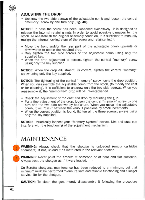
• Check again the .perfect adhesion of the trigger group with the walls of the receiver (Fig. 35). • Insert the supplied spanner In the screw positioned on the rear of the receiver and turn the screw clockwise of half turn. • Tighten the screw. • Remount the stock as previously described. • Decock the hammers as indicated in the relevant section. WARNING: Do not attempt to make repairs to any firearm without proper knowledge or training. Do not alter parts or use substitute parts not made by Beretta. Any alterations or adjustments that may be necessary to the operating mechanism should be performed by the Manufacturer or by its local official distributor. Do not attempt to alter the internal parts of your shotgun's firing mechanism. Altering internal parts can cause unsafe conditions and voids the manufacturer's warranty. REPLACING THE RECOIL PAD WARNING: Always check that the shotgun is unloaded (empty cartridge chambers). If not, unload it as instructed in the relevant section. WARNING: Never point the firearm at someone or at hard and flat surfaces. Always treat the shotgun as if it were loaded. Some Beretta Perennia over and unders come standard with a Gel•Tek recoil pad that can be replaced with other Beretta recoil pads of different thickness and material (optional). By assembling recoil pads of different thickness it is possible to modify the length of pull. REPLACING THE GEL•TEK PAD WITH A CONVENTIONAL RECOIL PAD. • With a flathead screwdriver (approx. 4 mm/0.15 in.), pull out retaining clasp of the Gel•Tek recoil pad (Fig. 36). • Remove the Gel•Tek recoil pad. • Unscrew and remove the retaining screws and their bushings from the stock. using a Phillips-head screwdriver (Fig. 37). • Pressing the conventional recoil pad firmly against the buttstock, insert the screws through the recoil pad and into the buttstock's pre-drilled holes and tighten them with a Phillips-head screwdriver. For rubber recoil pad it is advisable to oil the screwdriver head in order to facilitate its entry into the rubber material of the pad. • Tighten the screws. REPLACING A CONVENTIONAL RECOIL PAD WITH A GEL•TEK PAD • Unscrew and remove the retaining screws with a properly sized Phillips-head screwdriver and detach the recoil pad from the stock. For rubber recoil pad it is advisable to oil the screwdriver head in order to facilitate its entry into the rubber material of the pad. 59
-
 1
1 -
2
-
3
-
4
-
5
-
6
-
7
-
8
-
9
-
10
-
11
-
12
-
13
-
14
-
15
-
16
-
17
-
18
-
19
-
20
-
21
-
 22
22 -
 23
23 -
 24
24 -
 25
25 -
 26
26 -
 27
27 -
 28
28 -
 29
29 -
 30
30 -
 31
31 -
 32
32
 |
 |